
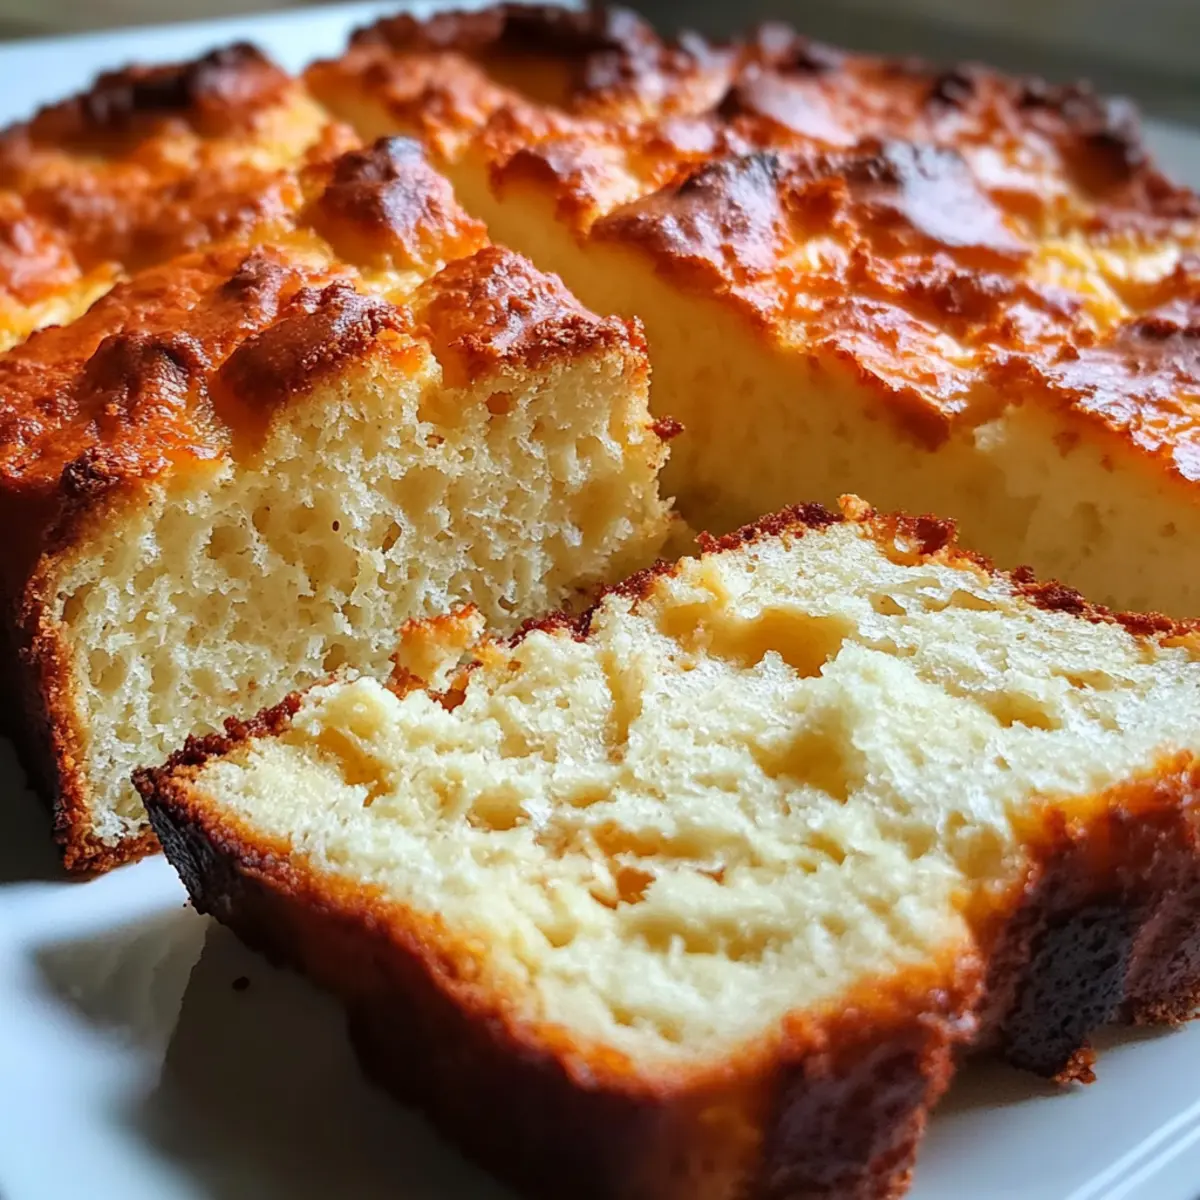
The first whiff of freshly baked bread is like a warm hug on a chilly day, isn’t it? I’ve often found myself craving that homemade goodness, but traditional loaves aren’t always the friendliest options for my gluten-free, low-carb lifestyle. Enter my Yogurt Bread Gluten‑Free Zero Carb Option! This delightfully fluffy bread comes together quickly, making it an incredible go-to for any home chef tired of the bread aisle’s limitations. With just a handful of simple ingredients—like creamy Greek yogurt and nut flours—you'll whip up a delectably satisfying loaf that not only caters to gluten-free diets but can also fit a zero-carb eating plan. It’s perfect for sandwiches, toast, or simply enjoyed on its own. So, are you ready to learn how to bake this versatile treasure? Let’s get started!
Why is this Yogurt Bread a Must-Try?
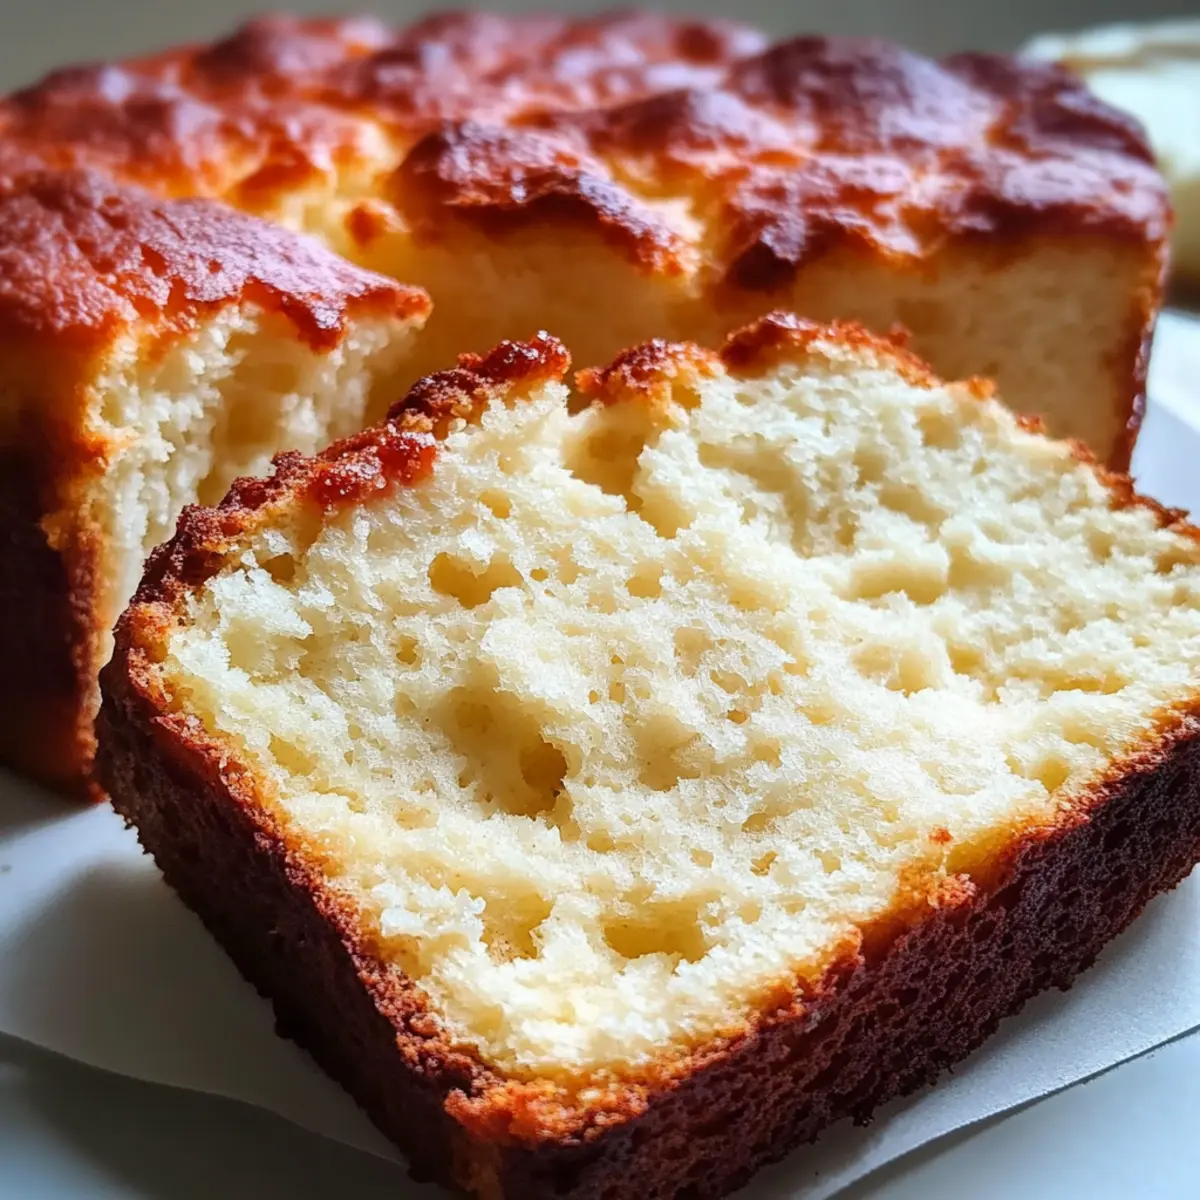
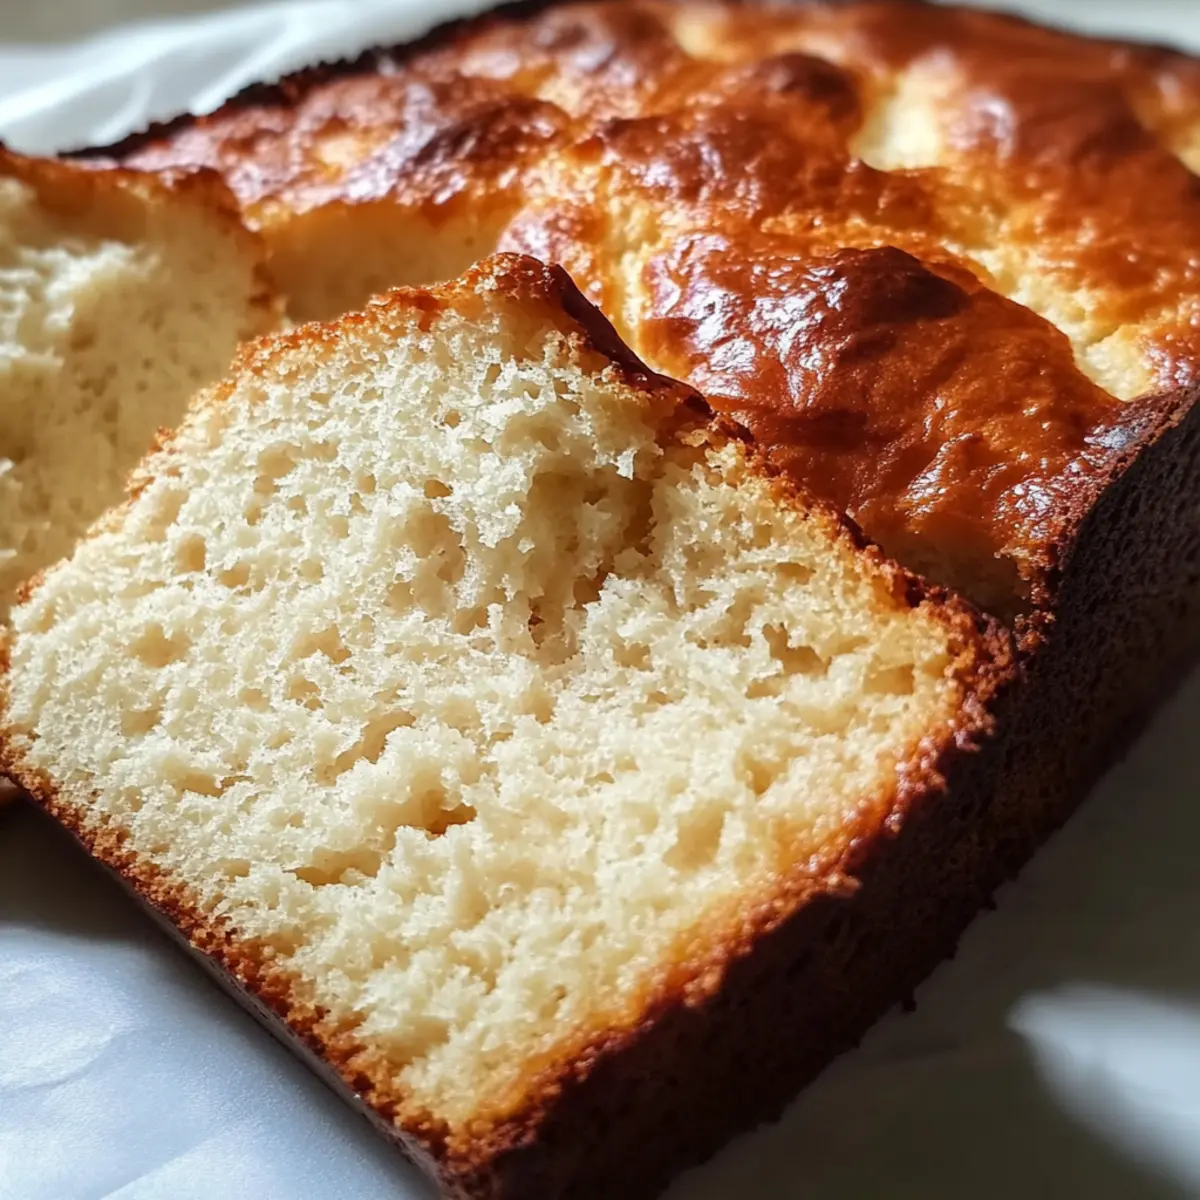
Delightful Texture: This bread boasts a fluffy, airy crumb that mimics traditional loaves, yet remains entirely gluten-free.
Low-Carb Wonder: With a zero-carb option, it’s perfect for anyone following a low-carb lifestyle without sacrificing flavor.
Quick and Easy: Prep time is only 20 minutes—ideal for busy people who crave homemade bread but need it fast.
Flavor Versatility: Customize it with your favorite herbs or cheeses, making it perfect for both sweet and savory applications.
Crowd-Pleaser: Serve it warm and watch it disappear—perfect for family dinners or brunch gatherings!
Nutrient-Rich: Packed with protein from Greek yogurt and healthy fats, this bread is as nourishing as it is delicious.
Yogurt Bread Gluten‑Free Zero Carb Option Ingredients
For the Bread Base
• Full-fat Greek yogurt – adds moisture and richness, making the bread fluffy.
• Large eggs – serve as a binding agent, ensuring a light texture.
• Olive oil or melted butter – enhances flavor and keeps the bread moist.
• Fine almond flour – provides a gluten-free base while keeping the carbs low.
• Coconut flour – helps absorb moisture; use in combination with almond flour for the best results.
• Ground psyllium husk – essential for texture; it mimics gluten and helps the bread rise.
• Gluten-free baking powder – ensures the bread rises well without gluten.
• Baking soda – works together with acid (like yogurt) to create lift.
• Fine sea salt – enhances flavor and balances sweetness.
• Sweetener (optional) – adds a hint of sweetness; suitable low-carb options are erythritol, allulose, or monk fruit.
• Water or unsweetened almond milk – helps adjust the batter's consistency for the perfect loaf.
Optional Flavor Add-Ins
• Apple cider vinegar or lemon juice – boosts flavor and aids in rising.
• Garlic powder + dried herb – for a flavorful savory twist—experiment with oregano, thyme, or rosemary!
• Grated Parmesan or other hard cheese – adds a cheesy flavor with minimal carbs.
• Sesame seeds, sunflower seeds, or pumpkin seeds – sprinkle on top for added crunch and nutrition.
This Yogurt Bread Gluten‑Free Zero Carb Option is not just a recipe but a big step towards rediscovering the joy of homemade bread. Enjoy creating your fluffy masterpiece!
Step‑by‑Step Instructions for Yogurt Bread Gluten‑Free Zero Carb Option
Step 1: Prepare the pan
Preheat your oven to 350°F (175°C) without the fan setting. While the oven heats, generously grease an 8.5x4.5-inch or 9x5-inch loaf pan with olive oil or melted butter. To make it even easier to remove the bread later, line the pan with strips of parchment paper, leaving some overhang for lifting.
Step 2: Mix the wet ingredients
In a medium bowl, whisk together 1 cup of full-fat Greek yogurt, 4 room-temperature large eggs, and 2 tablespoons of olive oil or melted butter. Ensure the mixture is fully smooth and uniform, which should take about 1-2 minutes. If you're using apple cider vinegar or lemon juice for added flavor, stir it in gently at this stage.
Step 3: Combine the dry ingredients
In a large bowl, thoroughly whisk together 1 cup of fine almond flour, ⅓ cup of coconut flour, 3 tablespoons of ground psyllium husk, 2 teaspoons of gluten-free baking powder, 1 ½ teaspoons of baking soda, 1 ½ teaspoons of fine sea salt, and any optional sweetener. This helps distribute the leavening agents evenly and breaks up any clumps, taking around 1-2 minutes.
Step 4: Bring the batter together
Pour the wet mixture into the bowl of dry ingredients. Using a spatula, stir the mixture until just combined—this should only take about 30 seconds. The ground psyllium husk will start to thicken the batter quickly, so aim for a thick, spreadable dough that holds together well.
Step 5: Adjust for the zero-carb option
If using defatted almond flour and extra psyllium, you might find the batter is a bit too thick. Gradually add in 1 tablespoon of water or unsweetened almond milk at a time until the batter is smooth yet retains a thick consistency. If it seems overly stiff, consider mixing in an additional egg for the ideal texture.
Step 6: Add flavorings (optional)
Gently fold in any optional flavorings at this point, like 1 teaspoon of garlic powder or your chosen dried herbs. If you’re using cheese or seeds, incorporate those as well. Be careful not to overwork the batter; this will keep your Yogurt Bread Gluten‑Free Zero Carb Option light and fluffy.
Step 7: Fill the pan
Transfer the batter into your prepared loaf pan, pressing it gently into the corners and smoothing the top with the back of a spatula. It’s ideal to mound the batter slightly in the center for an even rise, and feel free to sprinkle extra seeds or cheese on top for a decorative touch.
Step 8: Bake the bread
Place your pan on the middle rack of the preheated oven and bake for 40–50 minutes. Start checking at the 35-minute mark; the top should appear golden and feel springy when lightly touched. If it’s browning too quickly, carefully tent it with aluminum foil to prevent burning.
Step 9: Cool the loaf properly
Once baked, remove the pan from the oven and let it rest on a cooling rack for about 15–20 minutes. Gently lift the bread out using the parchment handles. Allow it to cool completely for 1-2 hours, as this prevents gumminess and ensures clean slicing.
Step 10: Slice and serve
When cooled, take a sharp serrated knife and cut the loaf into even slices. For sandwiches, make thicker cuts; for snacks or toast, slice thinner. The clean cuts will showcase the beautiful crumb of your warm Yogurt Bread Gluten‑Free Zero Carb Option.
Step 11: Storage
After slicing, store any leftovers in an airtight container in the refrigerator for 5–6 days. You can also freeze individual slices wrapped tightly in plastic wrap for 2–3 months, making it easy to enjoy a slice of homemade goodness anytime—reheat directly in a toaster or oven.
What to Serve with Yogurt Bread Gluten‑Free Zero Carb Option
Elevate your meal with delightful pairings that enhance the flavors of this fluffy bread.
- Creamy Avocado Smash: This vibrant topping offers a rich, creamy texture that balances the lightness of the yogurt bread.
- Savory Herb Butter: Infuse softened butter with fresh herbs for a decadent spread that complements every slice beautifully.
- Zesty Tomato Salad: A bright, refreshing salad adds a burst of acidity that brightens the bread’s flavor, making it a perfect side.
- Roasted Veggies: Tender, caramelized vegetables provide earthy notes that pair wonderfully with the subtle flavors of the bread.
- Cheesy Spinach Dip: Creamy and cheesy, this warm dip is perfect for slathering atop slices, creating a comfort-food delight.
- Light Chicken Salad: Layer with a flavorful chicken salad for a satisfying meal, adding protein and a delightful crunch.
- Sweet Berry Compote: For a breakfast treat, a drizzle of homemade berry compote adds sweetness and zest that pairs fantastically with yogurt bread.
- Infused Herbal Tea: A warm cup of herbal tea brings a calming touch to your meal, enhancing the cozy experience of enjoying homemade bread.
- Chocolate Avocado Mousse: Indulge your sweet tooth by serving this rich dessert for a luscious finish after enjoying your bread.
Tips for the Best Yogurt Bread
Fresh Ingredients: Always use fresh eggs and yogurt to enhance the bread's flavor and texture. Old ingredients may yield poor results.
Proper Mixing: Avoid overmixing after adding the dry ingredients; gently combine until just mixed. This will keep your Yogurt Bread Gluten‑Free Zero Carb Option fluffy and light.
Batter Consistency: Adjust water or almond milk gradually. A thick but smooth batter is key; if too stiff, an extra egg can help soften it without compromising texture.
Cooling Time: Don’t rush the cooling process! Allow 1-2 hours before slicing to prevent gumminess. Patience pays off for a perfect loaf!
Storage Tips: For ideal preservation, store sliced bread in an airtight container and enjoy it straight from the fridge or frozen for a quick treat.
Make Ahead Options
These Yogurt Bread Gluten‑Free Zero Carb Option is a great recipe to prep in advance, making your busy weeknights a breeze! You can mix the dry ingredients (almond flour, coconut flour, psyllium husk, baking powder, baking soda, and salt) and store them in an airtight container for up to 3 days. Additionally, you can whisk the wet ingredients (Greek yogurt, eggs, and olive oil) and refrigerate them in a covered bowl for up to 24 hours. When you're ready to bake, simply combine the wet and dry mixtures, adjust the batter as needed, and fold in any optional flavors. This way, you'll be enjoying fresh-baked bread with minimal effort, just as delicious and perfect for all your meals!
Yogurt Bread Gluten‑Free Zero Carb Option Variations
Feel free to make this delightful bread your own with these easy and tasty twists!
-
Herb-Infused: Stir in 1-2 tablespoons of fresh chopped herbs like basil or parsley for a garden-fresh note. This adds a wonderful aroma and flavor to each bite, elevating your bread experience.
-
Cheesy Goodness: Mix in ¼ cup of shredded cheese, such as cheddar or mozzarella, for a savory delight. The gooey cheese adds richness, creating a decadent loaf that pairs perfectly with soups.
-
Spicy Kick: Add 1 teaspoon of red pepper flakes or a dash of cayenne pepper for a subtle heat. This twist introduces an exciting flavor profile that gives your loaf an unexpected, yet enjoyable, punch.
-
Seeds Galore: Incorporate ¼ cup of assorted seeds like chia, flax, or hemp for added nutrition and crunch. These seeds not only enhance texture but also provide a boost of healthy fats and fiber.
-
Sweet Twist: For a sweeter loaf, fold in ½ cup of chopped dried fruits like cranberries or apricots. This scrumptious addition introduces a delightful sweetness that’s perfect for breakfast toasts.
-
Nuts About Nuts: Mix in ¼ cup of coarsely chopped walnuts or pecans for a nutty flavor and satisfying crunch. This adds a heartiness to your bread that makes it equally delicious for snacks.
-
Flavor Bomb: A tablespoon of pesto or tapenade can be mixed into the wet ingredients for an exciting flavor infusion. These Mediterranean ingredients will make every slice burst with robust flavors.
-
Citrus Zest: Grate in the zest of one lemon or orange to brighten up the flavor. This subtle zing can uplift the entire loaf, tantalizing your taste buds with a refreshing twist.
Don’t be shy about experimenting! Each variation offers a personal touch that makes every loaf unique, ensuring your adventure in baking is as delicious as it is fulfilling. For even more flavor ideas, check out my suggestions on herb-infused options or exploring sweet and savory combinations.
How to Store and Freeze Yogurt Bread Gluten‑Free Zero Carb Option
Fridge: Store the sliced bread in an airtight container for up to 5–6 days. This keeps it fresh and prevents it from drying out.
Freezer: For longer storage, individually wrap slices tightly in plastic wrap and freeze for 2–3 months. Perfect for easy access whenever you crave this delightful treat!
Reheating: To enjoy frozen slices, simply pop them directly into a toaster or warm them in the oven for a few minutes until heated through.
Separation: If you've stored the slices in the fridge, it’s best to separate each piece with parchment paper to prevent sticking, ensuring you get that lovely texture every time you serve your Yogurt Bread Gluten‑Free Zero Carb Option.
Yogurt Bread Gluten‑Free Zero Carb Option Recipe FAQs
What type of Greek yogurt should I use for this recipe?
Absolutely, using full-fat Greek yogurt is ideal as it adds moisture and richness to your Yogurt Bread. Opt for unsweetened or strained plain yogurt to achieve the best texture and flavor.
How should I store the bread once it's made?
To keep your bread fresh, store the slices in an airtight container in the fridge for 5–6 days. This method prevents it from drying out and ensures you can savor that delicious taste all week!
Can I freeze the Yogurt Bread, and if so, how?
Definitely! For longer storage, wrap individual slices tightly in plastic wrap or foil, then place them in an airtight container or freezer bag. This allows you to enjoy your homemade bread for up to 2–3 months. When you're ready to eat, just popped those slices directly into a toaster or warm them in the oven until heated through.
What if my batter is too thick or too thin?
No worries! If your batter seems too thick, gradually sprinkle in 1 tablespoon of water or unsweetened almond milk to adjust the consistency. Conversely, if it appears too thin, consider adding an extra egg for structure, or a bit more psyllium husk to thicken it up. It's all about that perfect spreadable dough!
Is this bread suitable for people with nut allergies?
While this Yogurt Bread Gluten‑Free Zero Carb Option is made with almond flour, you can substitute it with sunflower seed flour or a nut-free gluten-free flour blend for those with nut allergies. Always check ingredient labels to ensure they fit your dietary needs!
How can I tell when the bread is fully cooked?
The best way to check is by gently pressing the top of the bread; it should be golden and spring back slightly when done. You can also use a toothpick—insert it into the center; if it comes out clean or with just a few crumbs, your bread is ready to come out of the oven.

Delicious Yogurt Bread Gluten-Free Zero Carb Option Recipe
Equipment
- Loaf pan
- Mixing bowls
- Whisk
- Spatula
Ingredients
For the Bread Base
- 1 cup full-fat Greek yogurt adds moisture and richness
- 4 large eggs room-temperature
- 2 tablespoons olive oil or melted butter enhances flavor
- 1 cup fine almond flour gluten-free base
- ⅓ cup coconut flour absorbs moisture
- 3 tablespoons ground psyllium husk mimics gluten
- 2 teaspoons gluten-free baking powder ensures rise
- 1.5 teaspoons baking soda creates lift
- 1.5 teaspoons fine sea salt enhances flavor
- 1 tablespoon sweetener (optional) low-carb options available
- 1 tablespoon water or unsweetened almond milk helps adjust consistency
Optional Flavor Add-Ins
- 1 teaspoon apple cider vinegar or lemon juice boosts flavor
- 1 teaspoon garlic powder + dried herb optional for savory
- 1 cup grated Parmesan or other hard cheese adds cheesiness
- ¼ cup sesame seeds, sunflower seeds, or pumpkin seeds for topping
Instructions
Step-by-Step Instructions
- Preheat your oven to 350°F (175°C) and grease a loaf pan with olive oil or melted butter.
- In a bowl, whisk together Greek yogurt, eggs, and olive oil until smooth.
- In a separate bowl, mix almond flour, coconut flour, psyllium husk, baking powder, baking soda, salt, and sweetener.
- Combine the wet ingredients with the dry, stirring until just mixed.
- Adjust the consistency with water or milk as needed.
- Fold in any optional flavorings such as herbs or cheese.
- Transfer the batter into the prepared loaf pan, smoothing the top.
- Bake for 40-50 minutes, checking at 35 minutes for doneness.
- Cool the loaf in the pan for 15-20 minutes, then transfer to a rack to cool completely.
- Slice when cool and store leftovers in an airtight container.


Leave a Reply