
As I stood in the kitchen, the enticing aroma of stir-fried garlic filled the air, drawing me into a comforting embrace. What better way to indulge my cravings than with a plate of Yaki Udon? This delightful dish brings together silky udon noodles, a bounty of fresh vegetables, and your choice of juicy chicken, shrimp, or tofu in just 30 minutes! With this quick preparation, you can transform ordinary ingredients into a vibrant, nutritious meal that’s perfect for any night of the week. Plus, it’s not only a crowd-pleaser but also a brilliant way to reduce your takeout habit and enjoy homemade goodness. So, are you ready to whip up your very own Yaki Udon masterpiece?
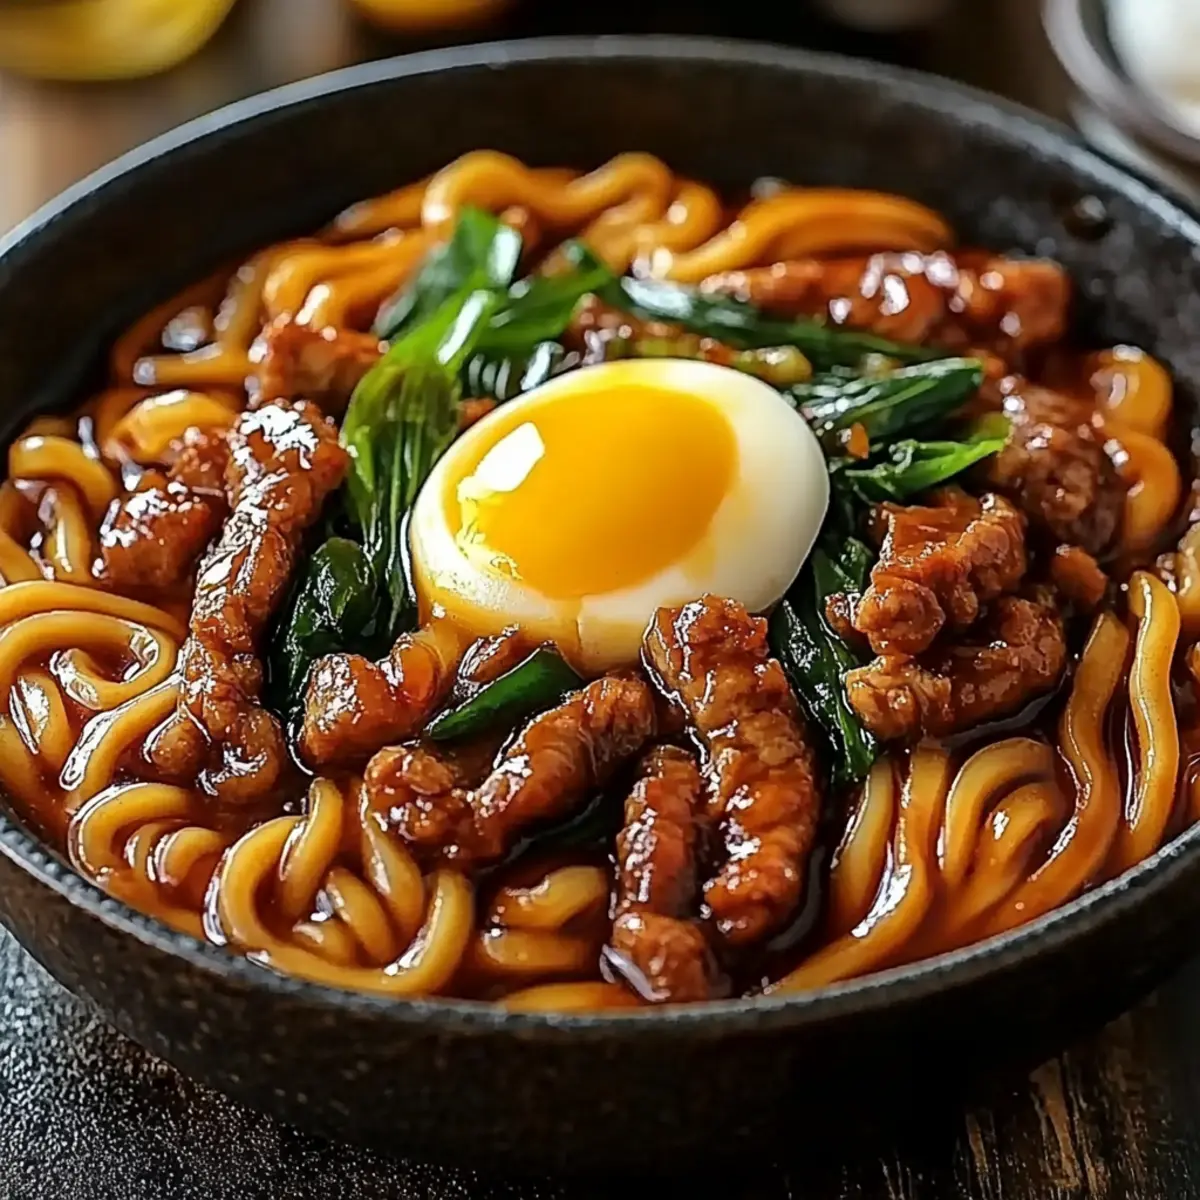
Why is Yaki Udon a Must-Try?
Quick Preparation: Just 30 minutes! You can have this delicious meal ready in no time.
Customizable Ingredients: Use chicken, shrimp, or tofu—perfect for whatever you have on hand.
Flavor Explosion: The combination of soy sauce, mirin, and sesame oil gives a rich, savory depth that makes every bite unforgettable.
Healthy and Nutritious: Packed with vegetables, this dish is a great way to incorporate more greens into your diet.
Crowd-pleaser: Whether it’s a family dinner or a gathering with friends, Yaki Udon is sure to impress everyone at the table.
Transform your weeknight dinners with this vibrant recipe that showcases the charm of homemade meals!
Yaki Udon Ingredients
• Discover the essential components for your delicious Yaki Udon!
For the Noodles
- Udon noodles – 14 ounces; choose fresh or frozen for the best texture.
For the Protein
- Chicken (or shrimp, or tofu) – 1 cup; select your favorite protein for a personalized touch.
For the Vegetables
- Mixed vegetables – 1 cup; use a variety like snow peas, bok choy, or mushrooms for color and nutrition.
For the Sauce
- Soy sauce – 2 tablespoons; this adds that essential umami flavor to your Yaki Udon.
- Mirin – 1 tablespoon; a sweet rice wine that enhances the overall taste.
- Sesame oil – 1 tablespoon; brings a wonderful nutty aroma to the dish.
For Flavoring
- Garlic – 1 teaspoon (minced); it gives a fragrant essence that elevates the dish.
- Green onions – 2 (sliced); these provide a crunchy freshness as a garnish.
- Sesame seeds (optional) – 1 teaspoon; add them for a delightful finishing touch and extra texture.
Dive into this simple yet satisfying recipe that can easily be adapted to your tastes with the vibrant flavors of Yaki Udon!
Step‑by‑Step Instructions for Yaki Udon
Step 1: Cook the Udon Noodles
Begin by bringing a large pot of water to a rolling boil over high heat. Add 14 ounces of udon noodles and cook according to the package instructions—usually about 8–10 minutes—until they are tender but still firm. Once done, drain the noodles in a colander and set them aside, allowing any excess water to escape.
Step 2: Heat the Oil
In a large skillet or wok, heat 2 tablespoons of vegetable oil over medium-high heat. You'll know it's ready when the oil shimmers slightly. This will create a perfect base for your Yaki Udon, ensuring that everything cooks evenly. Swirl the oil to coat the surface, preparing for the vibrant flavors to come.
Step 3: Stir-Fry the Garlic
Add 1 teaspoon of minced garlic to the hot oil and stir-fry for about 30 seconds or until fragrant. Be vigilant during this step; the garlic can quickly burn if left unattended. You’re aiming for a golden hue and a delightful aroma to fill your kitchen, enhancing the taste of your Yaki Udon.
Step 4: Cook the Protein
Introduce 1 cup of your choice of chicken, shrimp, or tofu to the skillet. Stir-fry the protein for about 4–5 minutes, until it's browned and cooked through completely. If you’re using chicken or shrimp, look for a nice golden color to indicate doneness. This step adds a hearty element to your delicious Yaki Udon.
Step 5: Add the Vegetables
Next, toss in 1 cup of mixed vegetables and stir-fry for 2–3 minutes until they’re slightly tender and vibrant. You may choose a blend of colorful options like snow peas, bok choy, or mushrooms. Stir constantly to ensure the vegetables are evenly cooked while maintaining their irresistible crunch.
Step 6: Combine the Noodles
Add the cooked udon noodles to your skillet with the vegetables and protein. Gently toss everything together to incorporate all the flavors, ensuring the noodles are warmed through and well-mixed. This will create a gorgeous medley of textures and colors, making your Yaki Udon truly inviting.
Step 7: Add the Flavors
Pour in 2 tablespoons of soy sauce, 1 tablespoon of mirin, and 1 tablespoon of sesame oil over the noodle mixture. Stir continuously for about 2 minutes, ensuring the noodles soak up all the wonderful flavors. The sauce should coat everything evenly, creating a mouthwatering aroma that will make your taste buds tingle.
Step 8: Heat It Through
Continue cooking the Yaki Udon for another 2–3 minutes, stirring occasionally until everything is heated through and combined perfectly. You'll notice the noodles take on a glossy sheen from the sauce. This step enhances the flavors while ensuring that your dish is steaming hot and ready to serve.
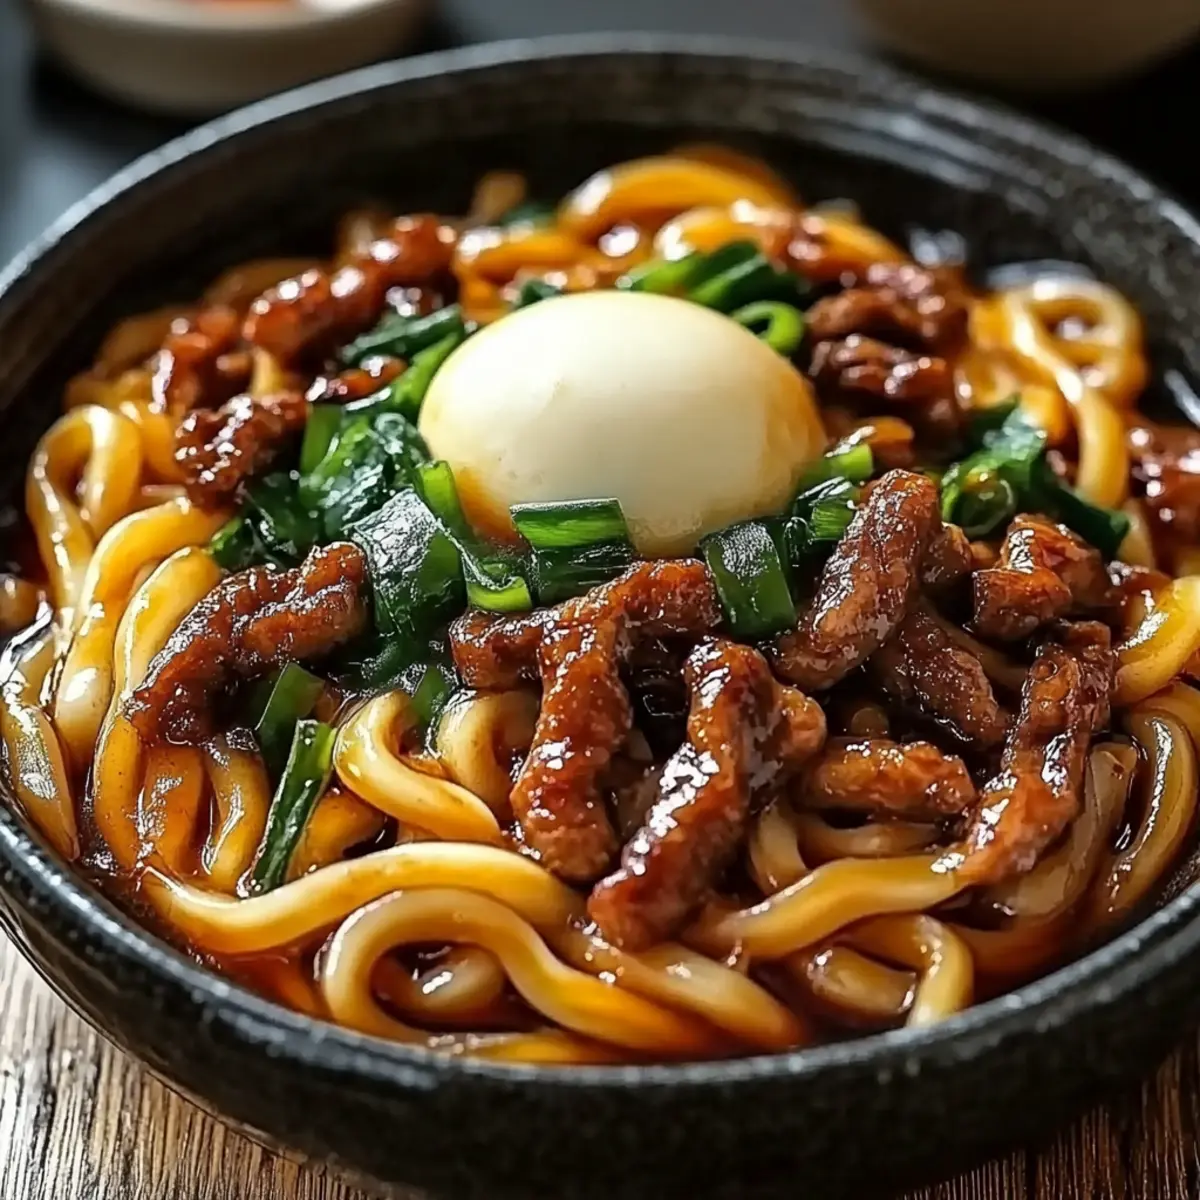
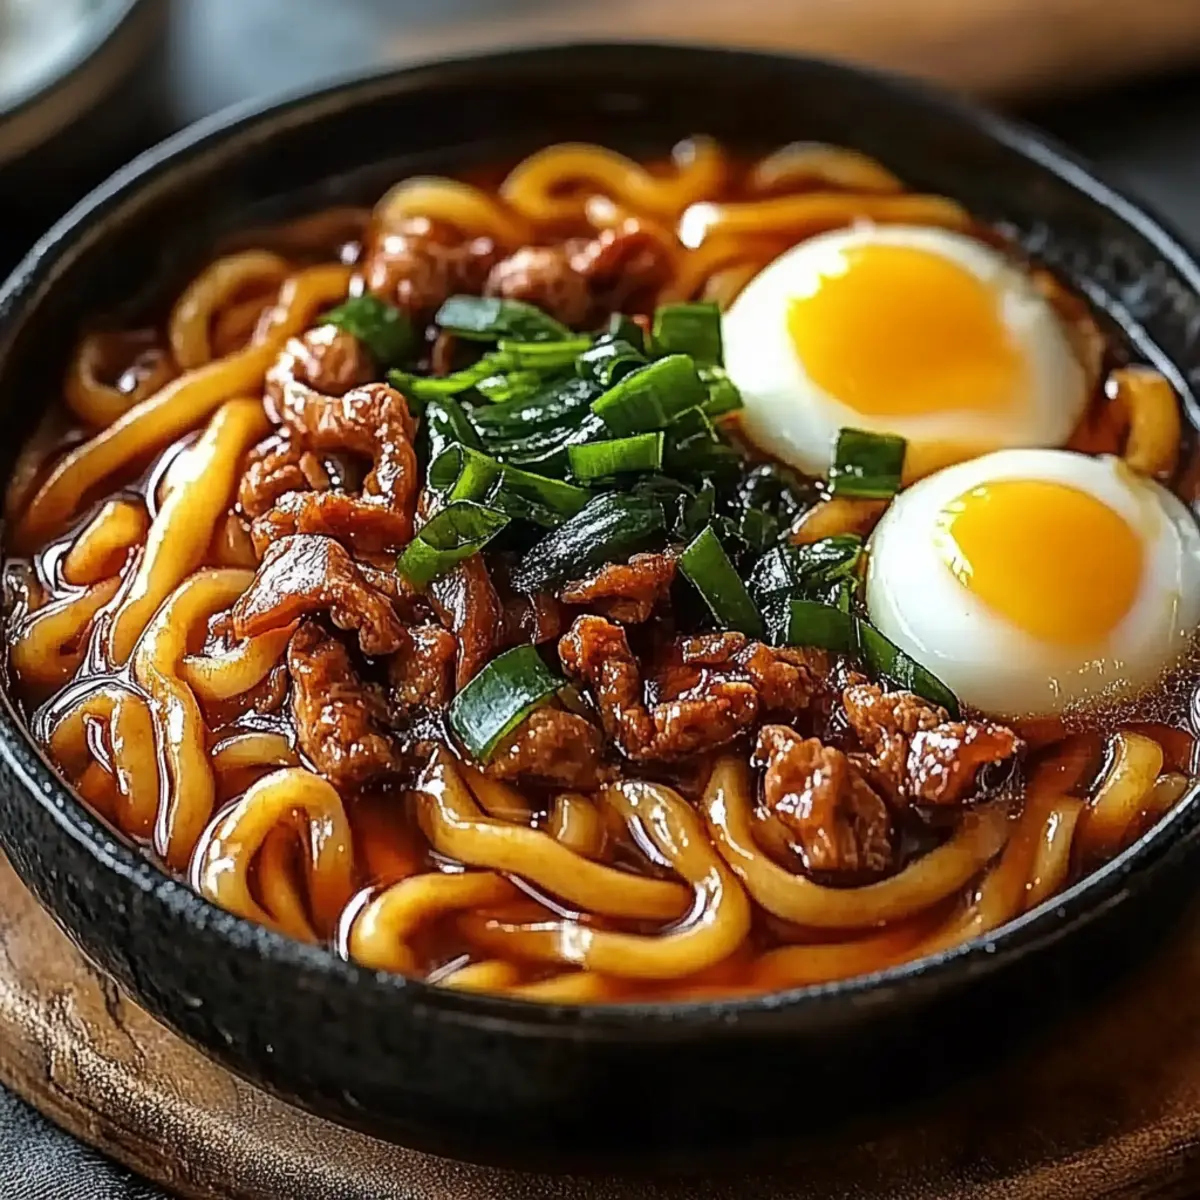
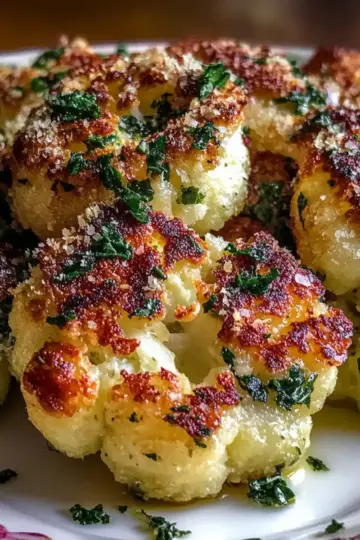
Step 9: Garnish and Serve
Finally, remove the skillet from the heat and garnish your homemade Yaki Udon with sliced green onions and a sprinkle of sesame seeds for added flavor and texture. Serve immediately, either plated individually or as a family-style dish in a large bowl, inviting everyone to dive into this delightful meal.
Expert Tips for Yaki Udon
-
Noodle Choice: Use fresh udon noodles for the best texture. If using dry ones, follow package instructions carefully to avoid overcooking.
-
Protein Prep: For chicken, ensure it’s diced evenly for consistent cooking. If using shrimp, look for a pink hue to confirm they’re fully cooked.
-
Veggie Variety: Feel free to mix and match your vegetables! Just remember that denser veggies like carrots require more cooking time, while leafy greens wilt quickly.
-
Sauce Secret: Adjust soy sauce levels according to preference, but don't skip mirin or sesame oil; they create the essential flavor profile of Yaki Udon.
-
Kitchen Timing: Prep all ingredients before starting to cook; this helps maintain flow and prevents overcooking the noodles or garlic.
-
Storage Tip: Leftovers can be refrigerated for up to three days. Reheat gently in a skillet, adding a splash of water or soy sauce to restore moisture.
What to Serve with Yaki Udon
As you savor this delicious stir-fried noodle dish, consider these delightful accompaniments that elevate your meal into a culinary experience.
- Creamy Miso Soup: This warm soup adds depth and umami, creating a comforting contrast to the textures of Yaki Udon.
- Asian Slaw: A vibrant mix of shredded cabbage, carrots, and sesame dressing adds a refreshing crunch that balances the dish perfectly.
- Spring Rolls: These crispy delights filled with vegetables or shrimp provide a satisfying texture and a burst of flavor alongside your noodles.
- Steamed Edamame: Lightly salted and served warm, these protein-packed pods are a nutritious and fun finger food to share.
- Chilled Soba Noodle Salad: A cold side of soba noodles with dressing offers a refreshing counterpart that pairs well with the warm Yaki Udon.
- Ginger-Lemon Iced Tea: Refreshing and zesty, this drink cleanses the palate between bites, enhancing every taste of your homemade Yaki Udon.
- Sesame Cookies: For a sweet finish, these light and crunchy cookies provide a delightful contrast to the savory main course.
- Fruit Sorbet: A light dessert such as mango or lychee sorbet can cleanse your palate after the rich flavors of the meal.
Make Ahead Options
These Yaki Udon are perfect for meal prep enthusiasts! You can chop and refrigerate your mixed vegetables (like snow peas, bok choy, and mushrooms) up to 24 hours in advance to save time on busy weeknights. Additionally, you can pre-cook your udon noodles, then toss them with a splash of oil before storing in the fridge for up to 3 days. When you're ready to prepare the dish, simply stir-fry the garlic, protein, and vegetables as per the recipe, then add the pre-cooked noodles and sauce ingredients until heated through. This way, you'll have restaurant-quality Yaki Udon at home, just as delicious and ready with minimal effort!
How to Store and Freeze Yaki Udon
Fridge: Store any leftovers in an airtight container for up to 3 days. Make sure it cools down to room temperature before sealing to preserve freshness.
Freezer: If you need to freeze it, place Yaki Udon in a freezer-safe container or bag for up to 2 months. Separate the ingredients if possible to help maintain texture.
Reheating: When ready to enjoy, thaw in the fridge overnight, then reheat in a skillet over low heat. Add a splash of water or soy sauce to prevent sticking and enhance flavor.
Meal Prep: You can also prep the mixed vegetables and store them in the fridge for up to a day before cooking, making your Yaki Udon preparation even more efficient.
Yaki Udon Variations & Substitutions
Feel free to get creative and make this Yaki Udon recipe uniquely yours with these delightful twists!
-
Gluten-Free: Use gluten-free udon noodles made from rice or another gluten-free grain for a tasty alternative.
Switching to gluten-free noodles keeps the deliciousness while accommodating dietary needs. -
Vegan Delight: Substitute chicken or shrimp with more tofu or tempeh for a hearty plant-based version.
This swap enhances the dish's protein content and brings a satisfying bite that everyone will enjoy! -
Extra Heat: Add sliced jalapeños or a dash of chili oil to spice things up, making each bite a flavorful adventure.
For heat lovers, this twist transforms your Yaki Udon into a tantalizing treat that ignites the taste buds! -
Crunchy Texture: Toss in some chopped roasted peanuts or water chestnuts for an added crunch and exciting texture.
This twist will elevate your Yaki Udon with layers of flavor and delightful surprises in every bite. -
Sautéed Greens: Include spinach, kale, or bok choy for a nutritional kick and vibrant color.
More greens not only boost health benefits but also enhance the dish's visual appeal with fresh touches of green! -
Sweet Twist: Drizzle a bit of hoisin sauce or teriyaki sauce for a hint of sweetness that balances savory flavors.
This option is perfect for those who love a sweet-savory profile that lingers on the palate long after the meal. -
Flavor Packed: Incorporate a splash of rice vinegar or lime juice to brighten the flavors and add a zesty punch.
These additions bring a fresh zest, elevating the dish and making it even more addictive! -
Protein Power: Mix and match proteins like beef, pork, or shrimp for an entirely different flavor profile.
Experimenting with proteins keeps your Yaki Udon exciting and caters to all preferences, ensuring everyone’s happy at the table.
Dive into these variations and watch your Yaki Udon transform into a thrill for your palate! Enjoy exploring these captivating twists that can make dinner around the table even more special.
Yaki Udon Recipe FAQs
How do I choose the right udon noodles?
Absolutely! When selecting udon noodles, opt for fresh or frozen for the best texture. Fresh noodles cook quickly and provide a delightful chew, whereas frozen ones, which have been pre-cooked, just need a brief boil before use. If you can only find dried noodles, ensure to follow the package instructions closely to avoid overcooking.
How should I store leftover Yaki Udon?
Very good question! Store leftover Yaki Udon in an airtight container in the fridge for up to 3 days. Make sure the dish cools to room temperature before sealing to maintain its freshness. This way, you can enjoy your delicious creation again without losing flavor.
Can I freeze Yaki Udon for later?
Definitely! To freeze Yaki Udon, place it in a freezer-safe container or bag, making sure to separate the ingredients if possible to maintain texture. It can be stored for up to 2 months. When you're ready to enjoy it, thaw the dish in the fridge overnight, then reheat in a skillet over low heat, adding a splash of water or soy sauce to prevent sticking.
What should I do if my noodles are too sticky?
Don’t worry! If your noodles end up being too sticky, it usually means they were overcooked or not rinsed properly. Always rinse the cooked udon noodles under cold water after draining to remove excess starch, helping to prevent them from clumping together. Additionally, adding a little oil during the stir-frying step can help keep them separate and enhance their flavor.
Are there any dietary considerations for Yaki Udon?
Absolutely! This Yaki Udon recipe is quite versatile. For those with dietary restrictions, you can easily swap in gluten-free soy sauce if you're avoiding gluten. If you have allergies, be mindful of possible shellfish allergies when choosing shrimp as your protein. Remember, tofu is a fantastic vegetarian option, providing a hearty alternative that’s not only delicious but also packed with protein.
Savor Homemade Yaki Udon in Just 30 Minutes!
Equipment
- Large pot
- Skillet
- colander
Ingredients
For the Noodles
- 14 ounces udon noodles choose fresh or frozen for the best texture
For the Protein
- 1 cup chicken (or shrimp, or tofu) select your favorite protein for a personalized touch
For the Vegetables
- 1 cup mixed vegetables use a variety like snow peas, bok choy, or mushrooms
For the Sauce
- 2 tablespoons soy sauce adds umami flavor
- 1 tablespoon mirin sweet rice wine
- 1 tablespoon sesame oil brings a nutty aroma
For Flavoring
- 1 teaspoon garlic (minced) gives fragrant essence
- 2 green onions (sliced) provides crunchy freshness
- 1 teaspoon sesame seeds (optional) adds flavor and texture
Instructions
Cooking Steps
- Begin by boiling a large pot of water. Add the udon noodles and cook according to package instructions, usually about 8–10 minutes.
- In a large skillet or wok, heat the vegetable oil over medium-high heat until it shimmers.
- Add the minced garlic to the oil and stir-fry for about 30 seconds until fragrant.
- Add the chicken, shrimp, or tofu to the skillet and stir-fry for 4–5 minutes until browned and cooked through.
- Toss in the mixed vegetables and stir-fry for 2–3 minutes until they’re slightly tender.
- Add the cooked udon noodles to the skillet and toss everything together to combine.
- Pour in the soy sauce, mirin, and sesame oil, stirring for about 2 minutes until the noodles soak up the flavors.
- Continue to cook for another 2–3 minutes until everything is heated through.
- Remove from heat and garnish with green onions and sesame seeds before serving.


Leave a Reply