
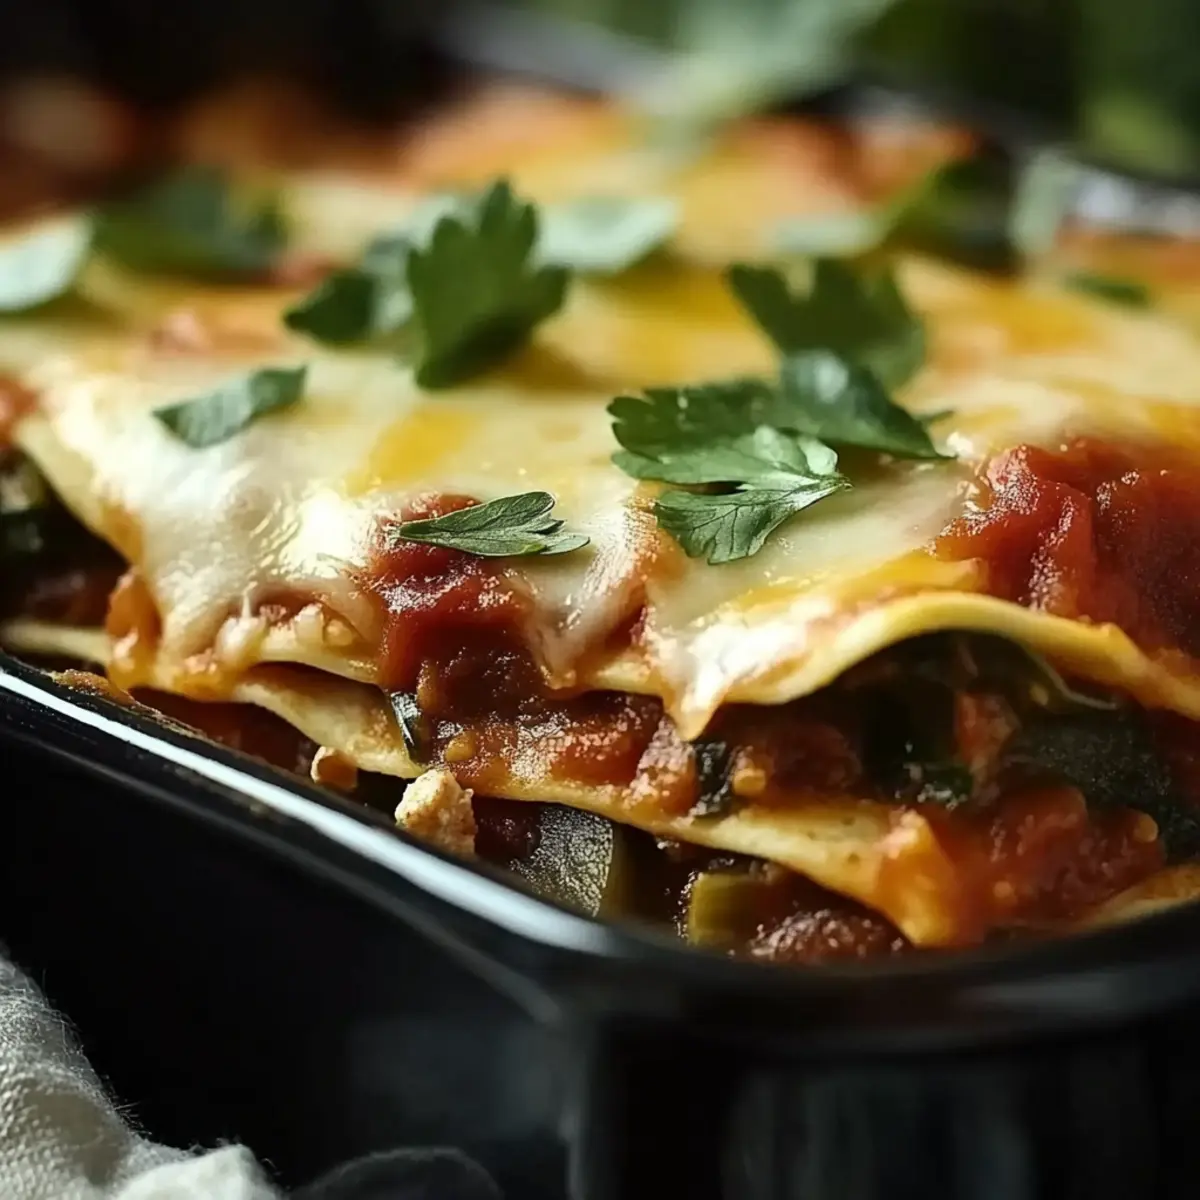
As I opened the fridge, a can of vibrant green chiles caught my eye, instantly sparking inspiration for dinner. Enter the Chile Relleno Casserole, a dish that’s become a cherished staple in my kitchen. It combines wholesome ingredients like eggs, cheese, and those fantastic green chiles, delivering both comfort and satisfaction in every bite. With just 15 minutes of prep and the option to make it ahead of time, this casserole is perfect for busy weeknights or casual gatherings with friends. Plus, it’s a versatile crowd-pleaser, easily accommodating various tastes with the addition of beans or your favorite toppings. What’s not to love about a dish that requires minimal effort but delivers maximum flavor? Are you ready to transform those simple ingredients into something spectacular? Let’s dive into this delightful recipe!
Why is This Casserole a Must-Try?
Ease of Preparation: With only 15 minutes of prep time, this Chile Relleno Casserole is perfect for busy cooks who want a hearty meal without the fuss.
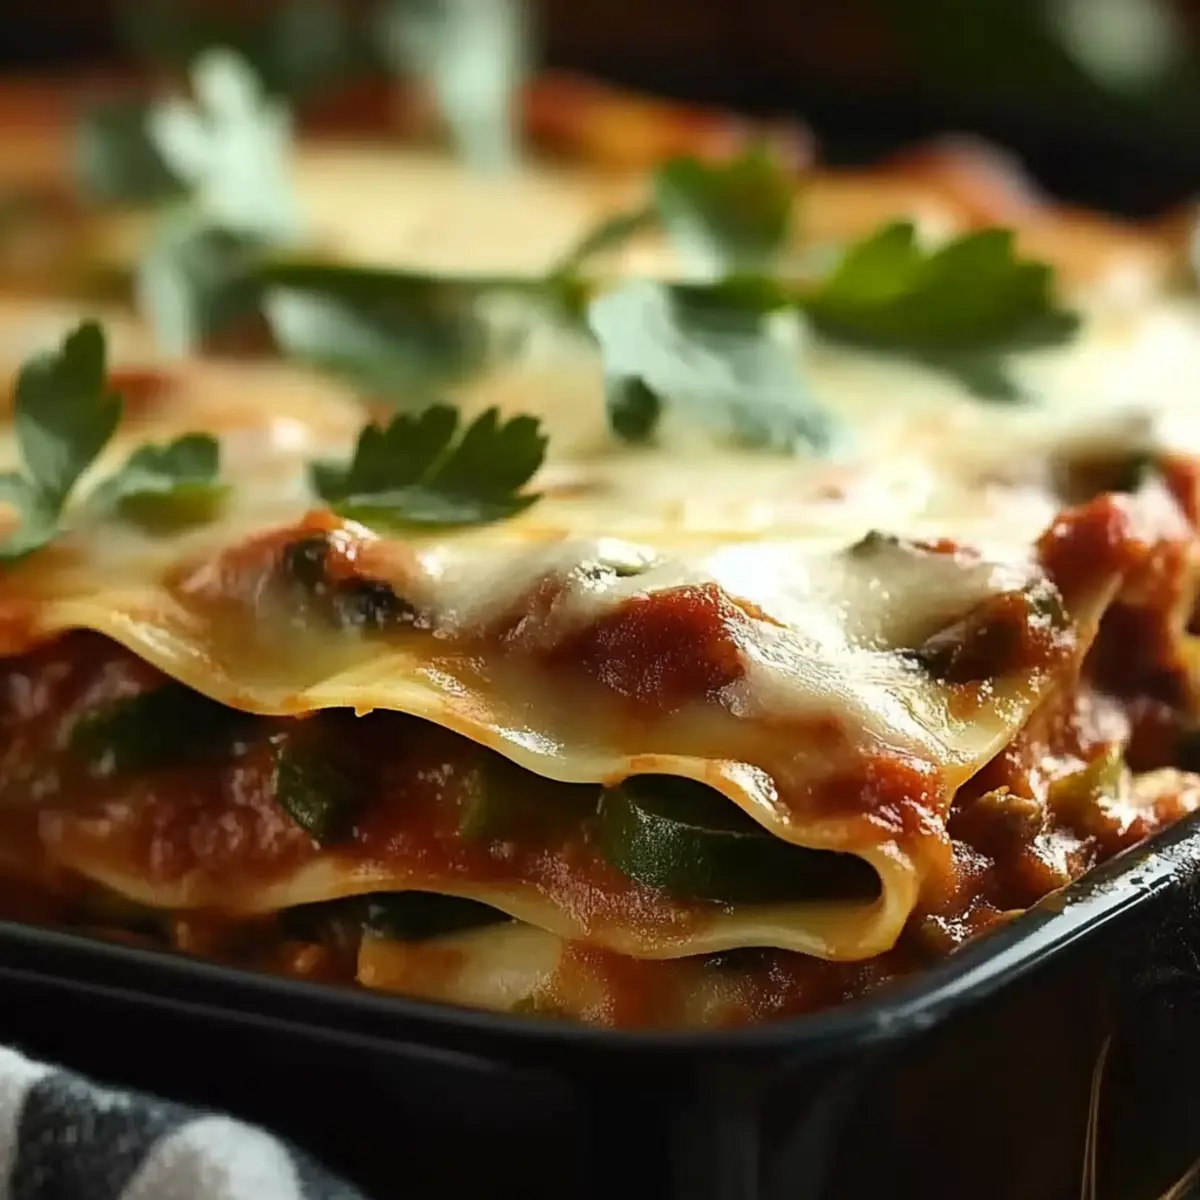
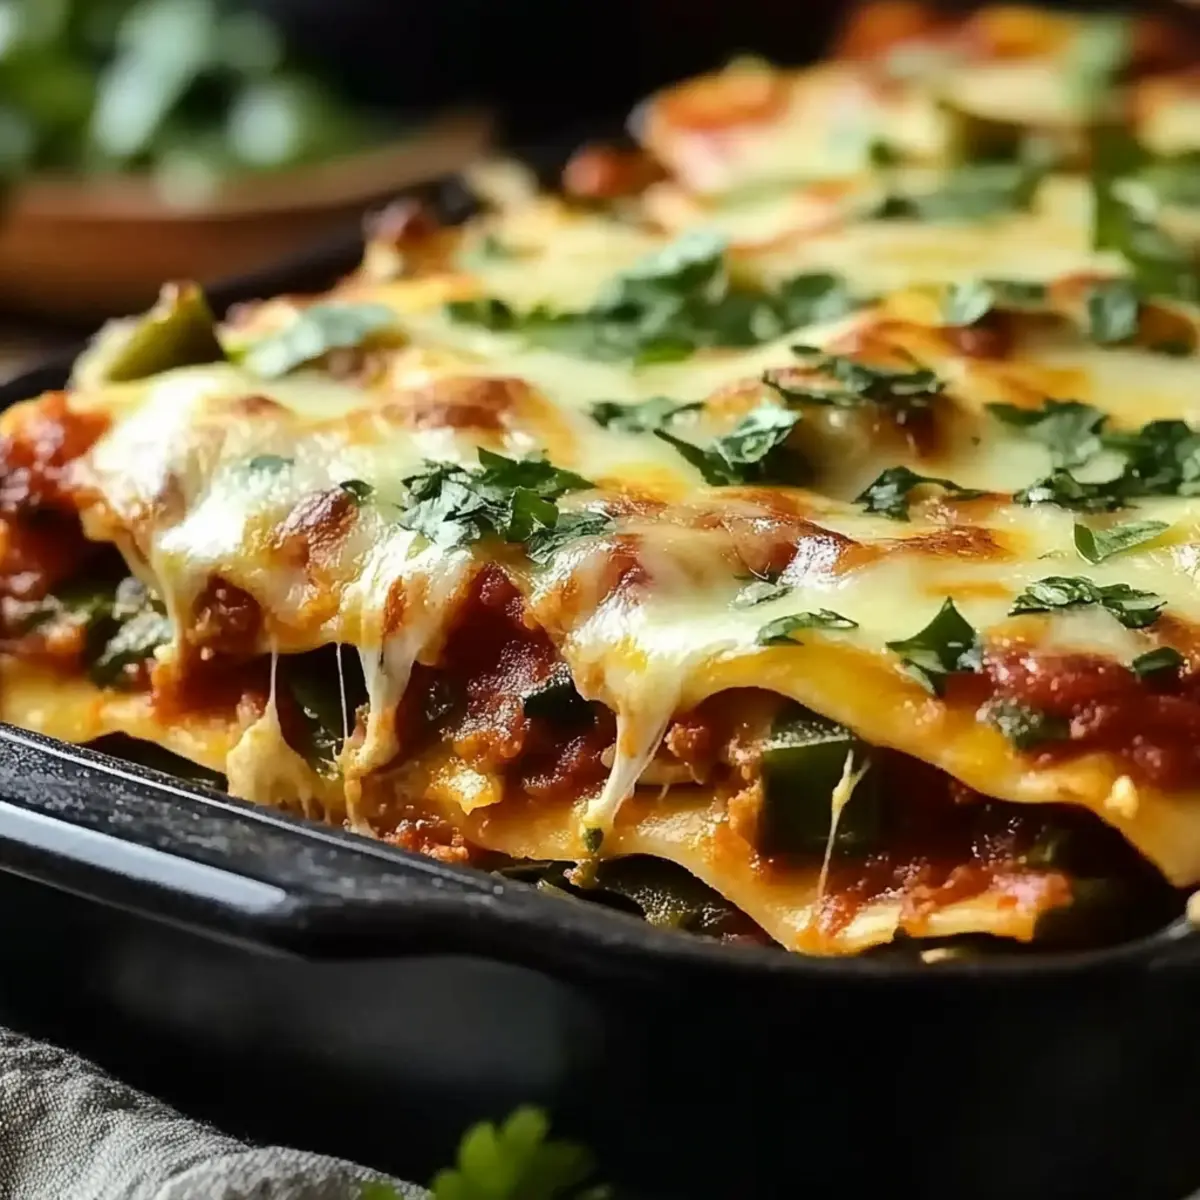
Flavor Explosion: The vibrant green chiles and melty cheese create a deliciously creamy and savory experience your taste buds will adore.
Versatile Options: Whether you prefer it meatless or loaded with beans, you can easily customize it for everyone's preferences, making it great for family dinners or gatherings.
Make-Ahead Convenience: You can prepare it hours in advance and just bake when you're ready, freeing up your evening for other activities.
Crowd-Pleasing Comfort: This casserole is sure to impress guests and bring smiles to the table, serving 6-8 people with ease. Try pairing it with fresh salsa or creamy avocado for added delight!
Chile Relleno Casserole Ingredients
For the Casserole
• 6 large eggs – the foundation of your casserole, providing a fluffy texture.
• 1 cup milk – adds creaminess and keeps the casserole moist during baking.
• 1 cup shredded cheese – choose your favorite cheese for a melty, gooey consistency; cheddar or Monterey Jack work beautifully.
• 1 can (15 oz) green chiles, drained – these provide the signature flavor and a mild kick for your Chile Relleno Casserole.
• 1 teaspoon ground cumin – brings warm, earthy notes that enhance the overall flavor profile.
• 1 teaspoon garlic powder – a quick flavor boost that pairs perfectly with the other ingredients.
• ½ teaspoon salt – enhances and balances the dish’s flavors.
• ½ teaspoon pepper – adds a subtle hint of spice to elevate your casserole.
• 1 tablespoon olive oil – greases the baking dish and adds a slight richness.
Optional Add-ins
• 1 can (15 oz) black beans or pinto beans, drained – these are perfect for adding protein and heartiness, transforming your casserole into a complete meal.
Step‑by‑Step Instructions for Chile Relleno Casserole
Step 1: Preheat the Oven
Begin by preheating your oven to 350°F (175°C). This temperature is crucial for ensuring that your Chile Relleno Casserole bakes evenly throughout, resulting in a delightful golden brown finish. As the oven warms up, gather your ingredients to streamline the cooking process.
Step 2: Prepare the Egg Mixture
In a large mixing bowl, whisk together the 6 large eggs and 1 cup of milk until the mixture is smooth and well combined. It’s essential to beat the eggs well to achieve a fluffy texture in your casserole. This step should take about 2-3 minutes, so keep an eye on the consistency before moving on.
Step 3: Add Flavorful Ingredients
Next, stir in 1 cup of shredded cheese, the drained green chiles, ground cumin, garlic powder, salt, and pepper. Mix everything together thoroughly, allowing the flavors to mingle. The vibrant green chiles infuse the egg mixture with a delightful zing, making your Chile Relleno Casserole irresistible.
Step 4: Grease the Baking Dish
Take a baking dish and drizzle 1 tablespoon of olive oil over the bottom, spreading it evenly to prevent sticking. This step is essential for achieving that perfect, golden crust on the edges of your casserole. Once greased, you’re ready to pour in the egg mixture.
Step 5: Pour the Egg Mixture
Carefully pour the egg mixture into the prepared baking dish, ensuring an even distribution across the bottom. The colorful green chiles and cheese will start to stand out, showcasing the vibrant ingredients of your Chile Relleno Casserole.
Step 6: Optional Bean Layer
If you choose to add a protein boost, sprinkle 1 can of drained black beans or pinto beans evenly over the egg mixture. This optional step enhances the heartiness of the casserole and provides additional flavor and texture, making it even more satisfying.
Step 7: Bake the Casserole
Place the baking dish in the preheated oven and bake for 30-35 minutes. Keep an eye on it, and look for the edges to turn golden brown, while a toothpick inserted into the center should come out clean. This visual cue means your Chile Relleno Casserole is perfectly set and ready to be enjoyed.
Step 8: Cool and Serve
Once baked, carefully remove the casserole from the oven and let it cool for a few minutes. This allows the flavors to settle and makes it easier to cut into squares. Now your beautiful Chile Relleno Casserole is ready to be served to family and friends!
Make Ahead Options
Preparing your Chile Relleno Casserole in advance is a fantastic time-saving strategy for busy weeknights! You can assemble the entire casserole up to 24 hours before baking. Simply follow the recipe instructions up to the point of pouring the egg mixture into the greased baking dish, then cover it tightly with plastic wrap and refrigerate. This helps flavor development while maintaining quality, as it keeps the ingredients fresh. When you're ready to serve, just preheat your oven and bake it straight from the fridge, adding an extra 5-10 minutes to the cooking time. With these make-ahead tips, you’ll enjoy a delicious, stress-free meal that’s just as tasty as if you made it that day!
Expert Tips for Chile Relleno Casserole
• Perfectly Whisked Eggs: Ensure your eggs and milk are thoroughly combined; under-whisking can lead to a dense texture in your casserole.
• Cheese Choices: Experiment with different cheeses such as pepper jack for extra spice or Gruyère for a nutty flavor; ensure it’s shredded for even melting.
• Careful Baking: Use an oven thermometer to confirm your temperature; an oven that's too hot can cause uneven baking or burnt edges.
• Customized Beans: If adding beans, rinse and drain them well to avoid excess liquid; this keeps your casserole from becoming soggy.
• Resting Time: Allow the casserole to cool for at least 5 minutes before slicing; this sets the layers and makes serving easier.
• Taste Testing: Before baking, taste your egg mixture for seasoning; feel free to adjust salt and spices for your personal preference.
Chile Relleno Casserole Variations
Feel free to tweak this delicious casserole to match your family's tastes or dietary needs!
-
Dairy-Free: Substitute milk and cheese with almond milk and a dairy-free cheese blend for a plant-based twist.
This will retain the casserole's creamy texture while accommodating lactose-free diets. -
Meat Lover's Delight: Add cooked ground beef or shredded chicken for a hearty protein-filled casserole.
The addition of meat brings a savory depth that adds to the overall heartiness of the dish. -
Spicy Kick: Mix in jalapeños or a dash of hot sauce for those who crave extra heat.
This fiery touch will ignite your taste buds, turning a comforting dish into something adventurous! -
Extra Veggies: Enhance the nutrition by layering in your favorite vegetables like sautéed bell peppers or spinach.
This not only brightens the dish but also adds more flavor and texture, making every bite exciting. -
Quinoa Boost: Substitute half of the eggs with cooked quinoa for a protein boost and a delightful chewy texture.
This alternative will make your casserole even more filling while keeping it gluten-free and nutritious. -
Herb Infusion: Add fresh cilantro, parsley, or even oregano to impart an aromatic twist that brightens each bite.
Fresh herbs can elevate the flavors and provide a beautiful garnish right before serving! -
Breakfast Style: Transform it into a brunch favorite by folding in some cooked and crumbled breakfast sausage.
This change will turn your casserole into a scrumptious morning meal that’s sure to impress guests. -
Creamy Avocado Topping: Top with sliced avocado or a dollop of guacamole right before serving for a fresh, creamy finish.
This elevates the dish and provides a lovely contrast to the warm, cheesy casserole.
Experiment with these variations, and don’t hesitate to explore even more ideas—your kitchen is your playground! For a delightful side, consider serving your casserole with fresh salsa or a scoop of creamy avocado, as they complement it beautifully.
What to Serve with Chile Relleno Casserole
Elevate your dining experience with delightful sides that complement the rich and savory flavors of the casserole beautifully.
-
Creamy Avocado Slices: Fresh, creamy avocado adds a buttery texture that balances the richness of the casserole. Toss with a sprinkle of salt for an effortless garnish.
-
Zesty Salsa: A vibrant, homemade salsa provides a zippy contrast that brightens each bite of the casserole, adding freshness and a burst of flavor.
-
Spanish Rice: Fluffy Spanish rice, seasoned with spices, offers a hearty side that echoes the flavors of the casserole while providing a satisfying base.
-
Crisp Green Salad: A light, crisp salad dressed with a tangy vinaigrette enhances the meal's freshness, cutting through the cheesy richness and creating a delightful balance.
-
Sour Cream Dollops: A dollop of cool sour cream on top of each slice enriches the casserole, offering a creamy, tangy element that perfectly complements the dish.
-
Cornbread Muffins: Sweet, fluffy cornbread muffins make for a delightful pairing; their sweetness beautifully contrasts the savory notes of the casserole.
-
Grilled Vegetables: A medley of grilled zucchini, bell peppers, and onions brings a burst of color and smokiness, adding depth to your meal and enhancing the overall flavor experience.
-
Cold Margarita: To unwind while enjoying your meal, pair it with a refreshing margarita. Its zesty lime brightness complements the casserole perfectly, making it a fantastic match.
-
Churros for Dessert: Round off the meal with a sweet treat like churros. Their warm, cinnamon-sugar coating contrasts the savory components and adds an irresistible ending to your culinary journey.
How to Store and Freeze Chile Relleno Casserole
Fridge: Store leftover Chile Relleno Casserole in an airtight container for up to 3-4 days. Place a piece of plastic wrap against the surface before sealing to maintain moisture.
Freezer: To freeze, slice the casserole into portions, wrap each slice tightly in plastic wrap, and then place in a freezer-safe bag. It can be frozen for up to 2 months.
Reheating: Reheat slices in the microwave for 1-2 minutes or until warmed through. If frozen, let thaw overnight in the fridge before reheating. Enjoy your delicious Chile Relleno Casserole without losing any flavor!
Make-Ahead Tip: You can prepare the dish fully and refrigerate it uncooked for up to 24 hours before baking; simply add a few extra minutes to the cooking time when ready.
Chile Relleno Casserole Recipe FAQs
What kind of green chiles should I use?
Absolutely! I recommend using canned green chiles, as they're already peeled, diced, and ready to go. However, if you want a fresher taste, you can roast and peel fresh poblano peppers instead. Just remember to deseed them for the best flavor in your casserole!
How long can I store the casserole in the fridge?
Leftover Chile Relleno Casserole can be safely stored in an airtight container for up to 3-4 days. To keep it moist, I like to place plastic wrap directly against the surface of the casserole before sealing it. This little tip helps maintain that delightful texture.
Can I freeze Chile Relleno Casserole?
Certainly! After baking, allow it to cool completely, then slice into portions. Wrap each slice tightly in plastic wrap and place them in a freezer-safe bag. Your delicious casserole can be frozen for up to 2 months. To reheat, let it thaw overnight in the fridge, then warm it in the microwave for 1-2 minutes until heated through.
What should I do if my casserole is too watery?
Very! If you find your Chile Relleno Casserole is a bit watery, it might be due to excess moisture from the ingredients. To avoid this, thoroughly drain canned ingredients like beans and chiles. If it still turns out watery after baking, try allowing it to cool for a few minutes; it usually firms up a bit as it sets.
Is this recipe suitable for those with allergies?
Definitely! This Chile Relleno Casserole can be tailored to accommodate various dietary needs. If you're dealing with cheese allergies, opt for dairy-free cheese alternatives. For those watching their sodium intake, consider using low-sodium beans or adjusting the salt. Always check the labels when selecting your ingredients to ensure they meet your needs!
Can I make this casserole ahead of time?
Absolutely! You can prep the Chile Relleno Casserole up to 24 hours in advance. Simply assemble everything in your baking dish and cover it tightly. When you're ready to bake, just pop it in the preheated oven; you may need to add a few extra minutes to the cooking time to account for the chill from the fridge. Enjoy your hassle-free cooking!

Delicious Chile Relleno Casserole in 50 Minutes Flat
Equipment
- Baking Dish
- Mixing bowl
- Whisk
Ingredients
For the Casserole
- 6 large eggs providing a fluffy texture
- 1 cup milk adds creaminess
- 1 cup shredded cheese cheddar or Monterey Jack recommended
- 1 can (15 oz) green chiles, drained providing signature flavor
- 1 teaspoon ground cumin brings warm notes
- 1 teaspoon garlic powder quick flavor boost
- ½ teaspoon salt balances flavors
- ½ teaspoon pepper adds subtle spice
- 1 tablespoon olive oil greases the baking dish
Optional Add-ins
- 1 can (15 oz) black beans or pinto beans, drained adds protein and heartiness
Instructions
Step-by-Step Instructions
- Preheat your oven to 350°F (175°C).
- In a large mixing bowl, whisk together the eggs and milk until smooth.
- Stir in shredded cheese, green chiles, cumin, garlic powder, salt, and pepper.
- Grease the baking dish with olive oil.
- Pour the egg mixture into the greased baking dish.
- Optionally, sprinkle beans over the egg mixture.
- Bake for 30-35 minutes until edges are golden brown.
- Let cool for a few minutes before serving.


Leave a Reply