
As I stood in my kitchen the other day, an unexpected craving hit me—those delightful little Starbucks Cake Pops that always bring a smile to my face. With their perfectly sweet confection coating and rich, moist cake filling, it's easy to see why they’re so popular. And guess what? You can recreate these treasures at home! This Cake Pop recipe not only saves you a trip to the café, but it also allows you to customize your treats exactly the way you want. Whether you’re planning a party, seeking something sweet for a coffee break, or just want to impress friends with your homemade prowess, these cake pops are quick to whip up and fun to decorate. Are you ready to dive into this delicious project?
Why are these Cake Pops a must-try?
Easy to Make: This recipe requires minimal baking skills, making it perfect for anyone looking to create something special without the hassle.
Customizable Flavors: Mix and match your favorite cake flavors and frostings for a unique spin — try pairing a rich chocolate cake with creamy vanilla frosting!
Perfect for Any Occasion: Whether it’s a birthday party, a cozy get-together, or just because, these cake pops will wow your guests and make every event memorable.
Sweet Eye Candy: Not only do they taste divine, but their vibrant colors and fun designs add a delightful touch to your dessert table—much like our Birthday Cake Pops!
Quick to Chill: With just a 30-minute chill time, you won’t be waiting long to enjoy your delicious creations.
These cake pops are also ideal for storage; you can prepare them a day in advance and keep them in the fridge for fresh treats whenever you fancy a sweet bite!
Cake Pop Ingredients
• Get ready to create a delightful dessert!
For the Cake Mixture
- Cake crumbs – use your favorite leftover cake for the best flavor.
- Frosting – choose a rich frosting to keep the cake pops moist and delicious.
For the Coating
- Candy melts or chocolate – opt for bright candy melts for a fun, colorful coating or rich chocolate for a classic taste.
For Assembly
- Lollipop sticks – these will give your cake pops a fun and easy way to enjoy them!
Get ready to enjoy making these delightful cake pops, where your imagination can run wild! 🍰
Step‑by‑Step Instructions for Starbucks Cake Pop Recipe
Step 1: Prepare the Cake Mixture
In a large mixing bowl, combine 1 cup of cake crumbs with ½ cup of your favorite frosting. Use a spatula or your hands to mix the ingredients thoroughly until well-blended, creating a moist, pliable mixture. The color should be uniform, and you should be able to form it easily into shapes. This will be the base for your delightful cake pops!
Step 2: Form Cake Balls
Scoop out small portions of the mixture and roll them into balls, roughly the size of a tablespoon. Place the formed cake balls onto a lined baking sheet, ensuring they are evenly spaced to prevent sticking. They should have a smooth surface and be about the same size for even coating. This step should take approximately 10-15 minutes to complete.
Step 3: Chill the Cake Balls
Refrigerate the baking sheet with the cake balls for 30 minutes. This chilling time is essential as it firms up the cake mixture, making the balls easier to handle and dip later. You’ll know they’re ready when they feel sturdy to the touch. It’s worth the wait, as this step ensures perfectly formed cake pops!
Step 4: Melt the Coating
While the cake balls chill, prepare your coating. Melt candy melts or chocolate according to the package instructions, typically in a microwave or double boiler. Stir until smooth and free of lumps, achieving a silky consistency. The melted coating should be warm but not too hot to touch. This will be the luscious outer layer for your cake pops.
Step 5: Insert the Lollipop Sticks
Once the cake balls are chilled, take a lollipop stick and dip one end into the melted coating. Insert this coated end about halfway into the center of each cake ball. This helps to secure the stick and ensures that the delectable cake pop stays intact. Repeat this step for all cake balls while they remain chilled.
Step 6: Dip the Cake Pops
Carefully dip each cake pop into the melted coating, ensuring they are fully submerged. Twist the stick gently to allow excess coating to drip off. This creates a smooth, even layer around your cake pops. Allow any drips to fall back into the bowl for a cleaner finish. You should see a beautiful glossy layer forming around your treats!
Step 7: Set the Cake Pops
Place each coated cake pop back onto the lined baking sheet. Ensure they are spaced out to avoid sticking together as the coating sets. Let the cake pops sit at room temperature for about 15-20 minutes, or until the coating hardens completely. This step is crucial for achieving that perfect finish.
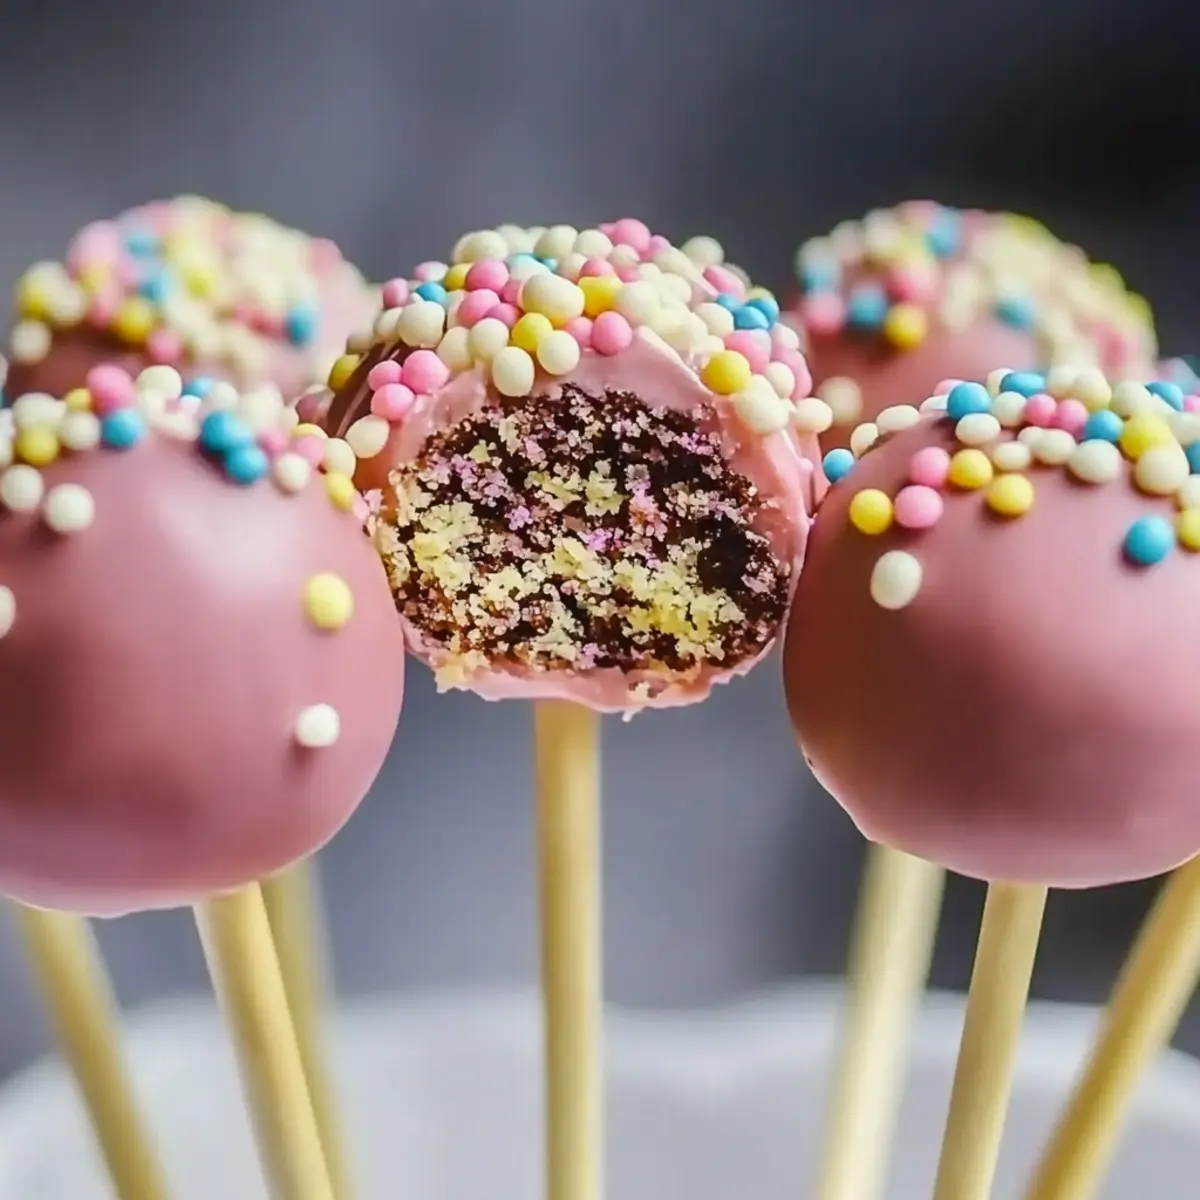
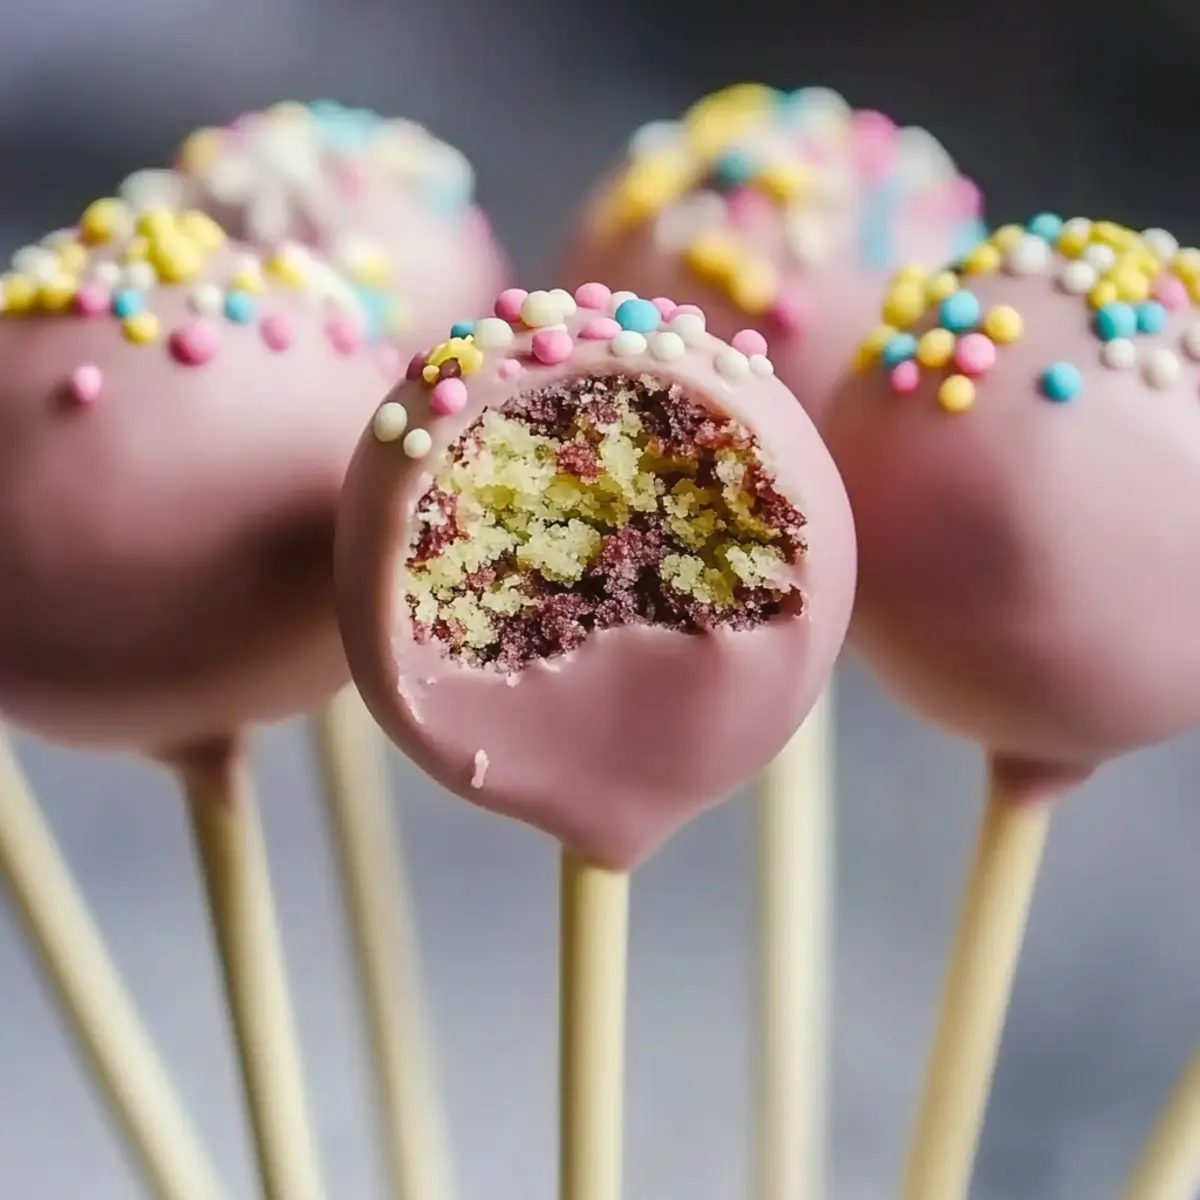
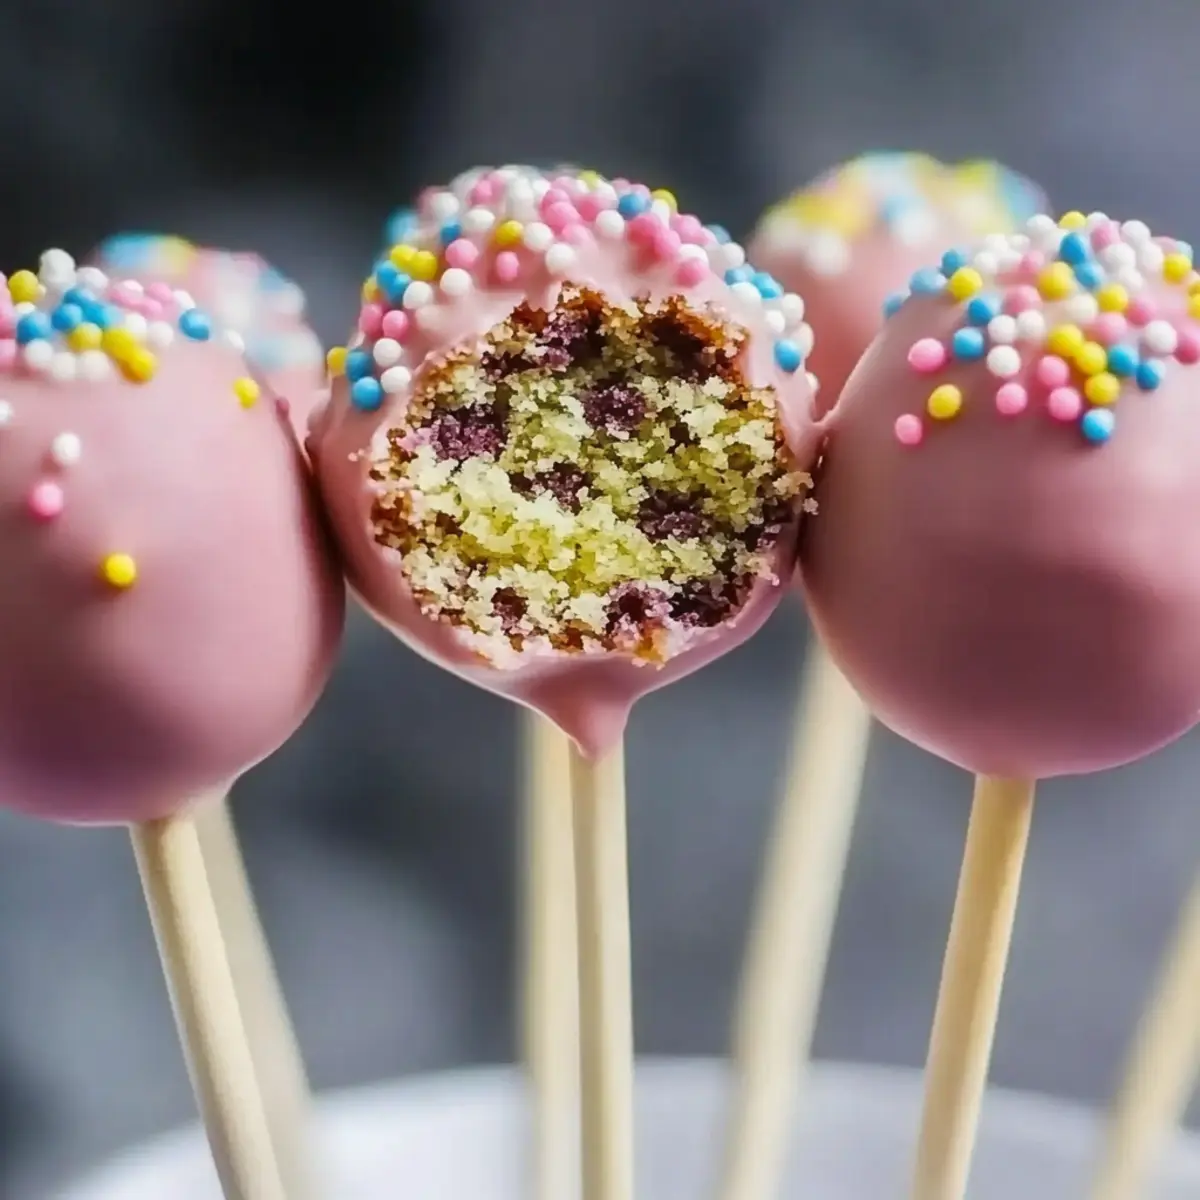
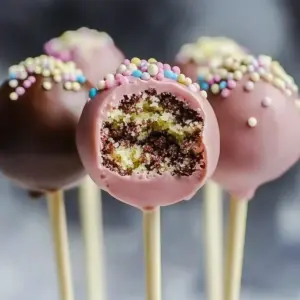
Step 8: Decorate Your Cake Pops
Once set, get creative and decorate your cake pops as desired! You can use sprinkles, melted chocolate drizzle, or edible glitter to make them pop. This is the fun part where you can express your unique style. Make sure to decorate before the coating hardens completely for better adhesion in your delightful creations!
How to Store and Freeze Cake Pops
Fridge: Store decorated cake pops in an airtight container in the refrigerator for up to 5 days. Keep layers separated with parchment paper to avoid sticking.
Freezer: For longer storage, freeze uncoated cake balls for up to 3 months. Thaw them in the fridge before dipping in coating.
Reheating: If using chocolate coating, avoid reheating in the microwave once set, as it won't retain the same appearance. Instead, use fresh melted coating for any repairs.
Make-Ahead: You can prepare cake pops a day in advance. Simply store them in the fridge until you're ready to serve, ensuring they're enjoyed fresh and delicious!
Expert Tips for Making Cake Pops
Chill Thoroughly: Ensure that your cake balls chill for the full 30 minutes, as this helps maintain their shape during dipping.
Coating Consistency: The melted candy melts or chocolate should be warm and smooth. If too thick, it won't coat evenly; if too thin, it won't stick to the cake pop.
Stick Placement: Dip the end of the lollipop stick in coating before inserting it into the cake ball. This helps secure the stick in place, preventing it from falling out after dipping.
Decorate Quickly: Be sure to add decorations like sprinkles or drizzles before the coating hardens, ensuring they stick nicely to your cake pops!
Uniform Sizes: Try to roll your cake balls into equal sizes for even coating and truer baking times. This way, all your cake pops will be equally delightful!
By following these expert tips, you’ll create delicious cake pops that not only look stunning but also taste amazing!
Make Ahead Options
These Starbucks Cake Pops are perfect for meal prep enthusiasts! You can prepare the cake mixture (1 cup of cake crumbs and ½ cup of frosting) up to 24 hours in advance; simply cover and refrigerate it until you're ready to roll them into balls. The chilled cake balls can also be stored in the fridge for up to 3 days before coating them in chocolate. To ensure your cake pops remain fresh, keep them well-covered and avoid moisture. When you’re ready to serve, just dip the chilled cake balls into the melted candy coating and follow the remaining steps for a delightful treat, just as delicious as if made fresh!
Cake Pop Variations & Substitutions
Feel free to get creative and tailor these cake pops to your taste buds and dietary needs!
-
Dairy-Free: Use coconut cream frosting and dairy-free chocolate for a delicious vegan twist.
-
Gluten-Free: Substitute traditional cake crumbs with gluten-free cake mix for a safe yet scrumptious alternative.
-
Flavor Boost: Add a teaspoon of peppermint extract or espresso powder to the cake mixture for an exciting flavor kick. Just imagine the rich, contrasting notes dancing on your palate!
-
Texture Twist: Fold in some finely chopped nuts, like pecans or almonds, for a delightful crunch amidst the soft cake.
-
Sweets Galore: Swap the candy melts for a different type of chocolate or white chocolate to create a variety of coated treats. You can even try peanut butter chocolate for a nutty finish.
-
Creative Decor: Experiment with edible glitter or themed sprinkles to match your celebrations. These little touches can elevate the appeal, making your cake pops memorable.
-
Heat Level: For an adventurous spirit, add a pinch of cayenne pepper to the cake mixture for a spicy surprise. The sweetness paired with a subtle heat can be an exhilarating combination!
By personalizing these cake pops, you can create an even more joyful and tasty experience—perfect for gatherings, a coffee break treat, or just because you deserve something sweet today! If you have leftover ingredients, why not use them in other delightful recipes like Light Cloud Cake or Divorce Carrot Cake? Happy baking!
What to Serve with Starbucks Cake Pop Recipe
Imagine gathering around a table, enjoying these sweet treats alongside delightful companions that enhance your dessert experience.
-
Rich Hot Chocolate: The creamy richness of hot chocolate perfectly balances the sweetness of cake pops, creating a cozy pairing perfect for any gathering.
-
Fresh Fruit Salad: A vibrant fruit salad adds a refreshing contrast to the sugary cake pops, providing a burst of natural sweetness and color on your plate.
-
Vanilla Ice Cream: Pairing a cake pop with a scoop of velvety vanilla ice cream creates a delightful textural harmony that is simply irresistible.
-
Coffee or Espresso: The bold flavors of coffee or espresso complement the cake pops' sweetness, making this combination a beloved choice for coffee break indulgence.
-
Decadent Brownies: For a double chocolate experience, serve cake pops alongside fudgy brownies — a dream for chocolate lovers wanting a variety of textures.
-
Flavored Lemonade: A chilled glass of tangy lemonade offers a zesty contrast to the rich cake pops, cleansing the palate beautifully between bites.
-
Cheesecake Bites: Mini cheesecake bites add a creamy yet tangy element to your dessert spread, giving your guests another delightful option to savor.
-
Sparkling Water: Fresh, bubbly sparkling water with a twist of lemon makes for a refreshing drink that lightens the sweetness of cake pops without overpowering them.
-
Decorative Sprinkles: For an added touch, accompany your cake pops with a variety of sprinkles in a small bowl, encouraging everyone to customize their treats and add a playful element to dessert!
Starbucks Cake Pop Recipe FAQs
What type of cake crumbs should I use?
Absolutely! The best cake crumbs come from your favorite cake—anything from vanilla to chocolate will work beautifully. If the cake has been frosted, simply scrape the excess frosting off before crumbling it. You want the crumbs to be dry enough to form into balls; otherwise, the mixture may become too soggy.
How should I store leftover cake pops?
Very simply! Store your decorated cake pops in an airtight container in the refrigerator for up to 5 days. I often place layers of parchment paper between each pop to prevent them from sticking together. This keeps them looking beautiful and fresh for when those cravings hit!
Can I freeze cake pops?
Absolutely! You can freeze uncoated cake balls for up to 3 months. Just make sure to wrap them tightly in plastic wrap before placing them in a freezer-safe bag. To use, thaw them overnight in the refrigerator before dipping them in your melted coating. This method helps retain their delightful texture!
What if my melted coating is too thick?
No worries at all! If your melted coating has thickened, you can thin it out by adding a small amount of vegetable oil or shortening, one teaspoon at a time, stirring well until you reach the desired consistency. This will make it easier to coat your cake pops smoothly and evenly.
Can these cake pops be safe for pets?
It's important to keep these cake pops away from pets, especially if they contain chocolate or any artificial sweeteners, as these can be harmful to them. Consider making a pet-safe version with ingredients such as peanut butter or pumpkin if you want to give your furry friends a treat!
How do I troubleshoot if my cake pops keep falling off the stick?
If your cake pops keep detaching from the stick, it’s often due to insufficient chilling or not dipping the stick into the coating before inserting it into the cake ball. Ensure to chill your cake balls for the full 30 minutes and dip the stick ends before inserting them. This provides a better grip!
Delicious Cake Pop Bliss: Easy Homemade Treats for Everyone
Equipment
- Mixing bowl
- Baking sheet
- Spatula
- microwave or double boiler
- Lollipop Sticks
Ingredients
Cake Mixture
- 1 cup Cake crumbs use your favorite leftover cake for best flavor
- ½ cup Frosting choose a rich frosting to keep the cake pops moist
Coating
- 1 cup Candy melts or chocolate opt for bright candy melts or rich chocolate
Assembly
- 12 pieces Lollipop sticks for easy enjoyment of cake pops
Instructions
Preparation Steps
- In a large mixing bowl, combine the cake crumbs with the frosting until well-blended.
- Scoop out small portions and roll them into balls about the size of a tablespoon.
- Refrigerate the balls for 30 minutes to firm them up.
- Melt the candy melts or chocolate until smooth.
- Dip the end of the lollipop stick into the melted coating, then insert it into each cake ball.
- Fully dip each cake pop into the melted coating and allow excess to drip off.
- Place coated cake pops onto lined baking sheet and let sit for 15-20 minutes until set.
- Decorate your cake pops with sprinkles or drizzles if desired.
Leave a Reply