
As I pulled the lid off the warm pot of perfectly cooked sushi rice, the sweet, tangy aroma filled my kitchen, instantly whisking me away to the sun-drenched coasts of California. Today, I'm excited to share my take on California Sushi Bowls, a delightful dish that captures bright flavors and is surprisingly simple to prepare. Whether you’re a seasoned chef or a busy weeknight warrior, these bowls offer both eye-catching presentation and a healthy upgrade from takeout. With a prep time of just 15 minutes, you can effortlessly whip up a meal that pleases the palate and nourishes the soul. So why not trade the fast food for a fresh, homemade twist that will leave you feeling satisfied? Are you ready to dive into this vibrant, culinary adventure?
Why Will You Love These Bowls?
Simplicity reigns supreme in this recipe, with just a few easy steps to create a stunning meal. Fresh ingredients—like creamy avocado and crunchy cucumbers—come together for a colorful presentation that’s as appealing as it is delicious. Customization is key; feel free to swap out the imitation crab for any protein or veggies you prefer! Plus, quick prep time means you can enjoy this dish whenever cravings strike. If you love sushi but want a healthier option, these California Sushi Bowls are a fantastic choice to impress your family and friends!
California Sushi Bowls Ingredients
• Dive into the fresh flavors of California with these simple ingredients!
For the Rice
- Sushi rice – a short-grain rice that becomes perfectly sticky when cooked, ideal for these California Sushi Bowls.
- Water – necessary for cooking the rice to achieve that fluffy texture.
- Rice vinegar – adds a lovely tanginess to balance the flavors of the dish.
- Sugar – a pinch of sweetness boosts the overall flavor profile.
- Salt – enhances the taste, making every bite delightful.
For the Toppings
- Imitation crab meat or alternative protein – provides a seafood flavor without the fuss; feel free to use shrimp, tofu, or your favorite protein!
- Avocado – adds creaminess and healthy fats that make these bowls even more satisfying.
- Cucumber – brings a refreshing crunch that contrasts beautifully with the textures.
- Carrot – adds a touch of sweetness and vibrant color.
- Green onions – offer a mild onion flavor that elevates the entire dish.
- Sesame seeds – sprinkle these on top for a nutty taste and lovely garnish.
For Serving
- Soy sauce or tamari – drizzle over for an umami boost, and consider low-sodium varieties for a healthier option.
- Optional: Wasabi and pickled ginger – these traditional companions add a nice kick and help cleanse the palate!
Experience the joy of creating these California Sushi Bowls, a refreshing twist on homemade sushi that's sure to impress!
Step‑by‑Step Instructions for California Sushi Bowls
Step 1: Rinse the Rice
Start by rinsing 2 cups of sushi rice under cold running water. Use your hands to gently swirl the rice around until the water runs clear, indicating that excess starch has been removed. This step is crucial for achieving the perfect sticky texture in your California Sushi Bowls. Once rinsed, drain the rice thoroughly.
Step 2: Cook the Rice
In a medium pot, combine the rinsed sushi rice with 2 ½ cups of water. Bring it to a boil over medium-high heat, then reduce the heat to low, cover the pot, and simmer for 20 minutes. Keep an eye on it, and avoid removing the lid during cooking to trap steam. The rice should be tender and the water absorbed by the end of this step.
Step 3: Prepare the Vinegar Mixture
While the rice cooks, prepare a tangy dressing by mixing ¼ cup of rice vinegar, 2 tablespoons of sugar, and 1 teaspoon of salt in a small bowl. Stir until the sugar and salt dissolve completely. This flavorful mixture will enhance the sushi rice in your California Sushi Bowls, adding a delightful balance of sweetness and acidity.
Step 4: Fluff and Season the Rice
After the rice has cooked for 20 minutes, remove the pot from heat and let it sit, covered, for an additional 10 minutes. This resting period allows the rice to steam and fully absorb the moisture. Once ready, fluff the rice with a fork and gradually mix in the vinegar mixture, taking care to gently incorporate it without mashing the grains.
Step 5: Assemble the Bowls
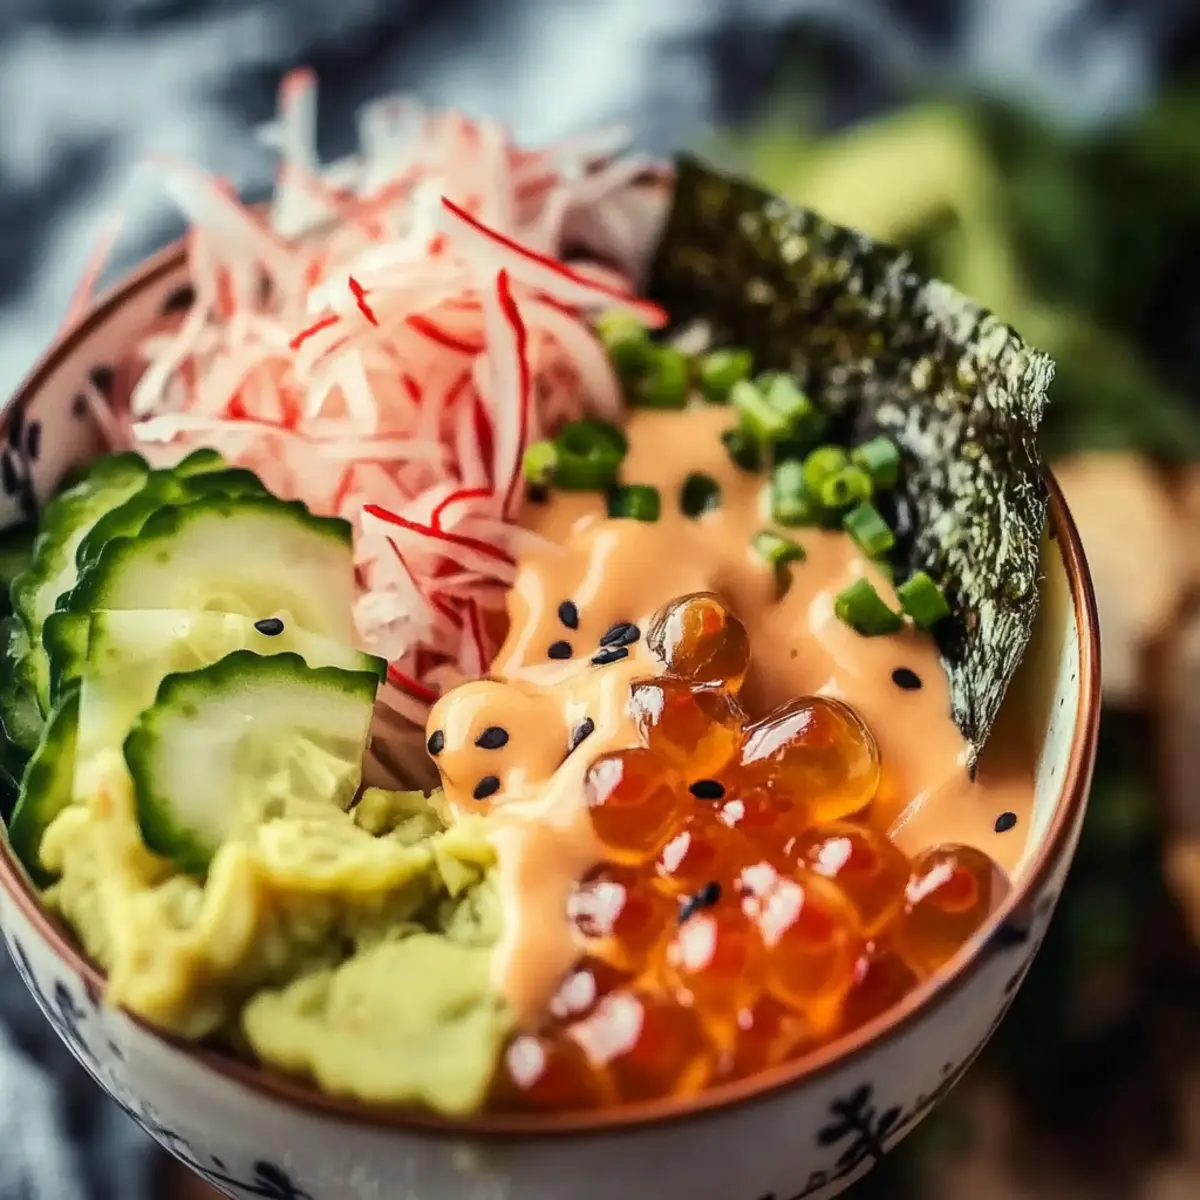
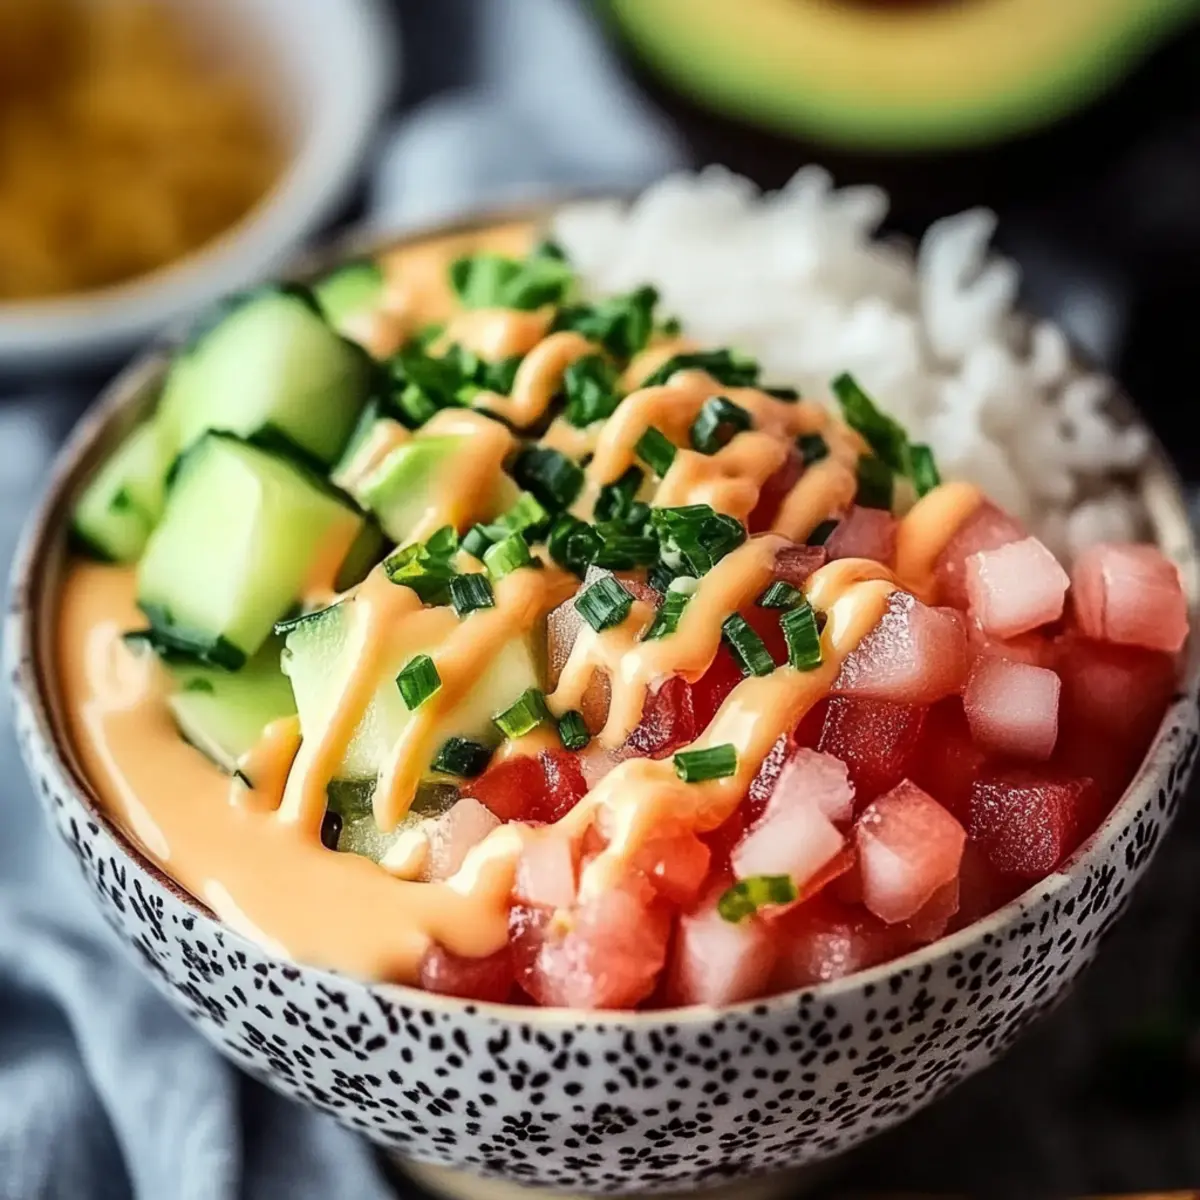
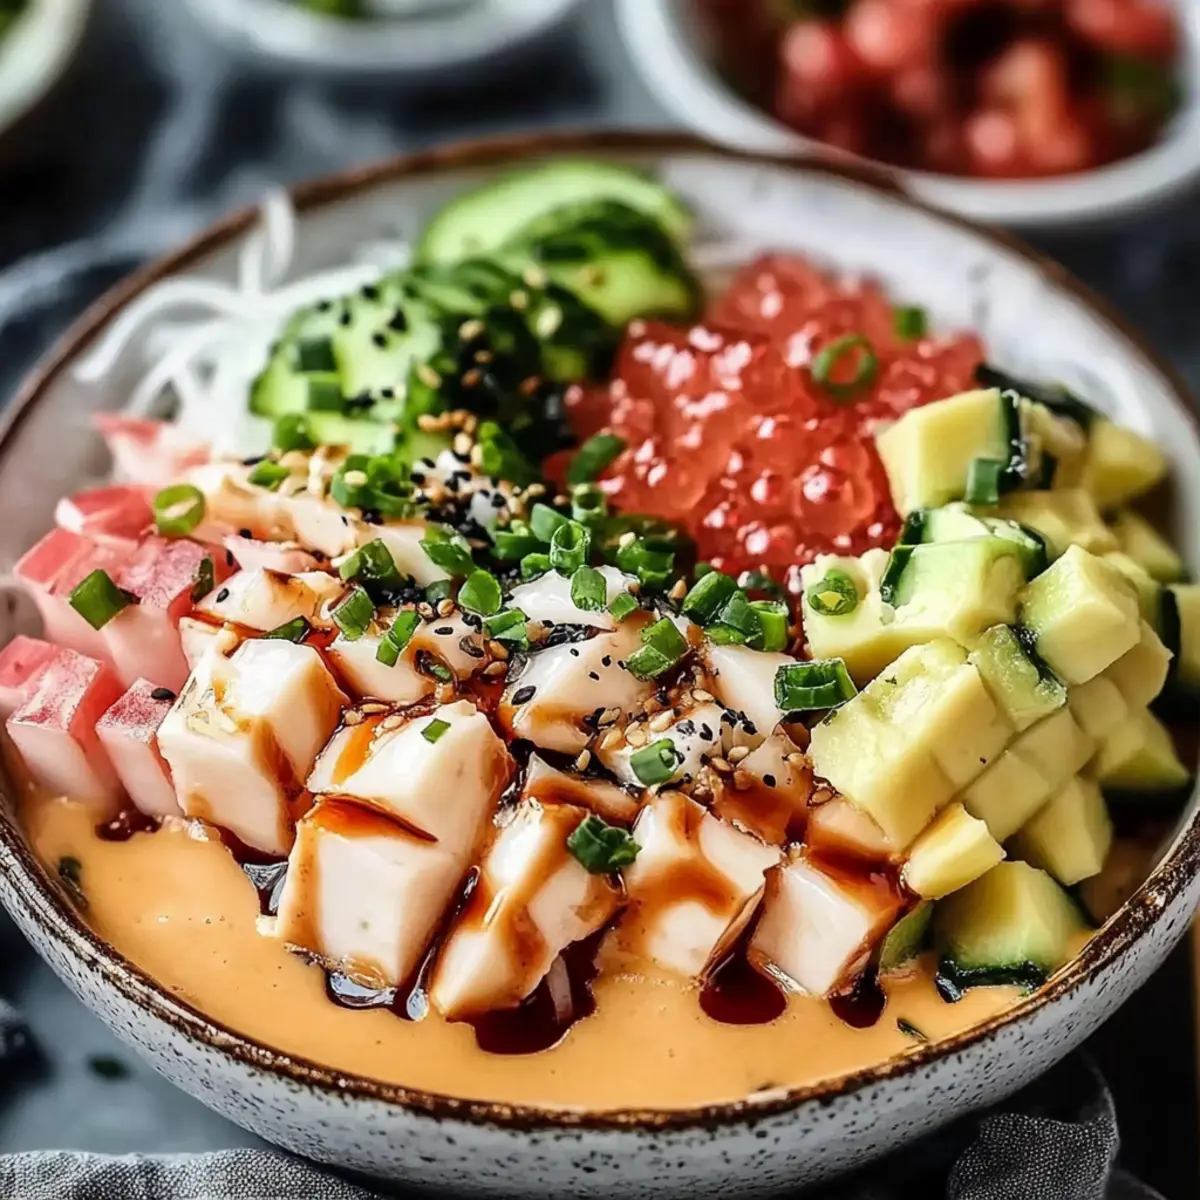
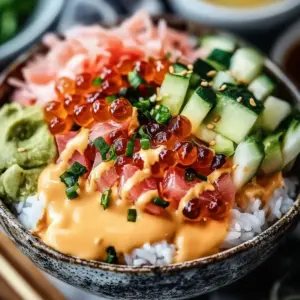
Divide the seasoned sushi rice evenly among your serving bowls, creating a fluffy base for your California Sushi Bowls. Start layering on your toppings: add the imitation crab meat (or your choice of protein), followed by sliced avocado, julienned cucumber, shredded carrot, and sliced green onions. Each bowl should resemble a colorful masterpiece!
Step 6: Finish and Serve
To finish, generously sprinkle sesame seeds over the top of each bowl for added texture and flavor. Serve your California Sushi Bowls with a side of soy sauce or tamari for drizzling, and include optional wasabi and pickled ginger for those who enjoy an extra kick. Enjoy this vibrant and nutritious meal!
What to Serve with California Sushi Bowls
There's nothing quite like adding complementary sides and drinks to elevate your homemade meal experience!
-
Miso Soup: A warm, savory bowl of miso soup refreshes the palate between bites, creating a harmonious meal experience. Its umami flavor pairs beautifully with the flavors of sushi bowls.
-
Seaweed Salad: This crunchy, tangy salad adds a different texture to your meal while enhancing the oceanic flavors of the sushi bowls. The contrast of flavors brings balance and satisfaction to your dining experience.
-
Edamame Hummus: A protein-packed dip with a smooth texture, edamame hummus served with crispy vegetables or chips makes for a delightful appetizer. Its nuttiness complements the freshness of your sushi bowls perfectly.
-
Sushi Ginger Ale: This refreshing drink cuts through the savory richness of the dishes, making it a lovely accompaniment. Its fizz and subtle sweetness pair well with the vibrant flavors of your California Sushi Bowls.
-
Cucumber Salad: A cool, crisp cucumber salad with a light vinaigrette brightens up the meal. Its refreshing taste is a natural match for the savory notes of the sushi bowls.
-
Matcha Green Tea: For a unique beverage, sip on matcha green tea. The earthy notes and delicate bitterness perfectly balance the flavors of the sushi bowls while providing a wholesome lift.
Enjoy mixing and matching these delightful pairings to create a complete dining experience that your family will remember!
How to Store and Freeze California Sushi Bowls
Fridge: Store leftover California Sushi Bowls in an airtight container in the refrigerator for up to 3 days. Keep toppings, like avocado, separate to prevent browning.
Freezer: While freezing is not ideal for these bowls, you can freeze the seasoned rice alone for up to 1 month. Thaw in the fridge before reheating.
Reheating: To reheat the rice, add a splash of water and steam it on the stovetop or microwave until warm. Avoid reheating with toppings already mixed in for the best texture.
Quality Check: Always check for any off smells or colors before consuming leftovers, ensuring your meals are both safe and delicious!
Helpful Tricks for California Sushi Bowls
-
Perfect Rice: Use short-grain sushi rice for the ideal sticky texture. It makes a world of difference in your California Sushi Bowls.
-
Vinegar Balance: Allow the vinegar mixture to dissolve completely before adding it to the rice. This ensures an even distribution of flavor without grain mashing.
-
Fresh Ingredients: Always opt for the freshest avocado and vegetables. Crisp, vibrant ingredients dramatically elevate your dish’s appeal and taste.
-
Prevent Sogginess: Avoid overcooking the rice and letting it sit too long in steam after cooking, as this can lead to a soggy base for your California Sushi Bowls.
-
Customization: Never hesitate to get creative! Substitute imitation crab with shrimp, grilled chicken, or even tofu for a different flavor profile.
California Sushi Bowls Variations
Don’t be afraid to mix things up and let your creativity shine in these delightful California Sushi Bowls!
- Dairy-Free: Swap the imitation crab with tofu or edamame for a plant-based protein hit that’s just as satisfying.
- Spicy Kick: Add sriracha or spicy mayo on top for those who crave a little heat in every bite. This twist will elevate the flavor profile wonderfully!
- Vegetarian Delight: Use roasted vegetables like bell peppers and zucchini instead of seafood for a colorful and hearty meal. Your bowls will still shine with vibrant flavors!
- Citrus Zest: Add a squeeze of fresh lime juice to each bowl right before serving. The citrus will brighten up the taste and add a refreshing zing!
- Quinoa Substitution: Switch out sushi rice for quinoa for a nutty flavor and whole grain goodness, giving your bowls a nutritious twist.
- Asian Slaw: Instead of cucumbers, mix in some Asian-style slaw with cabbage and carrots for a textural contrast that adds crunch to your dish.
- Noodle Addition: Incorporate cooked soba or rice noodles under your toppings for a fun texture twist, making them even heartier!
- Herb Boost: Toss in fresh herbs like cilantro or mint for an aromatic burst that will take your California Sushi Bowls to the next level!
Explore these variations for a fabulous twist on your sushi bowl experience! If you’re looking for an alternative meal idea, you might enjoy whipping up these Sushi Burritos next!
Make Ahead Options
These California Sushi Bowls are perfect for meal prep enthusiasts looking to save time on busy weeknights! You can prepare the sushi rice and store it in the refrigerator for up to 3 days; just make sure to let it cool completely before refrigerating to maintain its perfect texture. Additionally, slice the avocado, cucumber, and carrot, then place them in airtight containers to keep them fresh for up to 24 hours. When it's time to enjoy, simply reheat the rice in the microwave for a few seconds, assemble your bowls with the prepped toppings, and finish with sesame seeds and soy sauce before serving. This way, you'll have a vibrant, delicious meal ready in minutes, just as satisfying as if you made it from scratch!
California Sushi Bowls Recipe FAQs
What type of rice should I use for California Sushi Bowls?
Absolutely! It's essential to use short-grain sushi rice, as it becomes sticky when cooked, which is perfect for packing your California Sushi Bowls. This texture helps the bowls hold together beautifully!
How should I store leftovers?
Very! To store your California Sushi Bowls, place any leftovers in an airtight container and refrigerate them for up to 3 days. It's best to keep the avocado and other toppings separate to prevent them from browning.
Can I freeze California Sushi Bowls?
While it’s not ideal to freeze the assembled California Sushi Bowls, you can freeze the seasoned rice separately for up to 1 month. To do this, let the rice cool completely, then store it in a freezer-safe container. When ready to eat, thaw the rice in the refrigerator overnight before reheating.
What should I do if my avocado starts to brown?
If your avocado begins to brown, don't worry! You can squeeze a little lemon or lime juice over the exposed flesh to slow down the browning process. Alternatively, you can cover the avocado slices tightly with plastic wrap to minimize air exposure.
Can I use gluten-free ingredients?
Absolutely! To make your California Sushi Bowls gluten-free, simply choose gluten-free soy sauce or tamari. Also, ensure that any alternative proteins or sauces you use are labeled gluten-free for a completely safe meal.
How do I know if my sushi rice is cooked properly?
The rice should be tender and all the water should be absorbed when cooked. If you're unsure, after the 20 minutes of simmering, peek under the lid. If it seems dry and fluffy without excessive stickiness, you're on the right track! If there's still water, just cover and simmer for a little longer until perfect.
California Sushi Bowls: A Fresh Twist on Homemade Delight
Equipment
- Medium pot
- small bowl
- Fork
Ingredients
For the Rice
- 2 cups sushi rice a short-grain rice that becomes perfectly sticky when cooked
- 2.5 cups water necessary for cooking the rice
- 0.25 cups rice vinegar adds a lovely tanginess
- 2 tablespoons sugar adds sweetness
- 1 teaspoon salt enhances the taste
For the Toppings
- 8 oz imitation crab meat or alternative protein use shrimp, tofu, or any protein
- 1 medium avocado adds creaminess
- 1 medium cucumber adds crunch
- 1 medium carrot adds sweetness
- 2 stalks green onions for mild onion flavor
- 2 tablespoons sesame seeds for garnish
For Serving
- 0.25 cups soy sauce or tamari for drizzling
- wasabi and pickled ginger optional for an extra kick
Instructions
Preparation Steps
- Rinse 2 cups of sushi rice under cold running water until the water runs clear. Drain thoroughly.
- Combine rinsed rice with 2 ½ cups of water in a medium pot. Boil, then reduce heat to low, cover, and simmer for 20 minutes.
- In a small bowl, mix ¼ cup rice vinegar, 2 tablespoons sugar, and 1 teaspoon salt until dissolved.
- Let the rice sit covered for 10 minutes after cooking. Fluff with a fork and mix in the vinegar mixture gently.
- Divide the seasoned rice among serving bowls and layer with toppings: imitation crab, avocado, cucumber, carrot, and green onions.
- Sprinkle sesame seeds on top and serve with soy sauce or tamari. Enjoy!


Leave a Reply