
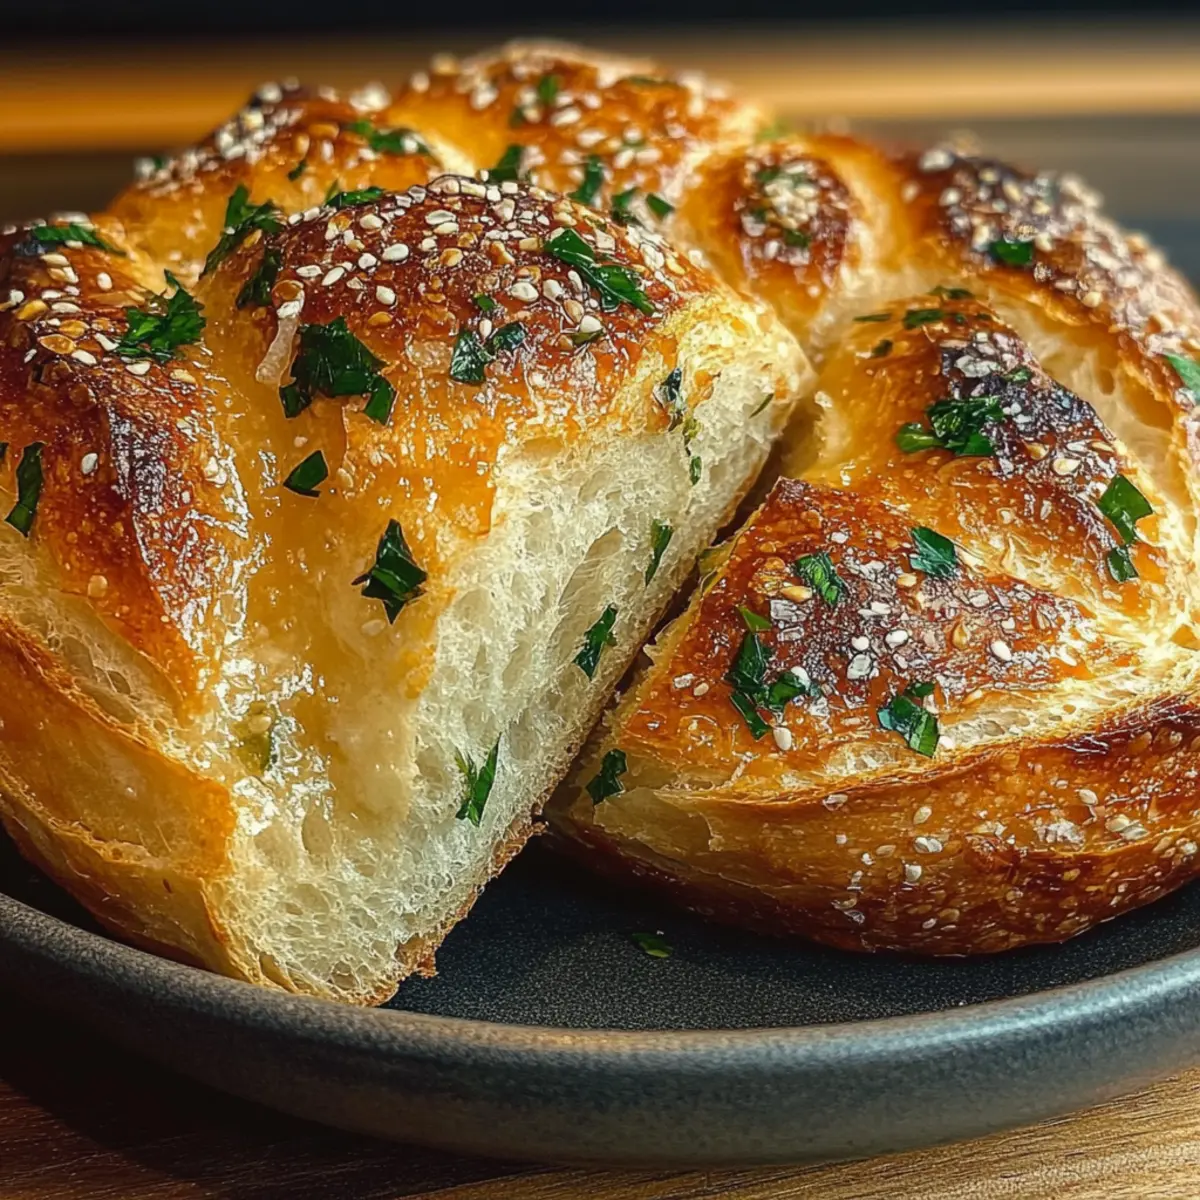
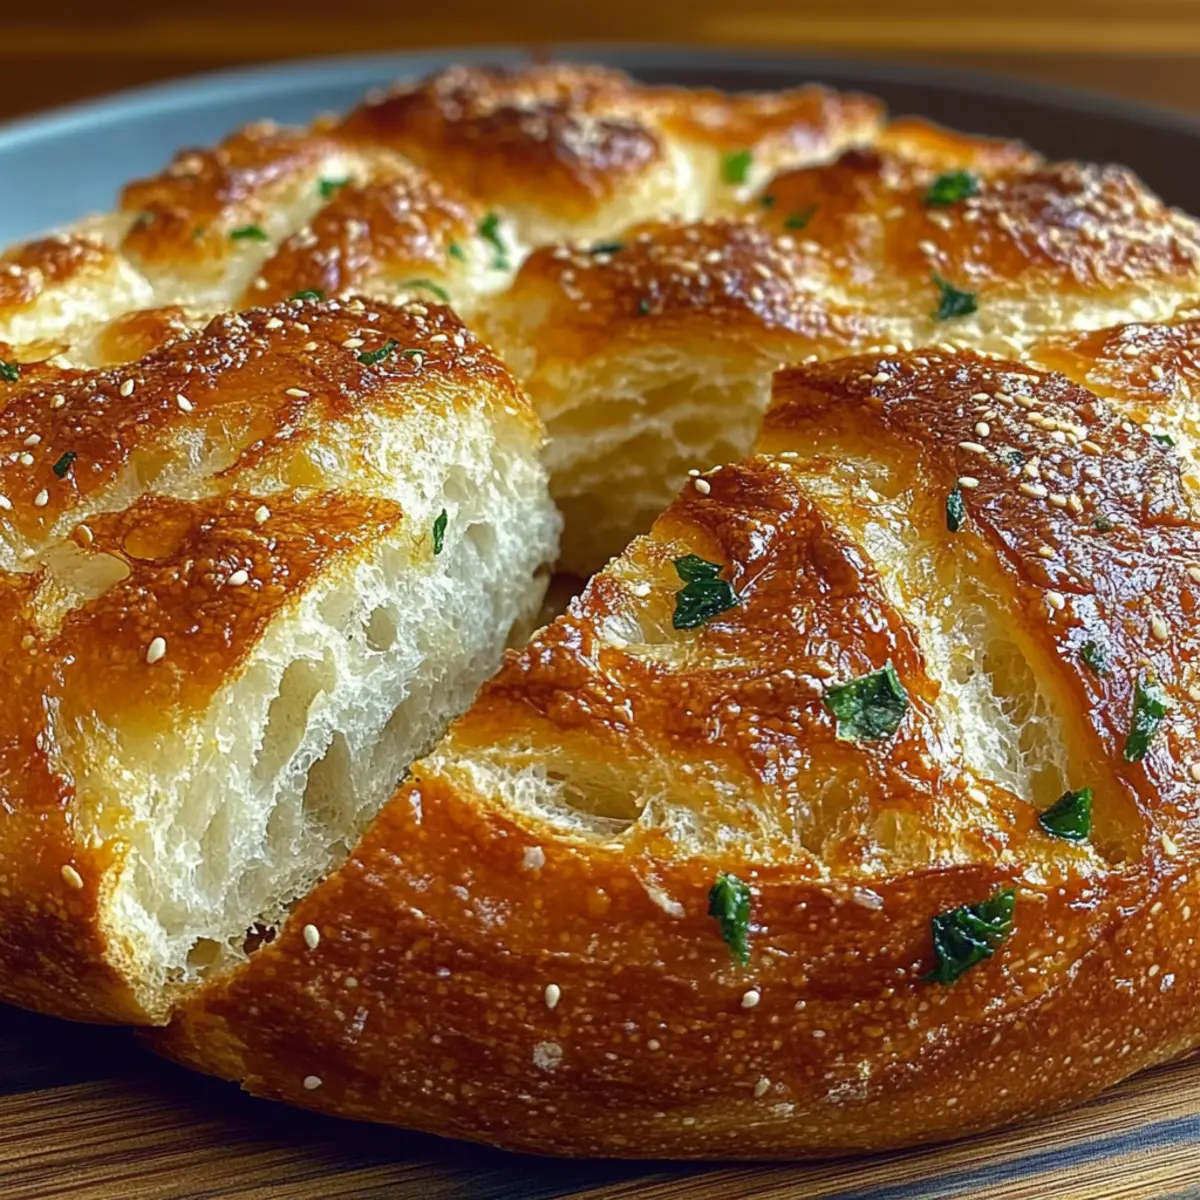
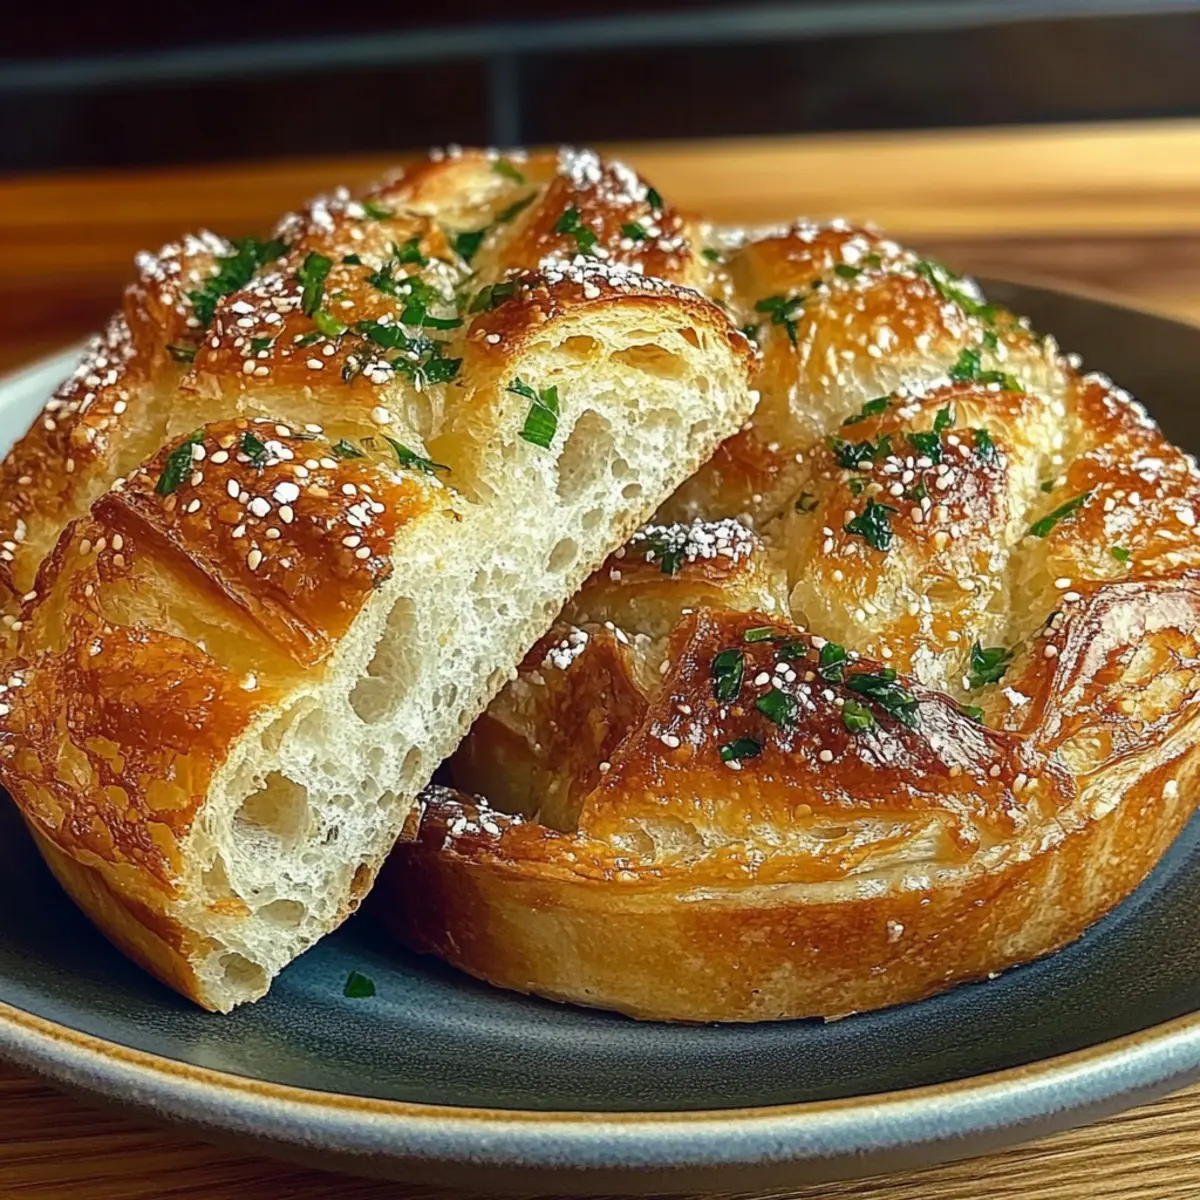
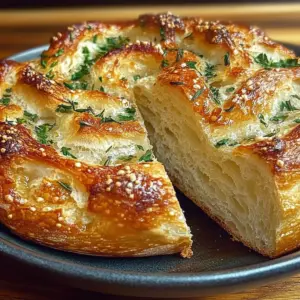
As I unfolded my favorite kitchen towel, the aroma of garlic and fresh herbs whisked through my home, instantly transporting me to a cozy café in the heart of Tuscany. It’s a simple joy that envelops you, and that’s what I adore about making Garlic Herb Dutch Oven Bread. One of the best parts? You don’t need to be a seasoned baker to create this beautiful, crusty loaf—its easy prep will have you feeling like a pro in no time! Plus, the method is surprisingly hands-off, meaning you can enjoy more of your day while this bread rises and bakes to perfection. With its golden crust and tender, flavorful inside, it's sure to warm your heart and impress anyone lucky enough to share a slice. Who wouldn’t want that delightful crust paired with a warm pat of butter? Ready to dive into a loaf that’s as satisfying to make as it is to eat? Let’s get started!
Why is Garlic Herb Dutch Oven Bread special?
Irresistible Aroma: The moment you take this loaf out of the oven, your kitchen will be filled with the delightful scent of roasted garlic and fresh herbs.
Simple Method: With minimal hands-on time, you’ll be amazed at how easy it is to make this bread! Simply mix, let it rise, and bake.
Beautiful Crust: The Dutch oven creates a perfect environment for achieving that sought-after crispy crust while keeping the inside soft and fluffy.
Versatile Pairing: This bread is perfect as a side for soups, salads, or simply slathered with butter. You can even enjoy it with dips or turn it into a delicious sandwich!
Impressive Results: No one will believe this artisan bread came from your home kitchen! It’s a guaranteed crowd-pleaser, whether at dinner parties or family gatherings.
Dive deeper into the art of bread-making with our easy homemade bread recipes that promise to impress!
Garlic Herb Dutch Oven Bread Ingredients
• Here’s everything you need to create your very own Garlic Herb Dutch Oven Bread!
For the Dough
• 3 cups all-purpose flour – This is the main structure for the bread and gives it that lovely chewy texture.
• 1 ¼ teaspoons salt – Enhances the flavor of the bread, making every bite more delicious.
• ½ teaspoon instant yeast – Helps the dough rise without long waiting times compared to traditional yeast.
• 1 ½ cups warm water – Ensure it’s about 110°F to activate the yeast without killing it.
For Flavoring
• 3 tablespoons olive oil – Adds richness and moisture to the bread while enhancing flavor.
• 4 cloves garlic, minced – Infuses the bread with a robust aroma and taste that everyone will love.
• 1 tablespoon fresh rosemary, chopped – Contributes a fragrant earthy flavor that pairs beautifully with garlic.
• 1 tablespoon fresh thyme, chopped – Offers a fresh and slightly peppery flavor to brighten the bread’s profile.
• 1 tablespoon fresh parsley, chopped – Adds a touch of freshness and color, making your bread visually appealing.
For Dusting
• Additional flour for dusting – Keeps your work surface manageable and prevents sticking while shaping the dough.
Gather these ingredients, and you’ll be well on your way to baking a comforting loaf of Garlic Herb Dutch Oven Bread that’s sure to impress!
Step‑by‑Step Instructions for Garlic Herb Dutch Oven Bread
Step 1: Combine Dry Ingredients
In a large mixing bowl, whisk together 3 cups of all-purpose flour, 1 ¼ teaspoons salt, and ½ teaspoon instant yeast until evenly mixed. This garlic herb Dutch oven bread starts with a solid foundation, so ensure the dry ingredients are well incorporated for consistent flavor throughout the loaf.
Step 2: Mix Wet Ingredients
In a separate bowl, blend 1 ½ cups of warm water (about 110°F), 4 cloves of minced garlic, and 3 tablespoons of olive oil. Add 1 tablespoon each of chopped fresh rosemary, thyme, and parsley. Stir until everything is well combined, allowing the aromatic herbs to infuse the liquid.
Step 3: Combine Mixtures
Pour the wet mixture into the dry ingredients, using a wooden spoon or your hands to mix until a shaggy, sticky dough forms. Be patient as you combine the components for your garlic herb Dutch oven bread; this mixture will be wet and might require a little extra effort to come together.
Step 4: Let the Dough Rise
Cover the bowl with plastic wrap or a clean kitchen towel, allowing the dough to rest at room temperature for 12 to 18 hours. You'll know it's ready when the surface is bubbly and the dough has doubled in size—a clear sign that your yeast has worked its magic.
Step 5: Shape the Dough
Once the dough has risen beautifully, sprinkle flour on a work surface and gently turn the dough out onto it. Using floured hands, shape the dough into a round loaf, being careful not to knead it too much. This will help maintain the airy texture essential for your garlic herb Dutch oven bread.
Step 6: Second Rise
Dust the top of your loaf with a bit of flour and cover it with a kitchen towel. Let it rest for another 1 to 2 hours, or until it has puffy, cute character. This step is crucial for achieving that delightful rise and texture when baking.
Step 7: Preheat the Dutch Oven
Approximately 30 minutes before baking, place your Dutch oven (with the lid on) into the oven and preheat to 450°F (230°C). This initial heat will help create a crusty exterior for your garlic herb Dutch oven bread while keeping the inside tender.
Step 8: Bake the Bread
Once preheated, carefully remove the Dutch oven from the oven and take off the lid. Place the loaf inside and quickly cover it again with the lid. Bake covered for 30 minutes, then uncover and bake for an additional 15 to 20 minutes, watching for a golden brown crust to form.
Step 9: Cool Before Slicing
Once the baking is complete and your kitchen is filled with the heavenly aroma of garlic and herbs, transfer the bread to a wire rack. Allow it to cool slightly before slicing into your gorgeous garlic herb Dutch oven bread—this step helps set the texture for perfect slices.
Garlic Herb Dutch Oven Bread Variations
Feel free to get creative and customize your Garlic Herb Dutch Oven Bread with these delightful twists!
-
Gluten-Free: Substitute all-purpose flour with a gluten-free flour blend for a gluten-free version. Just ensure it contains a binding agent for the best texture!
-
Cheesy Delight: Add 1 cup of shredded cheese, like mozzarella or cheddar, to the dough. It’ll melt beautifully inside and create an irresistible gooey texture!
-
Herb Mix: Experiment with different herbs. Try basil, oregano, or even spicy chili flakes to adjust the flavor profile to your taste. This adds a unique twist to every loaf!
-
Olive Oil Infusion: Use herbed olive oil instead of plain. This enhances the flavor and makes the bread even more fragrant and enticing.
-
Sweet Version: For a sweet twist, include 2 tablespoons of honey or sugar after mixing the wet ingredients. This creates a subtly sweet bread perfect for breakfast!
-
Nutty Crunch: Fold in ½ cup of chopped nuts or seeds like walnuts or sunflower seeds. They add both crunch and nutrition to your delightful loaf.
-
Smoky Spices: For those who enjoy a bit of heat, add smoked paprika or cayenne pepper. It’ll drastically change the bread’s flavor, giving desired warmth and smokiness.
-
Buttermilk Alternative: Replace warm water with buttermilk for a richer flavor and tender crumb. This small change can elevate your whole bread experience!
With these variations, you can make this Garlic Herb Dutch Oven Bread uniquely yours, turning every bake into a fresh adventure! And if you're looking for more inspiration, don’t forget to check out our easy homemade bread recipes and discover a variety of flavors to enjoy at home. Happy baking!
Make Ahead Options
Making Garlic Herb Dutch Oven Bread ahead of time is perfect for busy weeknights! You can prepare the dough up to 24 hours in advance; simply follow steps 1 through 4, then cover the bowl with plastic wrap and refrigerate it instead of leaving it at room temperature. This allows the flavors to deepen while keeping the dough just as airy and delicious. If you want to shape the loaf, you can do that and let it rest for an hour or two before baking; just remember to dust it with flour to avoid sticking. When you're ready to enjoy, preheat your Dutch oven and bake as directed—your homemade bread will be just as delightful as if you made it fresh that day!
How to Store and Freeze Garlic Herb Dutch Oven Bread
Room Temperature: Allow the bread to cool completely before storing it in a paper bag or wrapped in a kitchen towel for up to 2 days. This keeps the crust crispy while preventing sogginess.
Fridge: For longer storage, wrap the bread in plastic wrap and store it in the refrigerator for up to 1 week. Be aware that refrigeration may soften the crust.
Freezer: To freeze, slice the bread, place it in an airtight container or a heavy-duty freezer bag, and freeze for up to 3 months. Thaw at room temperature or toast slices directly from the freezer.
Reheating: To revive the bread, reheat it in the oven at 350°F (175°C) for about 10 minutes. This will help restore that delightful, crusty texture of your Garlic Herb Dutch Oven Bread.
Expert Tips for Garlic Herb Dutch Oven Bread
-
Perfect Temperature: Use warm water around 110°F to activate the yeast properly. Too hot can kill the yeast, and too cold may slow down the rise.
-
Avoid Over-Kneading: When shaping your dough, limit kneading to keep it airy. This fluffy texture is key for your garlic herb Dutch oven bread.
-
Resting Time Matters: Give your dough ample time to rise—12 to 18 hours. This slow fermentation enhances flavor and texture profoundly.
-
Dutch Oven Essentials: Preheating the Dutch oven is crucial for achieving that beautiful crust. Don’t skip this step!
-
Golden Crust Indicator: Bake with the lid on for 30 minutes, then remove it to achieve a crackly, golden crust. Keep an eye on it to avoid over-baking.
What to Serve with Garlic Herb Dutch Oven Bread
Imagine the comforting aroma of freshly baked bread filling your home, creating a perfect backdrop for a delightful meal.
-
Creamy Tomato Basil Soup: The acidity of the tomatoes complements the savory herbs, making each bite feel like a warm hug on a chilly day. Dunking your bread into this rich soup creates a medley of flavors that transport you to a cozy café.
-
Zesty Arugula Salad: The peppery bite of arugula, tossed with a tangy vinaigrette, refreshes the palate. Pairing it with garlic herb Dutch oven bread balances the richness of the bread with bright, crunchy textures.
-
Roasted Vegetables: A medley of seasonal roasted veggies brings color and sweetness to your table, providing a nourishing element that highlights the bread's hearty taste. Drizzle with olive oil for an added flavor dimension.
-
Savory Cheese Platter: Pairing aged cheeses, like sharp cheddar or creamy brie, enhances the bread's garlic and herb notes. The creamy textures and distinctive flavors create an inviting marriage of tastes that begs for a festive get-together.
-
Hearty Chili: A bowl of robust, spicy chili is the ultimate comfort food, and the bread serves as the perfect accompaniment to soak up every drop. Together, they create a satisfying meal that warms you from the inside out.
-
Chilled White Wine: A crisp, chilled Sauvignon Blanc pairs beautifully, its acidity cutting through the rich flavors of the bread. This refreshing drink elevates your dining experience, making it feel special.
-
Chocolate Fondue: For dessert, dip pieces of your garlic herb bread into a warm, velvety chocolate fondue. The unique flavor combination will undoubtedly surprise and delight your guests!
Garlic Herb Dutch Oven Bread Recipe FAQs
How do I choose the best ingredients for Garlic Herb Dutch Oven Bread?
Absolutely! When selecting ingredients, opt for all-purpose flour that’s fresh; check for any signs of moisture or pests on the package. For the garlic, go for firm cloves that are not sprouting or soft. Fresh herbs should be vibrant and fragrant; avoid any that appear wilted or discolored.
What is the best way to store Garlic Herb Dutch Oven Bread?
Once completely cooled, I recommend wrapping the bread in a clean kitchen towel and storing it in a paper bag at room temperature for up to 2 days to maintain that delightful crust. If you want it to last longer, tightly wrap it in plastic wrap before placing it in the fridge for about a week, although this may soften the crust.
Can I freeze Garlic Herb Dutch Oven Bread?
Absolutely! To freeze, slice the bread first, then place the slices in an airtight container or a heavy-duty freezer bag. It can last for up to 3 months in the freezer. For the best flavor, try to pre-slice it before freezing, so you can just grab what you need later. Thaw at room temperature or pop the slices directly in the toaster for a quick warm-up.
What should I do if my bread dough doesn’t rise?
Very well! If your dough hasn’t risen after the designated time, check the yeast’s freshness first—expired yeast can result in a flat loaf. Ensure the water used for mixing was warm (around 110°F); too hot will kill the yeast while too cold might not activate it. If you've confirmed all is well, simply give it more time to rise—it can sometimes take longer depending on room temperature!
Are there any dietary considerations for Garlic Herb Dutch Oven Bread?
Certainly! This bread contains gluten from the all-purpose flour and may not be suitable for those with gluten sensitivities or celiac disease. If you need a gluten-free variation, consider using a gluten-free all-purpose blend that includes xanthan gum, which may affect texture and rise. Always double-check ingredient labels when cooking for people with allergies or dietary restrictions.
Savor the Flavor: Garlic Herb Dutch Oven Bread Recipe
Equipment
- Dutch oven
- Mixing bowl
- Wooden spoon
- wire rack
Ingredients
For the Dough
- 3 cups all-purpose flour Main structure for the bread.
- 1.25 teaspoons salt Enhances flavor.
- 0.5 teaspoon instant yeast Helps dough rise quickly.
- 1.5 cups warm water About 110°F.
For Flavoring
- 3 tablespoons olive oil Adds richness.
- 4 cloves garlic, minced Infuses bread with flavor.
- 1 tablespoon fresh rosemary, chopped Adds earthy flavor.
- 1 tablespoon fresh thyme, chopped Brightens flavor profile.
- 1 tablespoon fresh parsley, chopped Adds color.
For Dusting
- additional flour For dusting the work surface.
Instructions
Step-by-Step Instructions
- Combine dry ingredients in a bowl.
- Mix wet ingredients in a separate bowl.
- Combine mixtures to form a shaggy dough.
- Let the dough rise covered for 12 to 18 hours.
- Shape the dough into a round loaf.
- Let the loaf rise for another 1 to 2 hours.
- Preheat Dutch oven in the oven at 450°F.
- Bake the bread covered for 30 minutes, then uncovered for 15 to 20 minutes.
- Cool on a wire rack before slicing.


Leave a Reply