
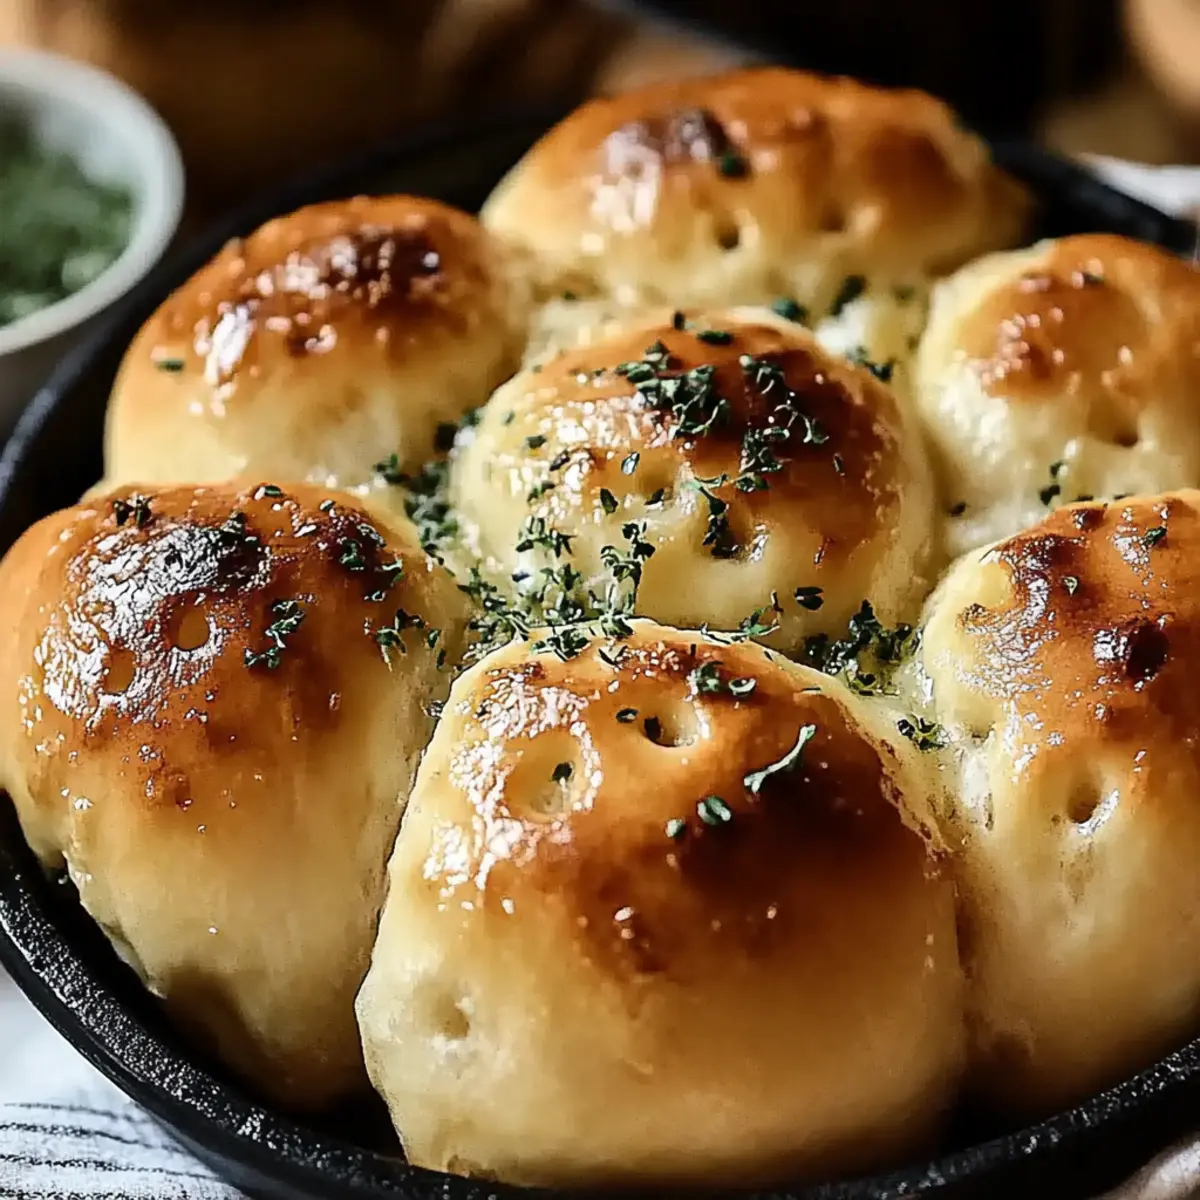
There’s nothing quite like the smell of fresh-baked bread wafting through the kitchen, is there? It instantly transports me back to cozy family gatherings where warm Garlic Butter Bread Rolls were always the star of the show. This recipe not only celebrates that nostalgic comfort but also offers a quick and satisfying way to elevate any meal—or make a perfect snack on their own. With just a handful of ingredients and about an hour and a half to spare, you can whip up these pillowy rolls that are filled with irresistible garlic goodness. Plus, they’re freezer-friendly, allowing you to have homemade goodness ready whenever the craving strikes. Curious to discover the joy of baking these delectable rolls? Let’s dive in!
Why Are You Going to Love These Rolls?
Warm, freshly baked Garlic Butter Bread Rolls will fill your home with an irresistible aroma that beckons everyone to the table. Easy to make, this recipe requires just a few simple ingredients and minimal time commitment. Versatile enough for any occasion, they pair perfectly with soups, salads, or can be enjoyed as a snack on their own! Crowd-pleaser alert: your friends and family will rave about these delightful rolls, making them a staple for gatherings. For a healthier twist, consider using whole wheat flour as suggested in our healthy alternatives section!
Garlic Butter Bread Rolls Ingredients
Get ready to whip up these delightful rolls!
For the Dough
• All-purpose flour – a great choice for soft, fluffy rolls.
• Warm milk – helps activate the yeast for perfect rising.
• Unsalted butter – adds richness and flavor to the dough.
• Sugar – fuels the yeast for a delightful rise.
• Salt – balances sweetness and enhances flavor.
• Active dry yeast – the secret ingredient that makes the rolls rise beautifully.
For the Filling
• Garlic butter – infuses each roll with a savory punch.
For the Topping
• Unsalted butter – for brushing on top to create a golden crust.
• Garlic powder – adds an extra layer of garlic flavor to the rolls.
These Garlic Butter Bread Rolls are destined to be a hit on your dinner table!
Step‑by‑Step Instructions for Garlic Butter Bread Rolls
Step 1: Prepare the Dough
In a large mixing bowl, combine 1 cup of warm milk and ¼ cup of sugar. Sprinkle 3 teaspoons of active dry yeast on top and let it sit for about 5 minutes until it becomes foamy. This process activates the yeast, giving life to your Garlic Butter Bread Rolls for a perfect rise.
Step 2: Mix the Ingredients
Once the yeast mixture is bubbly, stir in ¼ cup of melted unsalted butter and 1 teaspoon of salt. Gradually add 3 ½ cups of all-purpose flour, mixing until a soft dough forms. This dough will be the foundation of your rolls, so a gentle hand will help maintain its fluffiness.
Step 3: Knead the Dough
Turn the dough out onto a floured surface and knead it for about 10 minutes until it's smooth and elastic. This step is crucial to develop the gluten, leading to delightfully fluffy Garlic Butter Bread Rolls. Once ready, place the dough in a greased bowl, covering it with a damp cloth.
Step 4: Let It Rise
Set the covered bowl in a warm place to rise for about 1 hour or until the dough has doubled in size. You’ll know it’s ready when it feels light to the touch, signaling the yeast has done its job. This important wait will give you tender and airy rolls.
Step 5: Preheat the Oven
While the dough is rising, preheat your oven to 375°F (190°C). This ensures that once your rolls are shaped and filled, they’ll go directly into a perfectly heated oven, creating that golden-brown crust you crave on your Garlic Butter Bread Rolls.
Step 6: Shape the Rolls
After the dough has risen, punch it down gently and divide it into 12 equal pieces. Shape each piece into a ball and place them onto a baking sheet lined with parchment paper. At this stage, they should look plump and delightful, hinting at the savory goodness to come.
Step 7: Fill the Rolls
Using your finger, create a hole in the center of each rolled ball and fill it with garlic butter, about a teaspoon per roll. This step infuses each Garlic Butter Bread Roll with a heart of savory flavor. Make sure the filling is generously tucked!
Step 8: Second Rise
Cover the filled rolls again with a cloth and let them rise for another 30 minutes. This second rise helps them expand further, creating even lighter and airy rolls. You’ll see them puff up nicely, ready to soak in all those delicious garlic flavors.
Step 9: Brush and Sprinkle
Once they’ve risen again, brush the tops of the rolls with melted butter and sprinkle with garlic powder for an added punch of flavor. The butter will soon create that beautiful golden crust, making your Garlic Butter Bread Rolls irresistibly appealing.
Step 10: Bake the Rolls
Place the baking sheet in the preheated oven and bake for 15-20 minutes or until the tops are golden brown. Keep an eye on them as they bake, filling your kitchen with an enchanting aroma that will have everyone gathering round to enjoy these delightful rolls.
Step 11: Cool and Serve
Once baked to perfection, allow your Garlic Butter Bread Rolls to cool slightly on a wire rack. This waiting period ensures they set nicely and are easy to serve. Your pillowy rolls are now ready to shine, perfect for sharing or savoring solo!
Garlic Butter Bread Rolls Variations
Feel free to experiment and make these rolls your own with some delightful twists!
-
Whole Wheat: Swap all-purpose flour for whole wheat flour for a healthier alternative; expect a heartier texture.
-
Cheesy: Add shredded cheese into the garlic butter filling for a melty surprise that elevates your rolls to cheesy bliss. Try using mozzarella for a gooey texture that will have everyone reaching for more!
-
Herbed: Mix in fresh or dried herbs, like rosemary or thyme, to the dough to infuse aromatic flavors; they complement the garlic beautifully. Fresh herbs can bring a vibrant taste, making family dinners feel extra special.
-
Spicy Kick: Add a pinch of red pepper flakes in the garlic butter for a little heat, appealing to spice lovers. Just enough heat can turn these rolls into a fun surprise!
-
Sweet Cinnamon: Replace garlic butter with cinnamon sugar for a sweet twist; perfect for breakfast or dessert rolls. A drizzle of icing on top makes these rolls a delightful treat!
-
Vegan: Use plant-based butter and swap milk with almond or oat milk; the rolls will still be fluffy and delicious. Welcoming everyone at the table has never been easier.
-
Stuffed: Experiment with various fillings like pesto or sun-dried tomatoes; this adds an exciting flavor profile. Getting creative with these fillings will tantalize your taste buds!
-
Nutty Crunch: Sprinkle chopped nuts, like walnuts or pecans, on top of the rolls before baking for an added texture and flavor. This delightful crunch will be a fun surprise under your golden crust!
These variations are not just about substitutions; they encourage you to explore new flavors while crafting irresistible Garlic Butter Bread Rolls that everyone will love.
Expert Tips for Garlic Butter Bread Rolls
• Yeast Activation: Make sure your milk is warm but not hot; temperatures above 110°F can kill the yeast, preventing your rolls from rising.
• Kneading Technique: Knead until smooth and elastic, around 10 minutes. If the dough is too sticky, add a little more flour, but avoid adding too much, which can make the rolls dense.
• Proofing Conditions: Create a warm environment for rising by covering the bowl with a damp cloth and placing it in a sunny spot or a turned-off oven with the light on.
• Filling Generously: Don’t skimp on the garlic butter filling! Each roll should have just enough to create a flavorful pocket of goodness.
• Watch the Bake: Keep a close eye on the rolls during the last few minutes of baking for that perfect golden brown. Overbaking can lead to dry rolls, while underbaking may leave them doughy.
By following these tips, you're on your way to baking perfect Garlic Butter Bread Rolls that will impress everyone at the table!
Make Ahead Options
These delicious Garlic Butter Bread Rolls are perfect for meal prep and can save you time during those busy weeknights! You can prepare the dough up to 24 hours in advance by following the first five steps—allow it to rise, then shape into rolls and place them on a baking sheet. Cover the baking sheet with plastic wrap and refrigerate overnight. When you're ready to bake, let the rolls sit at room temperature for about 30 minutes to rise again. Brush with butter and sprinkle with garlic powder before popping them in the oven. This way, you'll enjoy freshly baked rolls that are just as delightful as if you made them all at once!
How to Store and Freeze Garlic Butter Bread Rolls
Room Temperature: Store rolls in an airtight container for up to 3 days to maintain their soft texture and fresh flavor.
Fridge: If you need to keep them longer, you can refrigerate for up to 5 days; however, this may affect the texture. Reheat gently before serving.
Freezer: Wrap the rolls tightly in plastic wrap followed by aluminum foil for up to 3 months in the freezer, ensuring they maintain their delicious taste.
Reheating: To reheat, bake rolls from the freezer at 350°F (175°C) for about 10-15 minutes, or until warmed through, restoring their fluffy goodness.
What to Serve with Garlic Butter Bread Rolls
There’s nothing quite like these warm, pillowy rolls to elevate your meals and accompany a delightful dining experience.
- Savory Soup: A creamy tomato or basil soup adds a deliciously comforting touch that pairs perfectly with the garlic goodness.
- Fresh Salad: A crisp garden salad brings a refreshing crunch, balancing the rich flavors of the rolls for a well-rounded meal.
- Grilled Chicken: Juicy grilled chicken with herbs complements the savory rolls, creating a satisfying dinner that's bursting with flavor.
- Pasta Dishes: Creamy fettuccine or spaghetti marinara benefits immensely from the addition of these rolls—perfect for mopping up sauce!
- Vegetable Stir-Fry: A colorful medley of sautéed veggies adds a nutritious element, providing contrasting flavors that make every bite memorable.
- Rich Stews: Hearty beef or vegetable stews are made even more fulfilling when served alongside these Garlic Butter Bread Rolls, ensuring you savor every morsel.
- Wine Pairing: A crisp white wine like Sauvignon Blanc enhances the meal, cutting through the richness and adding a touch of elegance.
- Chocolate Dessert: A light chocolate mousse or lava cake rounds out the meal with a sweet ending, balancing the savoriness of the rolls.
Garlic Butter Bread Rolls Recipe FAQs
How do I know if my yeast is good?
Absolutely! The best way to check yeast freshness is to sprinkle it over warm milk mixed with sugar and wait for about 5 minutes. If it bubbles and becomes frothy, your yeast is active and ready to work its magic in your Garlic Butter Bread Rolls!
What’s the best way to store Garlic Butter Bread Rolls?
I recommend storing your rolls in an airtight container at room temperature for up to 3 days. This will help keep them soft. If you anticipate needing them longer, refrigerate them for up to 5 days, keeping in mind that refrigeration can slightly alter the texture. Just reheat gently before serving!
Can I freeze Garlic Butter Bread Rolls?
Absolutely! To freeze, wrap each roll tightly in plastic wrap and then in aluminum foil. This will keep them fresh for up to 3 months. When you’re ready to enjoy them, bake directly from the freezer at 350°F (175°C) for about 10-15 minutes, until warmed through and fluffy once more.
What if my dough doesn’t rise?
No worries! If your dough doesn’t rise, it could be due to the yeast being inactive or the temperature being too cold. Ensure your milk is warm (around 100-110°F) when activating the yeast. You can also try placing the dough in a warmer area, such as a sunny spot in the kitchen or a pre-warmed oven. If your yeast is expired, a new batch may be needed for those delectable rolls!
Can I make these rolls with whole wheat flour?
Very much so! Using whole wheat flour is a fantastic alternative for a healthier twist on your Garlic Butter Bread Rolls. Keep in mind that while it adds great flavor and nutrition, it may result in denser rolls. For the best texture, you could try a blend of half all-purpose flour and half whole wheat flour for lighter rolls with added fiber.
Are these rolls suitable for people with allergies?
Be sure to check the ingredients! These Garlic Butter Bread Rolls contain gluten from the flour and dairy from the butter and milk. If you’re cooking for someone with gluten or dairy allergies, I suggest exploring gluten-free flour alternatives and plant-based milk and butter options. Always be vigilant about cross-contamination in your kitchen to ensure safety!
Garlic Butter Bread Rolls: Soft, Savory Perfection at Home
Equipment
- Mixing bowl
- Baking sheet
- parchment paper
Ingredients
For the Dough
- 3.5 cups all-purpose flour
- 1 cup warm milk temperature should be warm but not hot
- 0.25 cups sugar fuels the yeast
- 1 teaspoon salt balances sweetness
- 3 teaspoons active dry yeast the secret ingredient
- 0.25 cups unsalted butter melted for the dough
For the Filling
- 0.25 cups garlic butter infuses rolls with flavor
For the Topping
- 2 tablespoons unsalted butter for brushing
- 1 teaspoon garlic powder adds extra garlic flavor
Instructions
Step-by-Step Instructions
- In a large mixing bowl, combine warm milk and sugar. Sprinkle active dry yeast on top and let it sit for about 5 minutes until foamy.
- Stir in melted unsalted butter and salt into the yeast mixture. Gradually add all-purpose flour, mixing until a soft dough forms.
- Knead the dough on a floured surface for about 10 minutes until smooth and elastic. Place in a greased bowl and cover with a damp cloth.
- Let it rise in a warm place for about 1 hour, or until doubled in size.
- Preheat your oven to 375°F (190°C).
- Punch down the dough, divide it into 12 equal pieces, and shape each into a ball on a baking sheet.
- Make a hole in the center of each ball and fill it with garlic butter.
- Cover the filled rolls again with a cloth and let them rise for another 30 minutes.
- Brush the tops of the rolls with melted butter and sprinkle with garlic powder.
- Bake for 15-20 minutes until golden brown.
- Cool slightly on a wire rack before serving.


Leave a Reply