
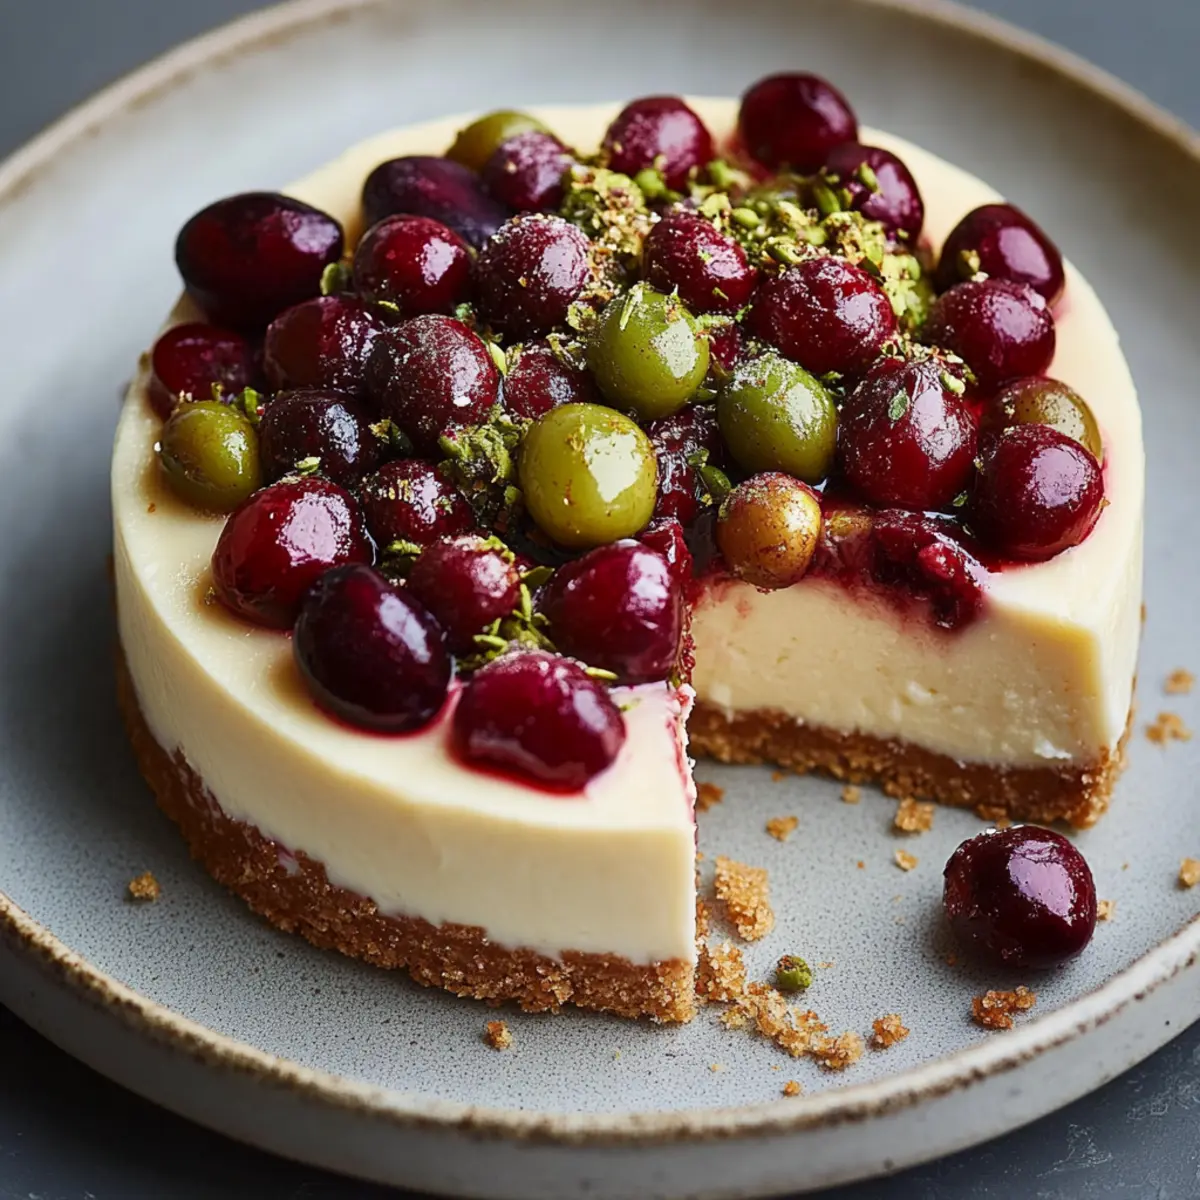
In the quiet moments of a Sunday afternoon, the scent of buttery graham crackers fills the air, mingling with the sweet allure of fresh cherries and the nutty crunch of pistachios. This is the magic of my Cherry Pistachio Cheesecake, a dessert that effortlessly transforms any gathering into a celebration. Not only is this cheesecake a stunning centerpiece that'll impress your friends and family, but it's also surprisingly simple to create at home. With minimal prep time and maximum flavor impact, it’s perfect for those looking to escape the fast-food rut and indulge in something truly homemade. So, are you ready to whip up some happiness and create unforgettable memories with every creamy slice?
Why is Cherry Pistachio Cheesecake special?
Irresistible Layers: This cheesecake boasts a perfect blend of creamy and crunchy textures, thanks to the soft cream cheese and crunchy pistachios.
Vibrant Flavor: The sweet cherries marry beautifully with the nutty pistachios, creating a burst of flavor that dances on your palate.
Effortless Creation: With just 20 minutes of prep time, this stunning dessert comes together effortlessly. Perfect for home chefs looking to impress without the stress!
Crowd-Pleasing Delight: Be prepared for rave reviews! This dessert will become a favorite at your gatherings, making it the ideal choice for parties or family dinners.
If you love cheesecakes, don't miss out on other delicious ideas from our popular cheesecake recipes. You won't regret trying each sweet twist!
Cherry Pistachio Cheesecake Ingredients
For the Crust
• Graham cracker crumbs – a key base that adds a buttery crunch.
• Unsalted butter – binds the crumbs together and enhances flavor.
• Granulated sugar – balances the buttery flavor for a sweet base.
For the Filling
• Cream cheese – the creamy core that makes the cheesecake lush and smooth.
• Powdered sugar – sweetens the filling without being gritty.
• Vanilla extract – adds a warm aroma that complements the cheesecake’s flavors.
• Sour cream – contributes to a rich, creamy texture and tanginess.
• Large eggs – bind the filling together, creating its structural integrity.
• Fresh cherries – provide juicy bursts of sweetness throughout the cake.
• Shelled pistachios – add a nutty crunch that elevates the overall flavor profile.
• Lemon juice – brightens the flavors, enhancing the tartness of the cherries.
With these Cherry Pistachio Cheesecake ingredients, you're just a few steps away from creating a delightful dessert that will leave everyone asking for seconds!
Step‑by‑Step Instructions for Cherry Pistachio Cheesecake
Step 1: Preheat the Oven
Start by preheating your oven to 325°F (160°C). While that’s warming up, take a 9-inch springform pan and grease it generously with unsalted butter. Lightly dust the inside with flour to ensure that the cheesecake will release easily after baking. This preparation will create a perfect foundation for your Cherry Pistachio Cheesecake.
Step 2: Make the Crust
In a medium mixing bowl, combine 1 ½ cups of graham cracker crumbs, ½ cup of melted unsalted butter, and ¼ cup of granulated sugar. Stir the mixture until it resembles wet sand with a cohesive texture. This will form a tasty crust. Once mixed, pack the crumb mixture into the bottom of the prepared springform pan evenly and firmly.
Step 3: Bake the Crust
Place the springform pan in the preheated oven and bake the crust for 10 minutes. The edges should look set, and the crust will slightly darken. Once baked, remove the pan from the oven and allow it to cool while you prepare the creamy filling for your Cherry Pistachio Cheesecake.
Step 4: Prepare the Cream Cheese Filling
In a large mixing bowl, beat 2 cups of softened cream cheese with an electric mixer on medium speed for about 2 minutes, or until it’s creamy and smooth. Ensure there are no lumps for a velvety cheesecake. This step sets the stage for the luscious filling that will blend beautifully with the cherries and pistachios.
Step 5: Add the Sweetness
Gradually add 1 cup of powdered sugar to the cream cheese mixture, blending on low speed until fully incorporated. Take your time to scrape down the sides of the bowl as needed to ensure everything is thoroughly mixed. This will create a perfectly sweet base that complements the tangy cherries in your Cherry Pistachio Cheesecake.
Step 6: Incorporate Flavor Elements
Next, add 1 teaspoon of vanilla extract, 1 cup of sour cream, and 1 tablespoon of lemon juice to the cream cheese mixture. Mix until all ingredients are combined and smooth. This combination of creamy and zesty flavors will elevate the overall richness of the filling, ensuring each bite is delightful.
Step 7: Add the Eggs
Carefully add 3 large eggs to the mixture one at a time, mixing just until blended after each addition. This step is crucial, as overmixing can lead to a dense texture. You want the filling for your Cherry Pistachio Cheesecake to remain light and airy, allowing it to rise beautifully during baking.
Step 8: Fold in Cherries and Pistachios
Gently fold in 1 cup of pitted and halved fresh cherries and 1 cup of roughly chopped shelled pistachios using a spatula. Be cautious not to break the fruit as you combine everything. The colorful cherries and crunchy pistachios will provide incredible flavor and texture in your finished cheesecake.
Step 9: Pour the Filling
Once everything is well combined, pour the creamy filling into the cooled crust. Use a spatula to smooth the top evenly, ensuring that the cherries and pistachios are nicely distributed throughout. This pouring step is where your Cherry Pistachio Cheesecake comes to life, ready for baking.
Step 10: Bake the Cheesecake
Bake the cheesecake in the oven for 50-60 minutes, or until the edges are set yet the center has a slight jiggle when gently shaken. The cheesecake should appear slightly puffed and golden around the edges. This baking process is key to achieving that smooth texture that you’ll love in each slice.
Step 11: Cool Gradually
Turn off the oven and crack the door open slightly. Allow the cheesecake to cool in the oven for about an hour. This gradual cooling helps prevent cracks from forming on the surface, ensuring your Cherry Pistachio Cheesecake looks as good as it tastes.
Step 12: Chill the Cheesecake
After an hour of cooling, transfer the cheesecake to the refrigerator and let it chill for a minimum of 4 hours, preferably overnight. Chilling sets the cheesecake, allowing all those wonderful flavors to meld beautifully. This step is vital for that perfect slice everyone will rave about.
Step 13: Serve and Enjoy
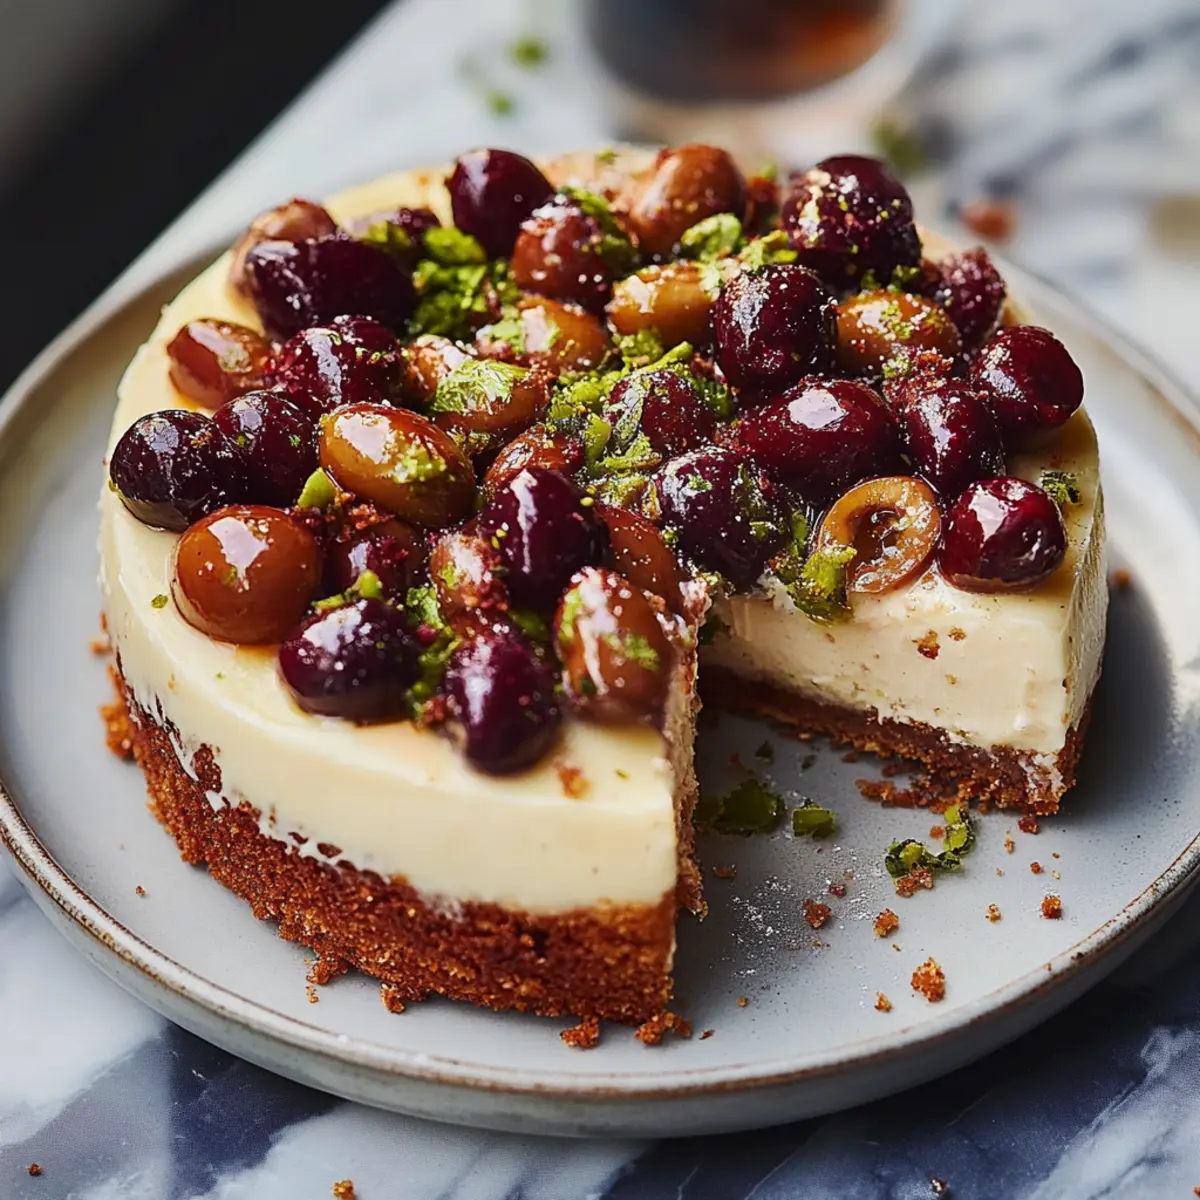
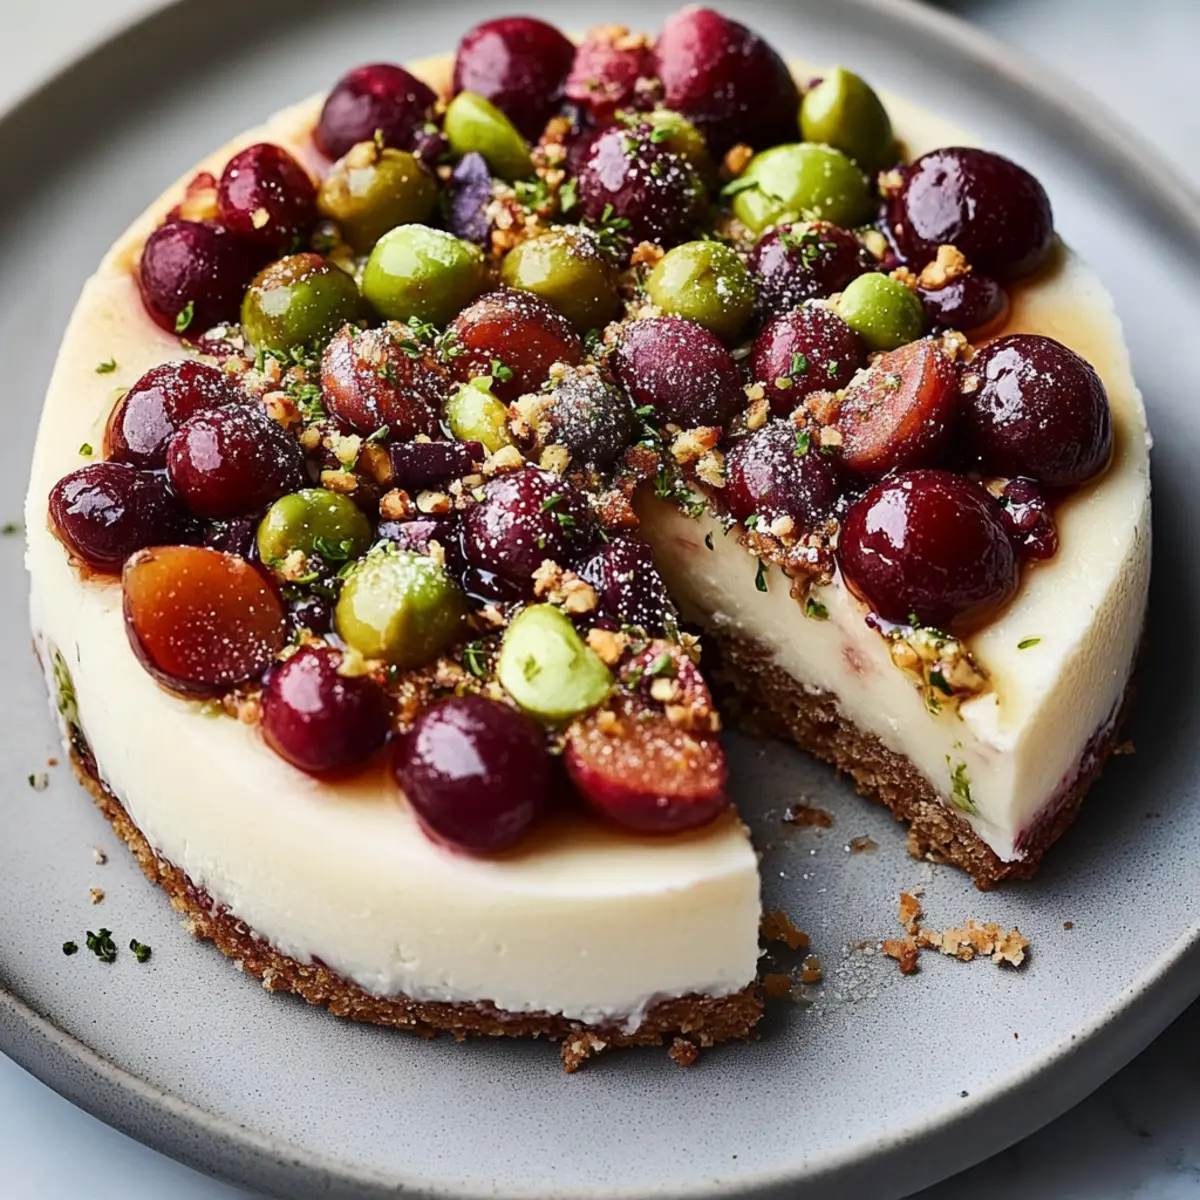
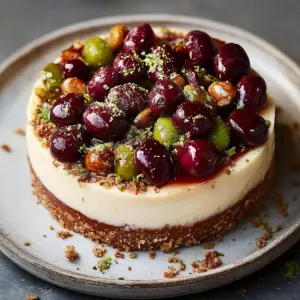
Once chilled, carefully remove the sides of the springform pan to reveal your beautiful Cherry Pistachio Cheesecake. Serve it chilled, optionally garnished with more cherries and chopped pistachios for an inviting touch. Each slice promises a delightful blend of flavors and textures that will have everyone coming back for more!
How to Store and Freeze Cherry Pistachio Cheesecake
Fridge: Store leftover Cherry Pistachio Cheesecake in an airtight container in the refrigerator for up to 3 days. Make sure it’s well covered to maintain its creamy texture.
Freezer: To freeze, wrap the cheesecake tightly in plastic wrap followed by aluminum foil. It can be stored in the freezer for up to 3 months. Thaw in the fridge overnight before serving.
Reheating: If you prefer a warm slice, gently reheat individual portions in the microwave for 15-20 seconds. Enjoy the blend of flavors with a bit of warmth!
Helpful Tricks for Cherry Pistachio Cheesecake
Cream Cheese Temperature: Ensure your cream cheese is at room temperature for easy mixing and a smooth texture in your Cherry Pistachio Cheesecake.
Avoid Overmixing: When adding eggs, mix just until blended to prevent a dense cheesecake. Overmixing can lead to unwanted cracks.
Cool Gradually: Allow the cheesecake to cool in the oven after baking. This step minimizes the chance of cracking, maintaining a beautiful presentation.
Chill Overnight: For the best flavor development and texture, refrigerate the cheesecake overnight. This allows all the flavors to meld together beautifully.
Serve with Confidence: When releasing your springform pan, run a knife around the edges to ensure a clean release while serving this gorgeous Cherry Pistachio Cheesecake.
What to Serve with Cherry Pistachio Cheesecake?
Creating the perfect dining experience goes beyond just a wonderful dessert; it's about curating a complete meal that enchants the senses.
-
Fresh Fruit Salad: A vibrant mix of seasonal fruits enhances your meal with freshness, complementing the cheesecakes' creamy depth. The sweetness beautifully contrasts with the tangy cherries.
-
Lightly Roasted Vegetables: Choose a mix of seasonal veggies for roasting. Their caramelized edges bring a delightful earthiness that balances the cheesecake’s rich flavors.
-
Honey-Glazed Carrots: These sweet and tender carrots work marvelously to accentuate the nutty notes of the pistachios while adding a pop of color to your plate.
-
Sparkling Water with Lemon: Keep the beverage light and refreshing with a fizzy drink. The citrus notes will uplift the flavors of your dessert perfectly.
-
Vanilla Ice Cream: An indulgent scoop of vanilla ice cream adds creaminess and a contrasting temperature, enhancing every bite of your Cherry Pistachio Cheesecake.
-
Chocolate Drizzle: A simple drizzle of dark chocolate over the slices adds an elegant touch and harmonizes beautifully with the cherry flavors.
Create your memorable meal by mixing these textures and flavors, and let the Cherry Pistachio Cheesecake shine as the grand finale!
Make Ahead Options
These Cherry Pistachio Cheesecake components are perfect for meal prep, saving you valuable time on busy days! You can prepare the crust and filling up to 24 hours in advance—just refrigerate them separately to maintain freshness. For the crust, after baking, let it cool completely, then wrap it tightly in plastic wrap. For the filling, mix all ingredients (except the eggs) and store it in an airtight container. When you're ready to bake, simply beat in the eggs, pour the filling into the chilled crust, and bake as directed. This way, your cheesecake will be just as delicious without any extra hassle!
Cherry Pistachio Cheesecake Variations
Feel free to get creative with your Cherry Pistachio Cheesecake and explore flavors that tickle your taste buds!
- Gluten-Free: Substitute graham cracker crumbs with a gluten-free cookie or almond flour blend for a similar crunch.
- Nut-Free: Skip the pistachios and replace them with sunflower seeds to maintain the crunch without the nuts.
- Cheesecake Swirl: Swirl in some chocolate or caramel sauce before baking for an extra treat! Just sprinkle it on top, and use a knife to create beautiful marbled patterns.
- Berry Blast: Add blueberries or raspberries alongside the cherries for an exciting mix of flavors that brighten up each bite. The combination of fresh berries will not only enhance the taste but also add a splash of color to your cheesecake.
- Cream Cheese Alternatives: Try using mascarpone or ricotta cheese for a different texture, making the cheesecake creamier or lighter. Each option brings its own charm, extending the indulgence with new nuances.
- Citrus Zest: Enhance the lemon flavor by adding some lemon or orange zest to the filling for a vibrant citrus note that dances on your palate. A little zest goes a long way in refreshing the flavors!
- Spicy Kick: For those who enjoy a bit of heat, add a pinch of cayenne pepper or some finely chopped jalapeños to the filling. This unexpected twist will leave your guests pleasantly surprised by the flavor adventure.
- Chocolate Lover's Delight: Fold in mini chocolate chips along with the cherries for an extra layer of decadence. Chocolate and cherries are a classic pairing that never fails to impress!
With these delightful variations, you can make your Cherry Pistachio Cheesecake your own. Don’t hesitate to experiment and have fun. For even more cheesecake inspiration, check out our popular cheesecake recipes to keep your baking journey exciting!
Cherry Pistachio Cheesecake Recipe FAQs
How can I choose the best cherries for the cheesecake?
Absolutely! Look for fresh cherries that are firm, plump, and have a vibrant color. Avoid any that show dark spots or bruising, as these may be overripe. If you can, try to select local, in-season cherries for the best flavor!
What’s the best way to store leftover Cherry Pistachio Cheesecake?
To keep your cheesecake fresh, cover it tightly with plastic wrap or keep it in an airtight container in the refrigerator. It will stay delicious for about 3 days. Ensure it's well-protected to maintain that creamy texture!
Can I freeze Cherry Pistachio Cheesecake?
Yes! To freeze, first let the cheesecake cool completely. Then, wrap it tightly in plastic wrap, followed by aluminum foil to avoid freezer burn. It can be stored for up to 3 months. When you're ready to enjoy, simply transfer it to the fridge overnight to thaw gently.
What should I do if my cheesecake cracks while baking?
Don’t worry, it happens! To minimize cracking, remember to cool the cheesecake gradually in the oven with the door slightly ajar for about an hour after baking. If cracks do appear, consider topping with a layer of whipped cream or fresh cherries to conceal imperfections.
Are there any dietary considerations for this recipe?
Yes! If you're serving this to guests with nut allergies, you can omit the pistachios or replace them with seeds like sunflower seeds for added crunch. Always check the ingredients if you're adjusting the recipe, especially if you're concerned about allergens.
How long should I chill the cheesecake before serving?
I recommend chilling the cheesecake for at least 4 hours, but if you can manage it, letting it sit overnight is even better! This allows the flavors to meld wonderfully, resulting in a richer taste with every creamy slice.
Enjoy diving into this delightful creation with loved ones and happy baking!
Decadent Cherry Pistachio Cheesecake You’ll Crave Daily
Equipment
- 9-inch springform pan
- Mixing bowls
- Electric mixer
- Spatula
Ingredients
For the Crust
- 1 ½ cups graham cracker crumbs a key base that adds a buttery crunch.
- ½ cup unsalted butter binds the crumbs together and enhances flavor.
- ¼ cup granulated sugar balances the buttery flavor for a sweet base.
For the Filling
- 2 cups cream cheese the creamy core that makes the cheesecake lush and smooth.
- 1 cup powdered sugar sweetens the filling without being gritty.
- 1 teaspoon vanilla extract adds a warm aroma that complements the cheesecake’s flavors.
- 1 cup sour cream contributes to a rich, creamy texture and tanginess.
- 3 large eggs bind the filling together, creating its structural integrity.
- 1 cup fresh cherries provide juicy bursts of sweetness throughout the cake.
- 1 cup shelled pistachios add a nutty crunch that elevates the overall flavor profile.
- 1 tablespoon lemon juice brightens the flavors, enhancing the tartness of the cherries.
Instructions
Steps
- Preheat your oven to 325°F (160°C) and prepare a 9-inch springform pan with butter and flour.
- Combine graham cracker crumbs, melted unsalted butter, and granulated sugar until it resembles wet sand. Pack into the springform pan.
- Bake the crust for 10 minutes, then allow it to cool.
- Beat the softened cream cheese until creamy and smooth for about 2 minutes.
- Gradually add powdered sugar to the cream cheese mixture, mixing on low speed.
- Incorporate vanilla extract, sour cream, and lemon juice until smooth.
- Add eggs one at a time, mixing just until blended.
- Gently fold in cherries and pistachios.
- Pour the filling into the cooled crust and smooth the top.
- Bake for 50-60 minutes until edges are set; center should jiggle slightly.
- Cool in the oven for about an hour.
- Chill in the refrigerator for at least 4 hours, preferably overnight.
- Carefully release the cheesecake from the springform pan and serve chilled.
Leave a Reply