
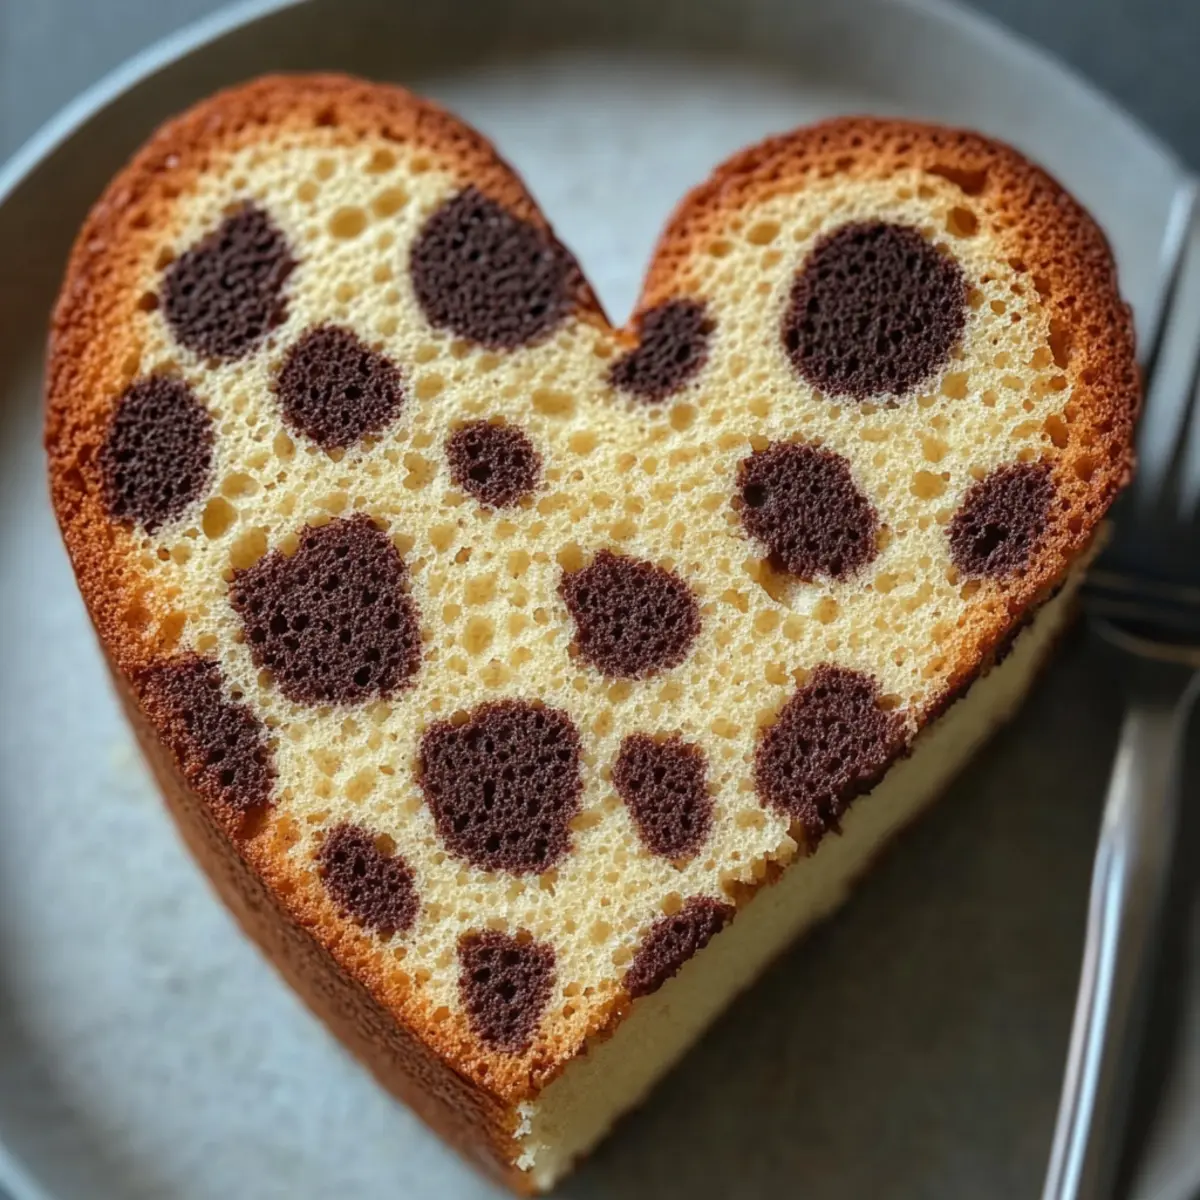
I couldn't help but marvel at the artistry of a beautiful cake recently—a Cheetah Print Heart Cake. The vibrant hues of golden yellow, rich brown, and deep black create a captivating pattern that’s almost too pretty to slice into. This recipe is perfect for those who love to impress with a creative twist yet don't have all day to bake. With a prep time that’s surprisingly manageable, you'll be able to whip up this stunning dessert without sacrificing your weekend. Plus, it's a delightful crowd-pleaser, ideal for celebrations or just satisfying those sweet cravings! Are you ready to unleash your inner pastry artist with this fun baking adventure?
Why Is This Cake So Special?
Unleash your creativity with this stunning Cheetah Print Heart Cake that adds flair to any occasion. Jaw-dropping visuals are guaranteed with the unique cheetah print design, making it the perfect centerpiece for parties. Family-friendly fun: even kids can help with the colorful batter. Deliciously moist layers of cake paired with creamy frosting will have everyone coming back for seconds. Plus, this delightful recipe is a great way to spice up your baking repertoire. Celebrate special moments with a cake that's not just a treat but a work of art!
Cheetah Print Heart Cake Ingredients
• Get ready to craft a masterpiece!
For the Cake
- All-purpose flour – provides the structure needed for a perfect cake.
- Cornstarch – adds tenderness to the cake, making it light and fluffy.
- Baking powder – helps the cake rise and achieve that lovely texture.
- Baking soda – a must for balancing acidity, ensuring a perfect bake.
- Fine sea salt – enhances the flavor of the cake and balances sweetness.
- Unsalted butter – gives richness and moisture; always use softened butter for easy blending.
- Granulated sugar – sweetens the cake beautifully, creating a tender crumb.
- Large eggs – bind the ingredients together while adding moisture. Use room temperature eggs for best results.
- Pure vanilla extract – offers a warm flavor note that brings everything together.
- Whole milk – adds creaminess and helps create a moist cake.
- Sour cream – enriches the cake and keeps it moist; Greek yogurt can be a great substitute.
For the Colors
- Gel food coloring: golden yellow – adds vibrant color for that striking cheetah print.
- Gel food coloring: brown – provides depth and contrast in your cake’s design.
- Gel food coloring: black – creates the dark, eye-catching spots essential for cheetah print.
For the Frosting
- Unsalted butter – ensures a rich and creamy frosting; keep it softened for easy mixing.
- Powdered sugar – sweetens the frosting and gives it a wonderful texture; sifted for smoothness!
- Heavy cream or whole milk – lighten the frosting to your desired consistency; add extra as needed.
With these ingredients, you're all set to create your stunning Cheetah Print Heart Cake! Get ready to impress everyone with both flavor and style!
Step‑by‑Step Instructions for Cheetah Print Heart Cake
Step 1: Preheat the Oven
Preheat your oven to 350°F (175°C). While it heats, take your heart-shaped cake pans and grease them with softened butter, then lightly flour them or line with parchment paper to prevent sticking. You’ll want to ensure each pan is prepped well, so your Cheetah Print Heart Cake can come out perfectly.
Step 2: Mix the Dry Ingredients
In a medium bowl, whisk together 2 ¾ cups of all-purpose flour, 1 tablespoon of cornstarch, 2 ¼ teaspoons of baking powder, ½ teaspoon of baking soda, and ½ teaspoon of fine sea salt. Set aside this mixture; it forms the foundation of your cake. Mixing these dry ingredients well helps incorporate the leavening agents evenly throughout the cake.
Step 3: Cream the Butter and Sugar
In a large mixing bowl, beat 1 cup of softened unsalted butter until creamy, which should take about 2 minutes. Gradually add 1 ¾ cups of granulated sugar and continue beating for 3-4 minutes, or until the mixture becomes light and fluffy. This step is crucial for creating a tender crumb in your Cheetah Print Heart Cake.
Step 4: Add the Eggs and Vanilla
Now it’s time to incorporate the eggs! Add 4 large room temperature eggs to the butter-sugar mixture, one at a time, mixing well after each addition. This ensures even distribution. Then, pour in 2 teaspoons of pure vanilla extract and mix until fully combined, adding a warm flavor to your batter.
Step 5: Combine Wet and Dry Mixtures
In a separate bowl, whisk together 1 ¼ cups of whole milk and ½ cup of sour cream until smooth. Gradually add the dry ingredients to the butter mixture, alternating with the milk mixture. Start and end with the dry ingredients, mixing until just combined after each addition to keep your Cheetah Print Heart Cake light and fluffy.
Step 6: Prepare the Colored Batters
Reserve 2 cups of the plain batter for later use. Divide 1 cup of the remaining batter into three separate bowls. Tint one cup golden yellow, another cup medium brown, and the last ½ cup black or very dark brown using gel food coloring. These colors will create the stunning cheetah print design in your cake.
Step 7: Create Surprise Hearts
For a delightful touch, pour half of the reserved plain batter into a lined 9×13 pan. Using the brown and black batters, pipe out fun patterns, then lightly cover with the yellow batter. Bake this for 12-16 minutes, until a toothpick comes out clean. Allow it to cool before cutting heart shapes for your cake.
Step 8: Bake the Main Cake Layers
Fill your prepared heart-shaped pans with a thin layer of plain cake batter. Randomly dollop the colored batters, then use a knife or skewer to swirl them together gently. Bake the cakes for 25-32 minutes if using 8-inch pans, or 40-50 minutes for one deep 9-inch pan, until golden and a toothpick comes out clean.
Step 9: Cool the Cakes
Once baked, let the cakes cool in the pans for about 10-15 minutes. Then carefully transfer the cakes to a wire rack to cool completely. This step is essential for preventing sogginess when layering your Cheetah Print Heart Cake.
Step 10: Level and Chill the Cakes
If your cake layers have domed tops, level them carefully with a serrated knife for a nice, even stacking. Place the leveled cakes in the refrigerator for 20-30 minutes to chill; this will help the frosting apply more smoothly during assembly.
Step 11: Make the Frosting
In a mixing bowl, beat together 1 ½ cups of softened unsalted butter until creamy. Gradually add around 5-6 cups of sifted powdered sugar and mix until combined. Alternate adding ¼ cup of heavy cream or whole milk until the frosting achieves a medium-thick consistency that spreads easily but holds its shape.
Step 12: Prepare the Frosting Colors
Reserve 1 cup of the ivory frosting for filling your cake. Then, tint the remaining frosting a golden tan, and divide it again to tint portions brown and black for piping your cheetah print. Keep these textural variations in mind to achieve a beautiful finish on your Cheetah Print Heart Cake.
Step 13: Assemble the Cake
To assemble, place one cake layer on your serving plate with a dab of frosting for stability. Spread the reserved ivory frosting as a filling, stack the second layer on top, and apply a crumb coat all over the cake. Chill it again until the crumb coat is firm, ensuring a clean finish for your frosting.
Step 14: Apply the Base Coat
Using the golden tan frosting, apply a smooth base coat over the entire cake, making sure to cover every exposed area evenly. This step is important as it not only sets the canvas for your cheetah print but also adds to the cake's overall appeal. Chill the cake to set the base coat before the finishing touches.
Step 15: Pipe the Cheetah Print
Now for the fun part! With the brown and black frosting, pipe your cheetah print spots onto the cake, varying the size of the spots to create a natural look. Channel your inner artist and don’t worry about being perfect; the beauty lies in the uniqueness of each design on your Cheetah Print Heart Cake.
Step 16: Chill and Slice
Let the decorated cake chill in the refrigerator for 30-45 minutes, which will help the frosting set nicely. When ready to serve, slice your cake neatly with a warm knife to achieve clean edges. Enjoy the delightful creation of your Cheetah Print Heart Cake with friends and family!
How to Store and Freeze Cheetah Print Heart Cake
Room Temperature: Keep the cake covered on the counter for up to 2 days. This helps maintain its moist texture, but for longer storage, refrigeration is recommended.
Fridge: Store any leftover Cheetah Print Heart Cake in an airtight container for up to 5 days. This preserves its flavor and prevents it from drying out.
Freezer: Wrap slices or the whole cake in plastic wrap, then aluminum foil, to freeze for up to 3 months. Thaw in the fridge overnight when ready to enjoy again!
Reheating: For best results, enjoy slices straight from the fridge, or if desired, warm gently in the microwave for about 10-15 seconds to enhance the frosting's creaminess.
Expert Tips for Cheetah Print Heart Cake
-
Use Room Temperature Ingredients: Ensure your eggs, butter, milk, and sour cream are at room temperature for a smoother batter and better rise in your Cheetah Print Heart Cake.
-
Don’t Overmix Batter: Once you combine the dry and wet ingredients, mix until just combined. Overmixing can lead to a dense cake, which is the last thing you want!
-
Chill for Smoothing: After leveling your cakes, chill them before frosting. This helps in applying a clean crumb coat, making your Cheetah Print Heart Cake visually stunning.
-
Experiment with Colors: Don’t hesitate to play with different shades of gel food coloring. A little creativity can take your Cheetah Print Heart Cake from beautiful to breathtaking!
-
Warm Knife Tips: Warm your knife with hot water before slicing to achieve clean, neat slices. This technique showcases your hard work beautifully!
-
Seal in Moisture: After decorating, keep your cake covered or in an airtight container to prevent it from drying out. Enjoy your creation for days!
Make Ahead Options
These Cheetah Print Heart Cakes are perfect for meal prep enthusiasts! You can prepare the cake layers up to 3 days in advance. Bake the heart cake layers, let them cool completely, then wrap each layer tightly in plastic wrap and refrigerate to maintain moisture. You can also make the frosting (up to 2 days ahead) and store it in an airtight container in the fridge. When you're ready to assemble, simply remove the layers from the fridge, level them if necessary, and allow them to come to room temperature while you mix and color your frosting. Finally, frost and decorate as per the recipe, and you’ll have a stunning cake with minimal effort right when you need it!
What to Serve with Cheetah Print Heart Cake
Transform your dessert into a delightful experience with the perfect pairings alongside your stunning cake.
- Fresh Berries: Their tartness beautifully balances the sweetness of the cake while adding a vibrant color contrast.
- Vanilla Ice Cream: A creamy scoop melts gently over each slice, enhancing the cake's rich flavors and adding a delightful chill.
- Whipped Cream: Light and airy, it complements the cake’s moist texture, making every bite feel indulgent and luxurious.
- Chocolate Ganache: Drizzling this rich sauce over the cake enhances its decadence, offering a delightful contrast to the fruity notes.
- Sparkling Lemonade: A fruity, bubbly drink will refresh your palate and add a citrusy note that complements the cake’s sweetness.
- Coffee or Espresso: A warm, bold cup pairs perfectly with cake, cutting through its sweetness while making an inviting atmosphere for conversation.
- Chocolate-Covered Strawberries: Elegant and sweet, they add a touch of sophistication to your dessert spread, enhancing the overall indulgence.
- Caramel Sauce: Drizzle this over your cake or on the plate for an extra layer of flavor that harmonizes wonderfully with the rich frosting flavors.
- Fruit Salad: A refreshing mix of seasonal fruits brings brightness and a lightness that contrasts beautifully with the cake's richness.
Cheetah Print Heart Cake Variations
Feel free to explore these delightful tweaks to make your Cheetah Print Heart Cake even more personal and delicious!
-
Gluten-Free: Substitute all-purpose flour with a gluten-free blend. Just ensure you use one that measures cup-for-cup for best results.
-
Dairy-Free: Use unsweetened almond milk and coconut cream in place of dairy ingredients for a creamy, lactose-free frosting.
-
Chocolate Flavor: Replace half of the flour with cocoa powder to create a rich chocolate version. The cheetah print will still shine through!
-
Fruit Twist: Add a layer of fresh berries between the cake layers for a fruity surprise that pairs well with the sweet frosting.
-
Nutty Notes: Incorporate chopped nuts like pecans or walnuts into the batter for a delightful crunch that contrasts nicely with the soft cake.
-
Spice It Up: Add a pinch of cinnamon or nutmeg to the batter for warm, cozy flavors that complement the cake beautifully, creating an enticing aroma.
-
Heat Things Up: Add a few dashed of cayenne pepper or chili powder in the batter to give your cake a surprising kick, creating a sweet and spicy balance.
-
Color Play: Experiment with vibrant gel food colors to create alternate animal prints like zebra stripes or polka dots for a fun twist!
Baking is all about imagination and taste. Have fun with these variations and let your unique style shine through! For more tips on enhancing your culinary creations, check out my post on expert tips for cake decorating.
Cheetah Print Heart Cake Recipe FAQs
How do I choose ripe ingredients for the Cheetah Print Heart Cake?
Absolutely! When selecting ingredients, look for unsalted butter that feels soft but not greasy, eggs that are uncracked at room temperature, and whole milk that’s not past the expiration date. For sour cream, opt for creamy consistency without any liquid separation; freshness is key for the best flavor and texture.
What’s the best way to store the Cheetah Print Heart Cake?
For short-term storage, keep the cake covered at room temperature for up to 2 days as it helps maintain moistness. If you need to keep it longer, transfer it to an airtight container and refrigerate for up to 5 days. Make sure to allow it to come to room temperature before serving for the best taste!
Can I freeze the Cheetah Print Heart Cake? How?
Absolutely! To freeze your cake, first wrap individual slices or the entire cooled cake tightly in plastic wrap. Then, wrap again in aluminum foil or place it in an airtight container. This method prevents freezer burn and preserves flavor for up to 3 months. When you’re ready to enjoy it again, thaw in the fridge overnight and savor the delightful surprise!
What should I do if my cake layers are domed on top?
Very common! If you find your Cheetah Print Heart Cake layers cooked with a dome shape, don’t worry! Just use a serrated knife to gently level the tops for even stacking. This ensures perfect layers and a beautiful finish when you frost and assemble your cake.
Is this cake safe for those with allergies?
While this Cheetah Print Heart Cake is a delicious treat, it contains common allergens like eggs, dairy, and gluten from flour, so take caution if you’re serving someone with allergies. For gluten-free options, consider using gluten-free all-purpose flour. There aren’t any pet-safe ingredients, so it’s best to keep this scrumptious dessert away from furry friends!
How long does it take to bake the cakes?
For optimal results, bake the smaller heart-shaped pans for about 25-32 minutes or a single deep 9-inch pan for 40-50 minutes. Use a toothpick to check doneness; it should come out clean when inserted in the center. Keeping an eye on them during the last few minutes helps avoid overbaking!
Cheetah Print Heart Cake: A Wildly Delicious Surprise!
Equipment
- heart-shaped cake pans
- Mixing bowls
- Whisk
- Electric mixer
- Spatula
- parchment paper
- Oven
Ingredients
For the Cake
- 2 ¾ cups all-purpose flour
- 1 tablespoon cornstarch
- 2 ¼ teaspoons baking powder
- ½ teaspoon baking soda
- ½ teaspoon fine sea salt
- 1 cup unsalted butter softened
- 1 ¾ cups granulated sugar
- 4 large eggs room temperature
- 2 teaspoons pure vanilla extract
- 1 ¼ cups whole milk
- ½ cup sour cream can substitute with Greek yogurt
For the Colors
- 1 bottle gel food coloring: golden yellow
- 1 bottle gel food coloring: brown
- 1 bottle gel food coloring: black
For the Frosting
- 1 ½ cups unsalted butter softened
- 5-6 cups powdered sugar sifted
- ¼ cup heavy cream or whole milk add more as needed for consistency
Instructions
Instructions
- Preheat your oven to 350°F (175°C) and grease your heart-shaped cake pans with softened butter, then flour them or line with parchment paper.
- In a medium bowl, whisk together 2 ¾ cups of flour, 1 tablespoon of cornstarch, 2 ¼ teaspoons of baking powder, ½ teaspoon of baking soda, and ½ teaspoon of fine sea salt.
- In a large bowl, beat 1 cup of softened unsalted butter until creamy. Gradually add 1 ¾ cups of granulated sugar and beat until light and fluffy (3-4 minutes).
- Add 4 large eggs, one at a time, mixing well after each addition, then mix in 2 teaspoons of pure vanilla extract.
- In a separate bowl, whisk together 1 ¼ cups of whole milk and ½ cup of sour cream. Gradually add the dry ingredients to the butter mixture, alternating with the milk mixture.
- Reserve 2 cups of plain batter. Divide 1 cup of the remaining batter into three bowls and tint one golden yellow, another medium brown, and the last ½ cup black or very dark brown.
- Pour half of the reserved plain batter into a lined 9×13 pan, pipe fun patterns with the brown and black batters, then cover with yellow batter. Bake for 12-16 minutes and cool before cutting heart shapes.
- Fill your heart-shaped pans with a thin layer of plain batter, dollop colored batters, and swirl them together. Bake for 25-32 minutes if using 8-inch pans, or 40-50 minutes for one deep 9-inch pan.
- Let the cakes cool in the pans for 10-15 minutes, then transfer to a wire rack to cool completely.
- Level the cakes if domed, and chill them in the refrigerator for 20-30 minutes.
- Beat together 1 ½ cups of softened unsalted butter until creamy, then gradually add 5-6 cups of sifted powdered sugar and alternate adding ¼ cup of heavy cream until desired frosting consistency is achieved.
- Reserve 1 cup of ivory frosting for filling. Tint remaining frosting golden tan, divide again to tint portions brown and black for piping details.
- Layer one cake on a serving plate with frosting for stability, spread filling, stack the second layer, and apply a crumb coat before chilling until firm.
- Apply a smooth base coat with golden tan frosting over the entire cake, then chill again to set.
- Pipe cheetah print spots in brown and black frosting on the cake, varying the spot sizes for a natural look.
- Chill the decorated cake for 30-45 minutes, then slice with a warm knife to serve.
Leave a Reply