
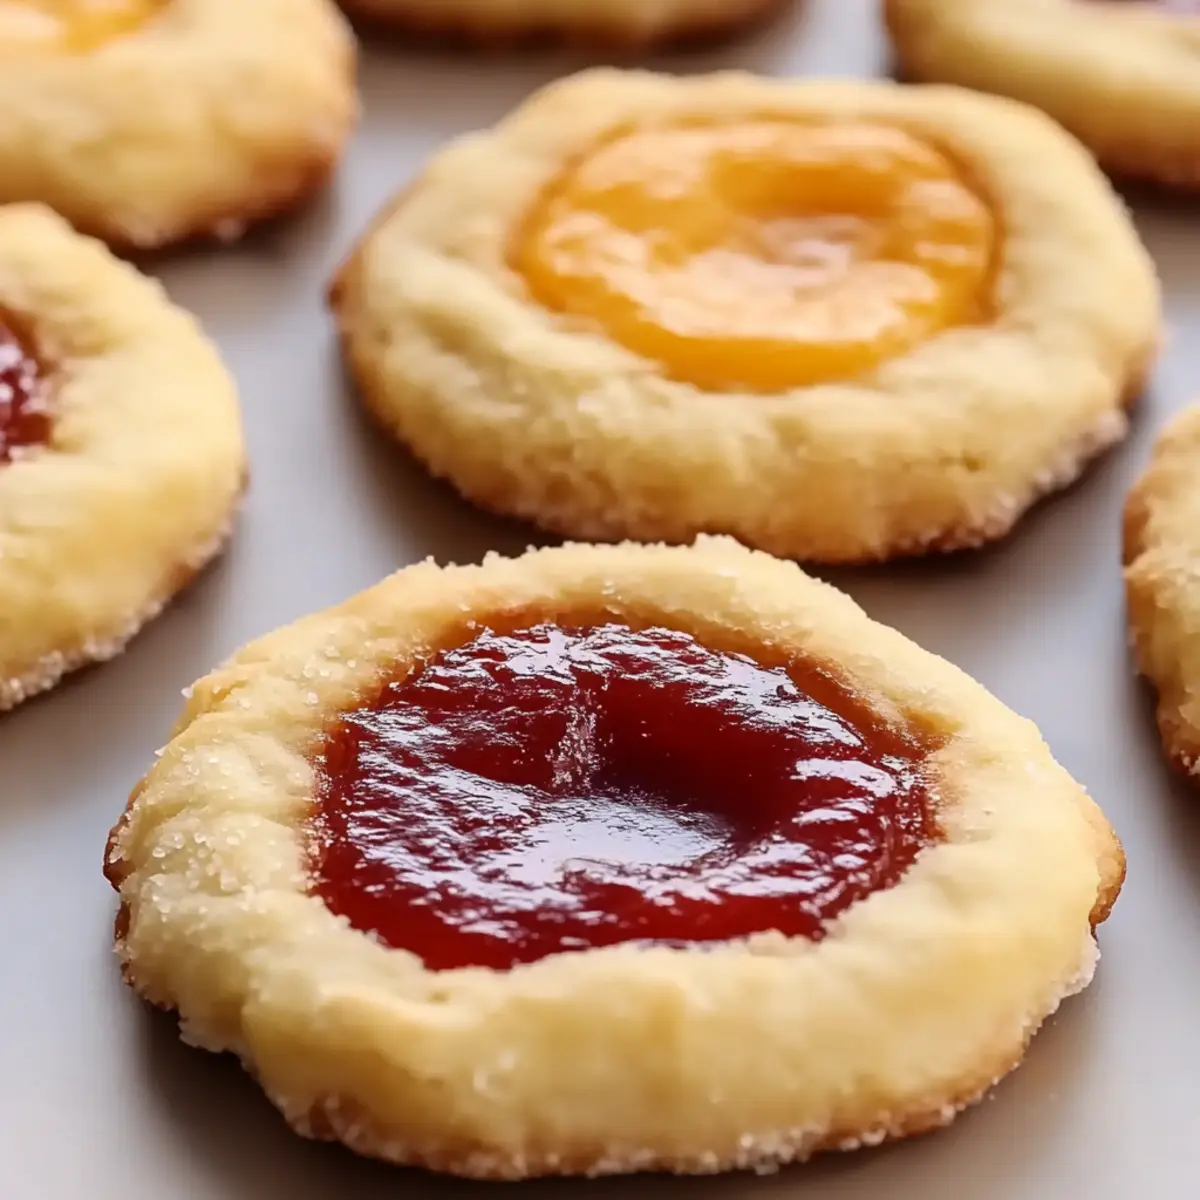
As I rummaged through my pantry last week, I stumbled upon a jar of raspberry preserves just waiting to be used. That little find sparked a nostalgic craving for Classic Thumbprint Cookies, the delightful treats that bring back the essence of home-baked goodness. With just a few simple ingredients, these cookies are not only easy to whip up but also a wonderful way to impress friends and family during any gathering. They’re quick to prepare and can be filled with your favorite jam or chocolate, adding a personal touch that transforms humble cookies into homemade treasures. Whether you're a seasoned baker or just starting out, join me as we dive into this cookie adventure. What flavor combination will you choose for your thumbprints?
Why Are Thumbprint Cookies So Special?
Nostalgic memories flood back when you bake these delightful treats, creating a sweet sense of home. Versatile fillings like fruit preserves or chocolate ganache let you personalize each cookie. Quick and easy, they come together in just 30 minutes, making them perfect for impromptu gatherings. Crowd-pleasers, these cookies are sure to impress at any event! Dive into your own baking adventure with our other delicious recipes like Chocolate Chip Cookies or Peanut Butter Blossoms for even more sweet inspiration.
Thumbprint Cookies Ingredients
Unlock the secrets to making delightful Thumbprint Cookies with this simple list!
For the Dough
• 1 cup softened butter – This provides a rich and creamy texture that makes the cookies melt in your mouth.
• 1 cup granulated sugar – Adds sweetness and helps create that perfect cookie crunch.
• 1 egg yolk – This enriches the dough, giving it a lovely golden color and enhancing flavor.
• 1 teaspoon vanilla extract – A must for that classic, comforting aroma and taste.
• 2 ¼ cups all-purpose flour – The backbone of any cookie, giving it structure and chew.
• ½ teaspoon salt – Balances the sweetness and intensifies the flavors.
For the Filling
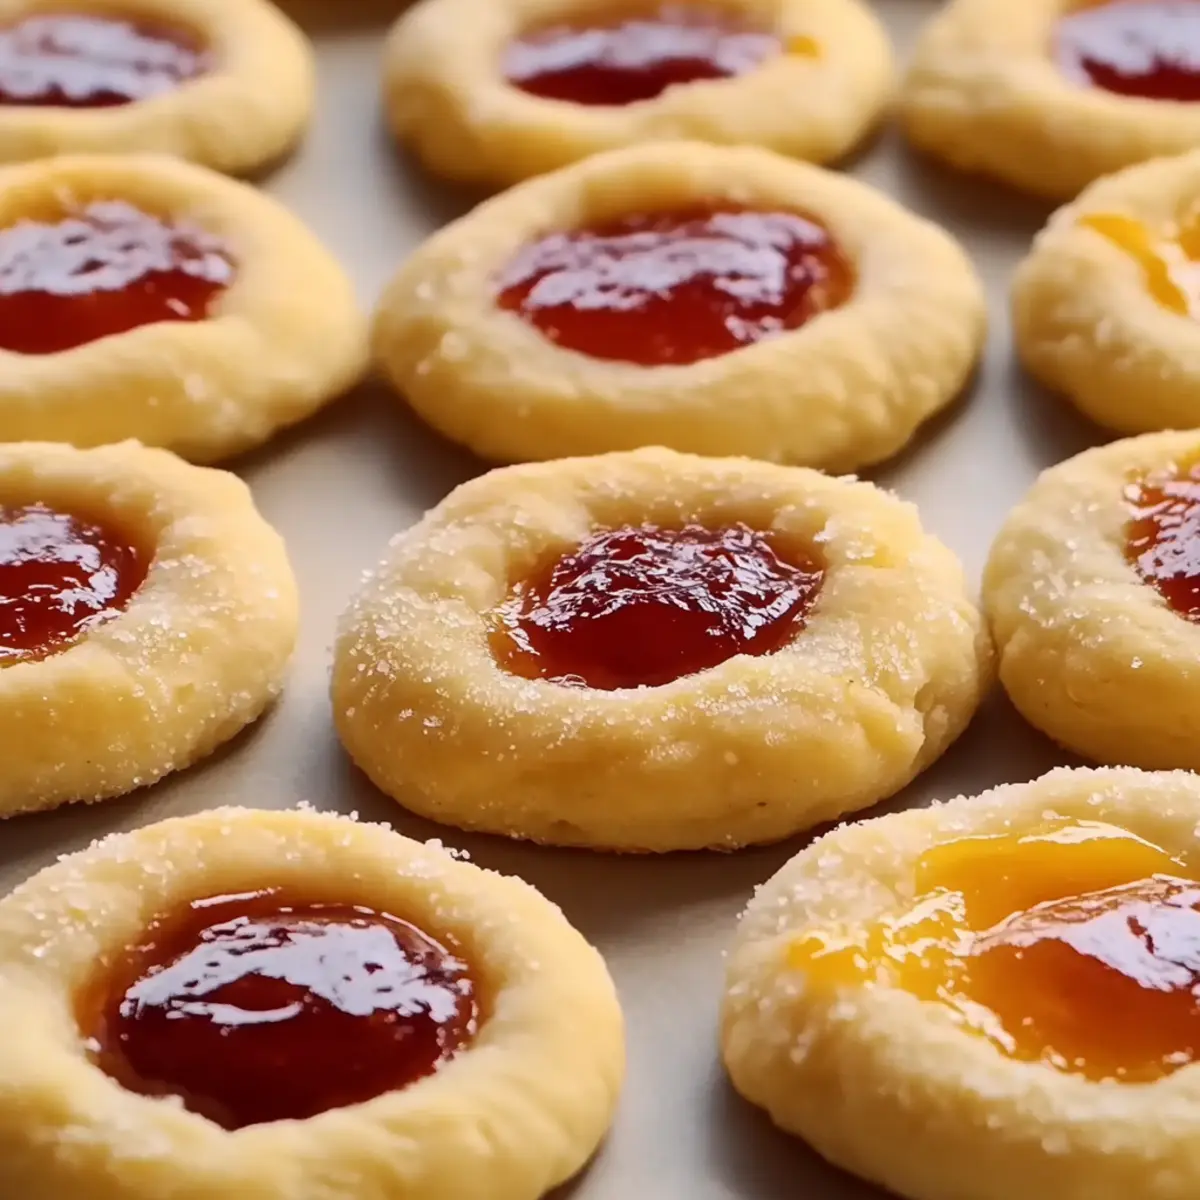
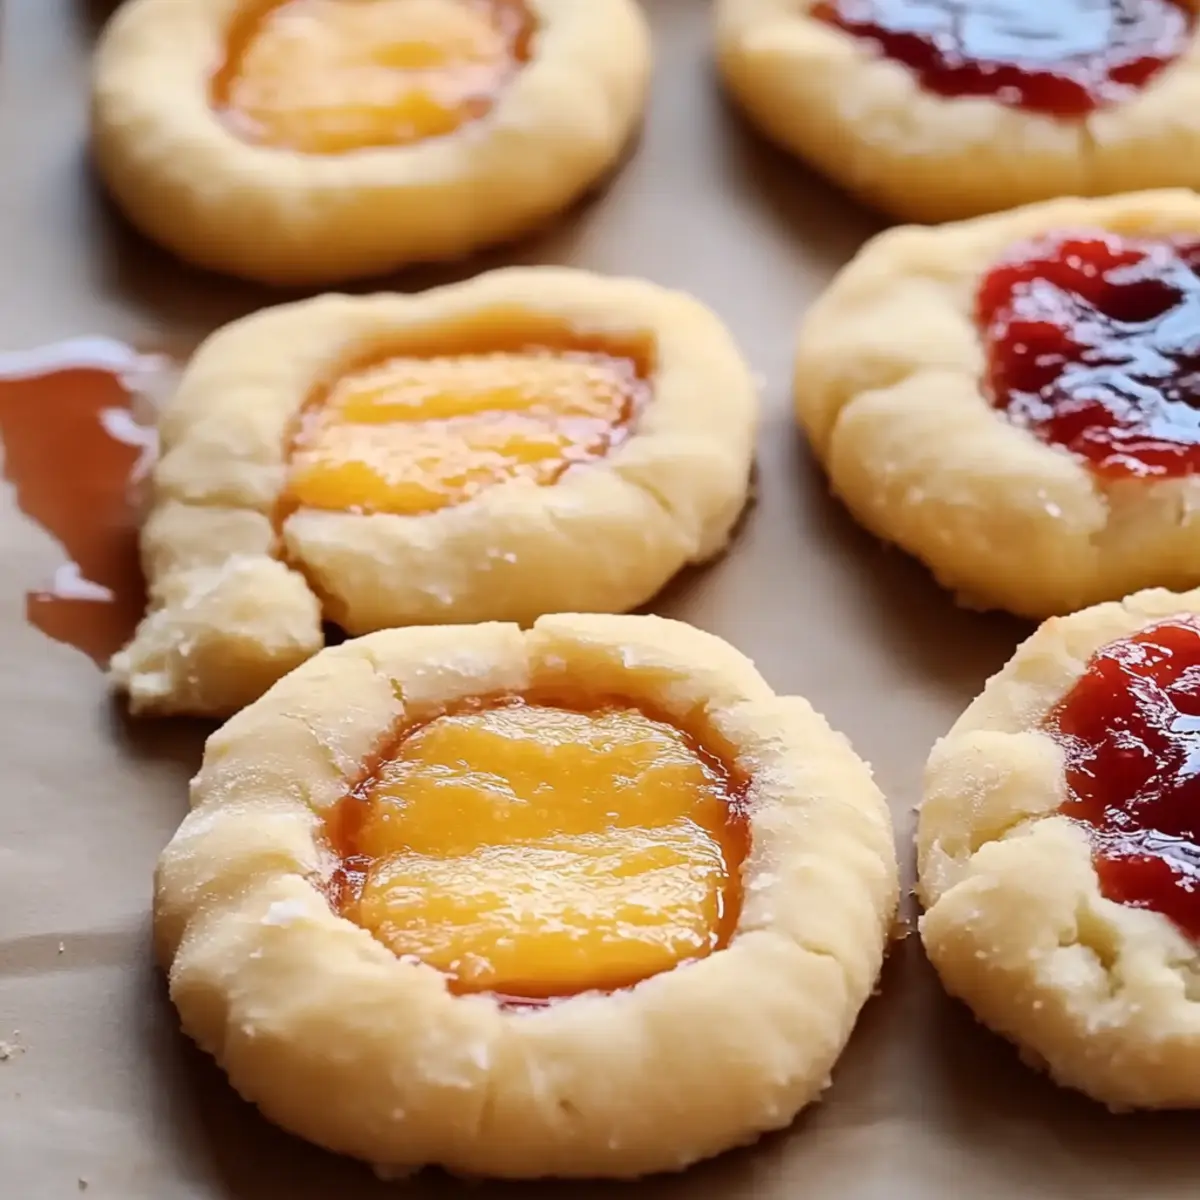
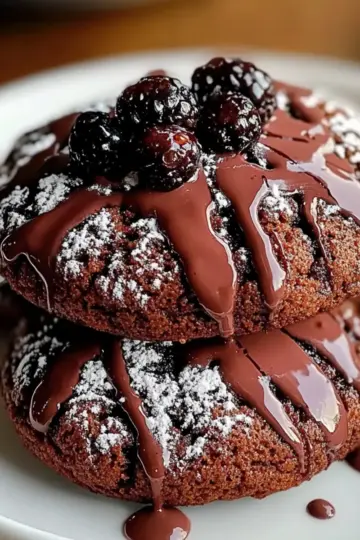
• ½ cup fruit preserves or chocolate ganache – Choose your favorite for a delightful surprise in every bite of your Thumbprint Cookies!
For Dusting (Optional)
• Powdered sugar – A light sprinkle adds an elegant finish to these charming treats.
Step‑by‑Step Instructions for Thumbprint Cookies
Step 1: Cream the Butter and Sugar
In a large mixing bowl, use an electric mixer to cream together 1 cup of softened butter and 1 cup of granulated sugar until the mixture becomes light and fluffy, approximately 3-5 minutes. This step is crucial as it incorporates air into the dough, ensuring your Thumbprint Cookies will have a wonderfully tender texture.
Step 2: Add Egg Yolk and Vanilla
Next, beat in 1 egg yolk along with 1 teaspoon of vanilla extract into the creamed mixture. Continue mixing until everything is well combined, which should take around 1-2 minutes. The blend will achieve a smooth consistency and release a lovely aroma, indicating it’s ready for the next step.
Step 3: Combine Dry Ingredients
In a separate bowl, whisk together 2 ¼ cups of all-purpose flour and ½ teaspoon of salt. This process helps evenly distribute the salt and ensures there are no lumps in your dry mixture, allowing for a flawless blend when added to the wet ingredients in the following step.
Step 4: Mix Dough Together
Gradually add the flour mixture to the butter mixture, stirring gently with a wooden spoon or spatula until the dough begins to form and comes together. It should be soft yet slightly sticky. This can take a couple of minutes. Be careful not to overmix, which could lead to tough cookies rather than the tender Thumbprint Cookies you desire.
Step 5: Chill the Dough
Once the dough is formed, cover it tightly with plastic wrap and refrigerate for at least 30 minutes. Chilling is essential as it helps the dough firm up, making it easier to shape and preventing the cookies from spreading too much during baking.
Step 6: Preheat the Oven
While the dough is chilling, preheat your oven to 350°F (175°C) and line a baking sheet with parchment paper. Preheating ensures that your Thumbprint Cookies bake evenly and achieve that perfect golden color once placed in the oven.
Step 7: Shape the Cookies
After chilling, scoop tablespoon-sized portions of the dough and gently roll them into balls. Place these balls about 2 inches apart on the prepared baking sheet. This distance allows for ample spreading during baking, ensuring your cookies maintain their shape and do not merge into one another.
Step 8: Create Indentations
Using your thumb or the back of a spoon, gently press down in the center of each dough ball to create a small indentation. This is where the filling will go, so make sure it’s deep enough to hold a small spoonful without breaking through the bottom.
Step 9: Fill with Preserves
Spoon a small amount of your chosen fruit preserves or chocolate ganache into each indentation. Fill it generously, but avoid overflowing. This personal touch transforms your Thumbprint Cookies into delightful little treasures bursting with flavor.
Step 10: Bake the Cookies
Place the baking sheet in the preheated oven and bake for 12 to 15 minutes, or until the edges of the cookies turn lightly golden. Keep an eye on them, as oven temperatures can vary. Once done, your kitchen will be filled with a warm, inviting aroma!
Step 11: Cool and Dust with Sugar
Let the cookies cool on the baking sheet for a few minutes before transferring them to a wire rack. This allows them to set properly. Once completely cooled, dust them with powdered sugar, if desired, for an elegant finish that enhances their charming appearance before serving.
How to Store and Freeze Thumbprint Cookies
Fridge: Keep your Thumbprint Cookies in an airtight container for up to 5 days. This helps maintain their softness and flavor without drying out.
Freezer: For longer storage, freeze the cookies in a single layer on a baking sheet, then transfer to a freezer-safe bag. They can last up to 3 months.
Reheating: To enjoy frozen cookies, simply thaw them at room temperature for about 15 minutes or heat them in the oven at 300°F (150°C) for 5-10 minutes for a fresh-out-of-the-oven taste.
Storing Filled Cookies: If your Thumbprint Cookies are filled with preserves or ganache, consume them within 3 days for the best flavor and texture.
Helpful Tricks for Thumbprint Cookies
Chill the Dough: Allowing the dough to chill for at least 30 minutes prevents excessive spreading, ensuring perfectly shaped Thumbprint Cookies that hold their indentation.
Don’t Overmix: Mix just until the dough comes together. Overmixing can lead to tough cookies. Keep the texture light and fluffy!
Fill Generously: Use enough fruit preserves or chocolate ganache to fill the indentation, but avoid overflowing. This ensures each bite is a delightful surprise without mess.
Watch the Bake Time: Ovens vary, so start checking your cookies at 12 minutes. A light golden edge ensures they’re perfectly baked while still soft inside.
Experiment with Fillings: Get creative! Try different fruit preserves or even nut butters. Customizing your Thumbprint Cookies makes them uniquely yours!
What to Serve with Classic Thumbprint Cookies
Building a delightful spread to accompany your cookies is an invitation to indulge in a comforting experience.
- Hot Cocoa: A warm, rich cocoa envelops each bite with cozy flavors, making it the perfect pairing on chilly days.
- Fresh Fruit Salad: Bright and juicy, this vibrant medley adds a refreshing touch, balancing the sweetness of the cookies. It’s a light and invigorating addition that complements the cookies’ texture beautifully.
- Vanilla Ice Cream: Creamy and smooth, a scoop of vanilla ice cream beside your cookie elevates dessert time into pure bliss. The melting ice cream softens each bite, making it an irresistible combination.
- Cheesecake Fluff Dip: Light and fluffy with a tangy cream cheese base, this dip invites you to scoop up chunks of your thumbprint cookies, creating an engaging taste adventure perfect for sharing.
- Herbal Tea: A fragrant herbal tea helps cleanse the palate and offers a soothing warmth that pairs beautifully with the cookies’ sweetness. Choose chamomile for calming or peppermint for a refreshing twist.
- Caramel Sauce: Drizzling warm caramel over your cookies adds a decadent twist, creating that luscious, gooey texture that makes every bite irresistible.
- Chocolate Milk: For a nostalgic touch, serve classic chocolate milk alongside your cookies; it’s a childhood favorite that enhances the playful essence of thumbprint cookies.
- Nutty Biscotti: Embrace a delightful crunch with nutty biscotti that complements the soft texture of thumbprint cookies. Dip them together for a satisfying contrast in every bite.
- Coffee: A steaming cup of coffee enhances the flavors of the cookie, presenting a rich backdrop that brings out the buttery notes in every bite.
Thumbprint Cookies Variations & Substitutions
Feel the freedom to make these delightful cookies uniquely yours with a few simple swaps and twists!
- Nut-Free: Substitute butter with your favorite dairy-free margarine and use sunflower seed butter for filling.
- Gluten-Free: Replace all-purpose flour with a gluten-free flour blend, ensuring you check the blend for a 1:1 ratio.
- Chocolate Lovers: Instead of preserves, fill cookies with melted chocolate or Nutella for an indulgent treat.
- Spice It Up: Add 1 teaspoon of cinnamon or nutmeg to the flour mixture for an aromatic flavor boost. This warm touch brings out a wonderful spice that will envelop your kitchen in delightful scents.
- Extravagant Toppings: After baking, drizzle melted chocolate over the cooled cookies for an elegant touch that will impress all who see (and taste) them!
- Citrus Zest: Incorporate 1 teaspoon of lemon or orange zest into the dough for a zingy freshness. This bright twist awakens the flavors and adds a joyful note to each bite!
- Vegan: Use coconut oil instead of butter, flax egg (1 tablespoon ground flaxseed mixed with 2.5 tablespoons water) instead of egg yolk, and agave syrup instead of granulated sugar.
- Fruity Fun: Instead of traditional fruit preserves, try filling with homemade compote or even a fun jelly flavor, like grape or apple, for a nostalgic treat that surprises!
Dive into the world of flavors with these variations and discover a personal touch that resonates with your taste! For more delightful inspiration, don’t miss our crowd-pleasing Chocolate Chip Cookies or try the comforting Peanut Butter Blossoms for a sweet twist.
Make Ahead Options
These Thumbprint Cookies are perfect for busy home cooks looking to save time without sacrificing flavor! You can prepare the dough up to 24 hours in advance by chilling it in the refrigerator; just tightly wrap it in plastic to maintain its moisture. If you prefer, shape the dough into balls and create the indentations, then cover and refrigerate them for the same timeframe. When you're ready to bake, simply fill the indentations and pop them in the oven. They’ll bake up just as delicious, allowing you to enjoy freshly baked cookies with minimal effort on hectic days.
Thumbprint Cookies Recipe FAQs
What should I look for when selecting fruit preserves for my Thumbprint Cookies?
Absolutely! When choosing fruit preserves, look for jars that contain visible fruit pieces and a rich color. Avoid those with dark spots or a watery consistency, as this may indicate they're past their prime. Fresh preserves will impart vibrant flavors and lovely textures to your cookies.
How should I store my Thumbprint Cookies to keep them fresh?
Very! To store your Thumbprint Cookies, place them in an airtight container at room temperature for up to 5 days. If you want to keep them longer, consider freezing them in a single layer on a baking sheet, then transfer to a freezer-safe bag. They can last up to 3 months frozen without losing flavor or texture!
Can I freeze my Thumbprint Cookies, and how should I do it?
Of course! To freeze, follow these simple steps: First, let the baked cookies cool completely. Then, arrange them in a single layer on a baking sheet so they're not touching. Freeze for about 1-2 hours until solid, then transfer them to a freezer-safe bag, removing as much air as possible before sealing. For the best quality, consume them within 3 months.
What can I do if my dough is too sticky?
If your dough is too sticky, don’t worry! Dust your hands and the surface with a bit of flour while shaping the cookies. If needed, add a tablespoon of flour to the dough until it’s manageable. Just be careful not to add too much, as it can lead to tougher cookies!
Are there any dietary considerations for filling Thumbprint Cookies?
Definitely! If you're adapting the recipe for dietary restrictions, you can use sugar-free fruit preserves or vegan chocolate ganache for a great alternative. Ensure to check the labels for allergens, particularly if serving to kids or anyone with allergies. If you're accommodating pets, it's best to avoid any chocolate fillings altogether, as chocolate is toxic to pets.
What’s the best way to dust powdered sugar on my Thumbprint Cookies?
To dust your cookies evenly with powdered sugar, place the sugar in a fine mesh sieve or a sifter. Hold it above the cookies and gently tap it to create a light, even coating. This method gives a lovely finish without overwhelming the flavor of the cookies!

Delicious Thumbprint Cookies: A Sweet Memory Maker
Equipment
- Electric mixer
- Mixing bowl
- Whisk
- Baking sheet
- parchment paper
- Spoon
- Plastic wrap
Ingredients
Dough
- 1 cup softened butter provides rich and creamy texture
- 1 cup granulated sugar adds sweetness and crunch
- 1 egg yolk enriches the dough
- 1 teaspoon vanilla extract for classic aroma and taste
- 2 ¼ cups all-purpose flour gives structure and chew
- ½ teaspoon salt balances sweetness
Filling
- ½ cup fruit preserves or chocolate ganache choose your favorite filling
Dusting (Optional)
- powdered sugar for an elegant finish
Instructions
Dough Preparation
- Cream together softened butter and granulated sugar until light and fluffy, about 3-5 minutes.
- Beat in egg yolk and vanilla extract until well combined.
- Whisk together all-purpose flour and salt in a separate bowl.
- Gradually add the flour mixture to the butter mixture, stirring until dough forms.
- Cover dough with plastic wrap and refrigerate for at least 30 minutes.
Baking
- Preheat oven to 350°F (175°C) and line a baking sheet with parchment paper.
- Shape dough into tablespoon-sized balls and place on baking sheet 2 inches apart.
- Create indentations in the center of each ball with your thumb.
- Fill each indentation with chosen fruit preserves or chocolate ganache.
- Bake for 12 to 15 minutes until edges are lightly golden.
- Cool on baking sheet for a few minutes, then transfer to a wire rack.
- Dust with powdered sugar if desired before serving.


Leave a Reply