
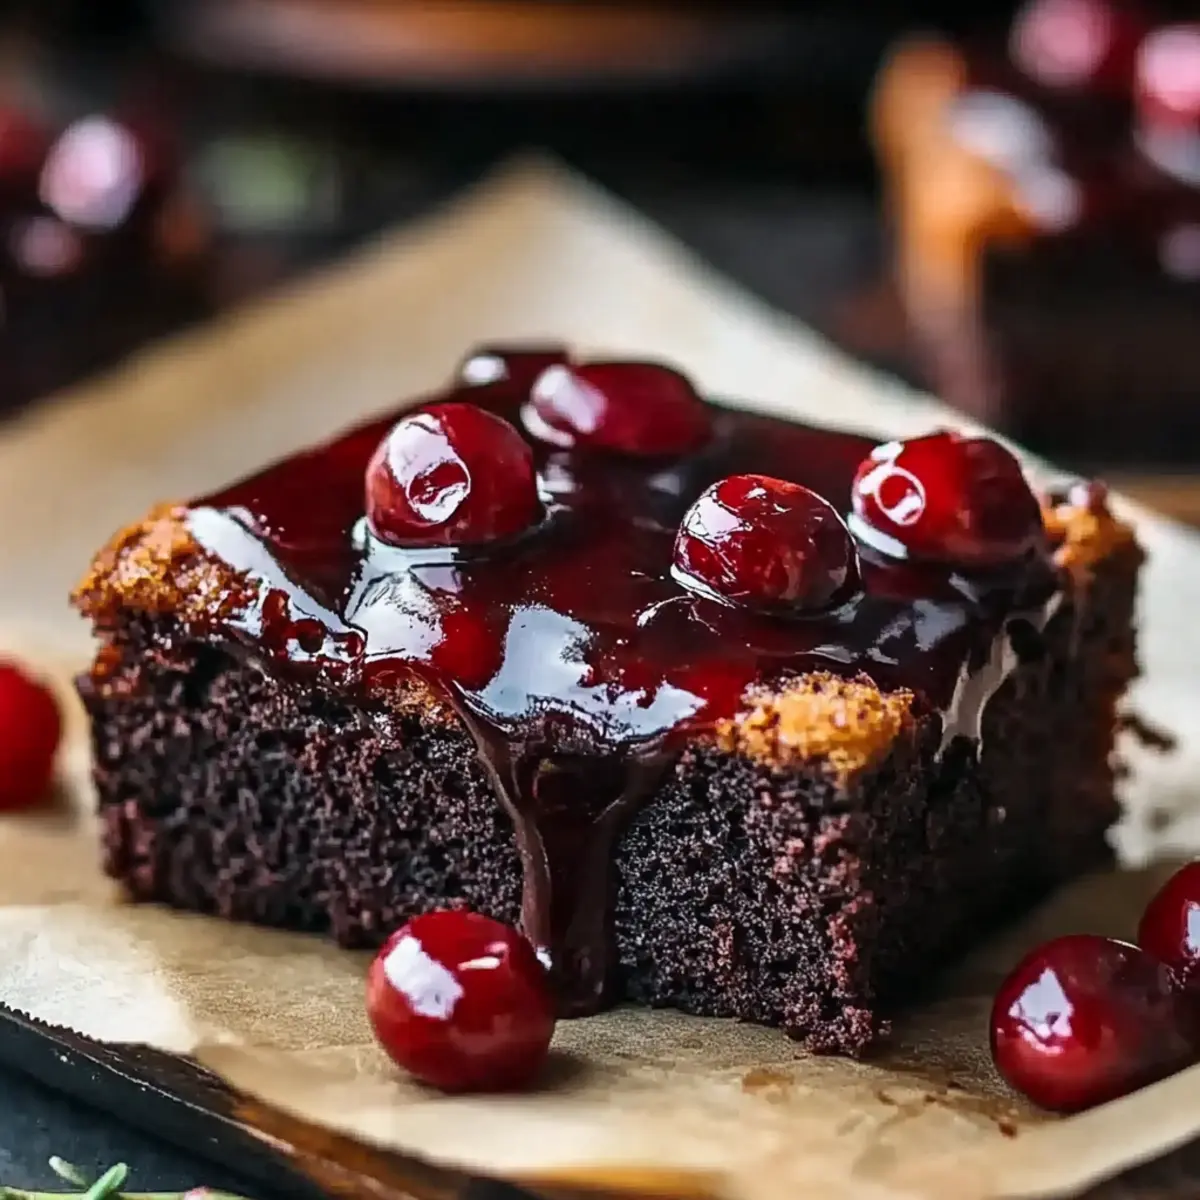
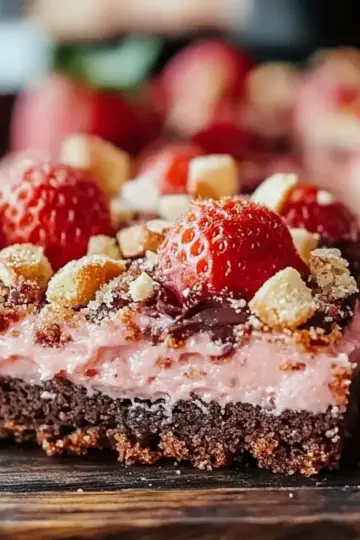
The aroma of roasted cherries danced through my kitchen, weaving an irresistible spell that had me forgetting all about store-bought treats. At that moment, I realized that there was no need for fast food when homemade magic like these Roasted Cherry Brownies was just a bake away. With a quick prep time and just a handful of simple ingredients, you can create a comforting dessert that surprises with every bite. Plus, these brownies are a delightful way to incorporate fresh fruit into your indulgence—perfect for impressing friends and family or simply enjoying a cozy night in. Are you ready to bring a touch of sweet warmth to your day with these decadent bites? Let’s dive into the recipe!

Why are Roasted Cherry Brownies irresistible?
Decadent flavors: The sweet, roasted cherries create a delightful contrast to the rich chocolate base, making each bite an explosion of taste.
Quick and easy: With just 15 minutes of prep time, you can have these brownies in the oven and your kitchen smelling divine in no time, leaving you more moments to enjoy life.
Crowd-pleaser: These Roasted Cherry Brownies are perfect for gatherings! Impress your guests with this unique treat that combines comfort and sophistication in one delicious square.
Versatile delight: They pair wonderfully with ice cream or whipped cream, giving you endless serving options for those special occasions or cozy nights in. Don't forget to check out our tips on baking with fresh fruit for even more inspiration!
No more fast food: Once you taste these homemade brownies, there’s no going back to store-bought desserts. Treat yourself to a wholesome indulgence that warms the heart!
Roasted Cherry Brownie Ingredients
For the Brownies
- ½ cup butter – Melted butter adds richness and moisture to these delightful Roasted Cherry Brownies.
- 1 cup sugar – White sugar enhances the sweetness and balances the rich cocoa flavor.
- 2 large eggs – Eggs provide structure and help bind the ingredients together.
- 1 teaspoon vanilla extract – A splash of vanilla elevates the overall flavor profile of the brownies.
- 1 cup all-purpose flour – This forms the base, creating the classic brownie texture you love.
- ⅓ cup unsweetened cocoa powder – Unsweetened cocoa powder delivers the rich chocolate flavor that defines these brownies.
- ¼ teaspoon salt – A pinch of salt enhances the sweetness, making the flavors pop.
- ½ teaspoon baking powder – This helps the brownies rise slightly, ensuring a light and fluffy texture.
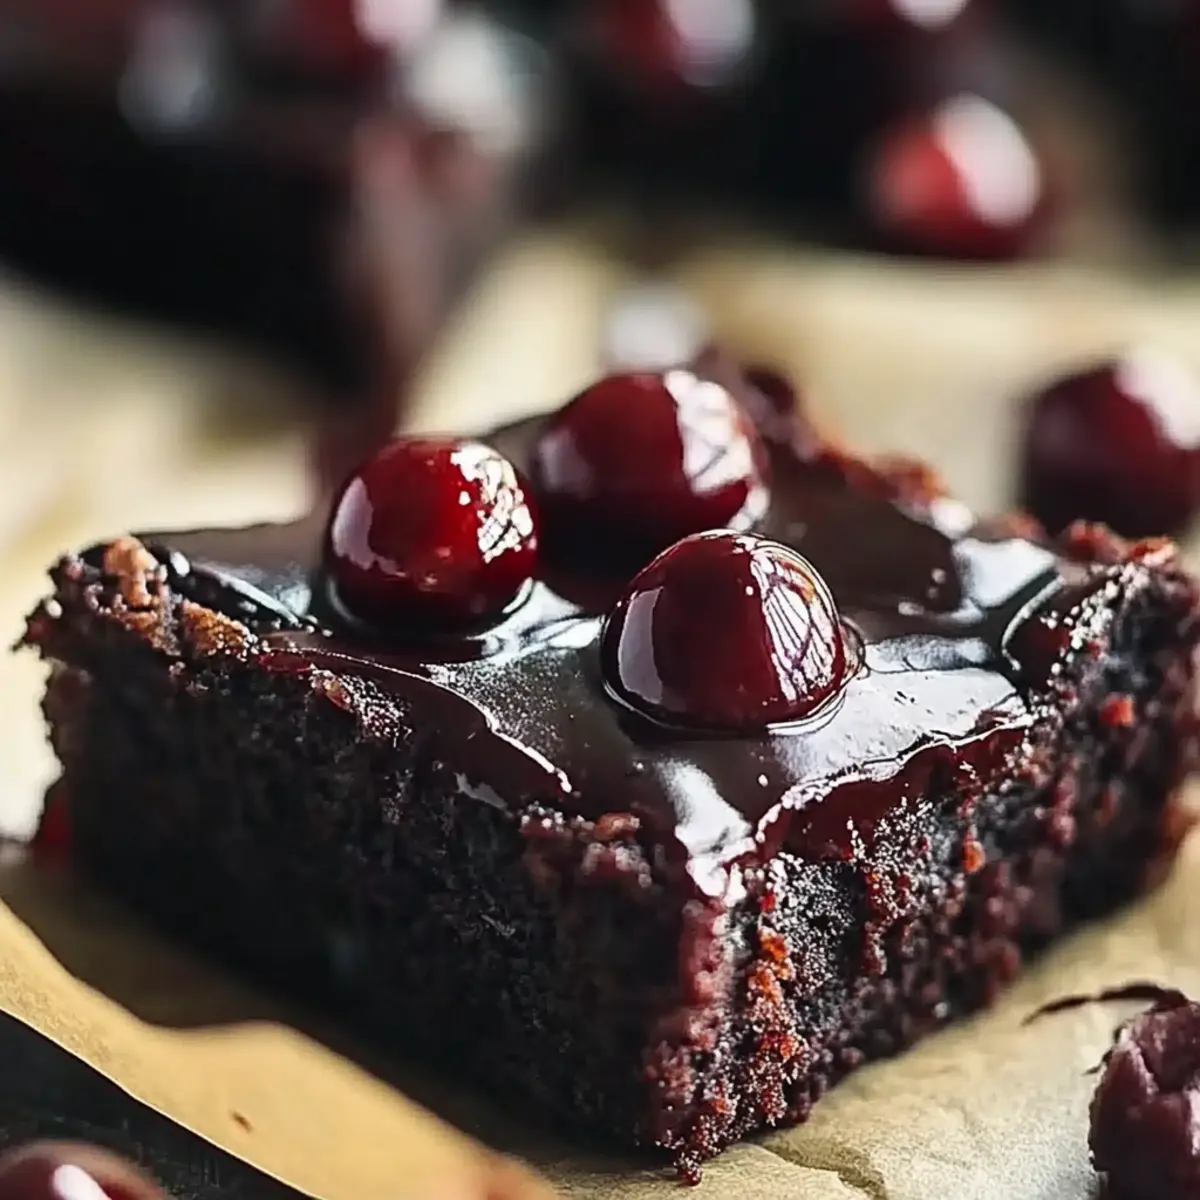
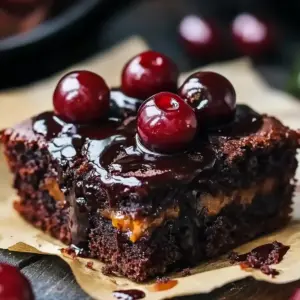
- 1 cup roasted cherries – Roasted cherries lend a burst of flavor and a sweet juiciness that contrasts beautifully with the chocolate.
Feel free to gather all the ingredients, and soon you'll create a deliciously warm batch of Roasted Cherry Brownies that will have everyone coming back for more!
Step‑by‑Step Instructions for Roasted Cherry Brownies
Step 1: Preheat the Oven
Begin by preheating your oven to 350°F (175°C). As you wait for the oven to heat up, take a moment to grease a baking pan with butter or line it with parchment paper to ensure easy removal later. This first step sets the stage for your delicious Roasted Cherry Brownies.
Step 2: Mix the Wet Ingredients
In a mixing bowl, melt ½ cup of butter in the microwave or on the stovetop until completely liquid. Stir in 1 cup of sugar using a whisk or spatula until the mixture is smooth and glossy. The melted butter should create a rich base, inviting other ingredients to blend seamlessly, so continue mixing until well combined.
Step 3: Add Eggs and Vanilla
Crack in 2 large eggs and pour in 1 teaspoon of vanilla extract to the butter-sugar mixture. Stir vigorously until the texture is creamy and uniform—this will help create the perfect fudgy consistency in your Roasted Cherry Brownies. The aroma of vanilla will start to fill the air, tantalizing your senses.
Step 4: Combine Dry Ingredients
In a separate bowl, sift together 1 cup of all-purpose flour, ⅓ cup of unsweetened cocoa powder, ¼ teaspoon of salt, and ½ teaspoon of baking powder. This step is crucial for avoiding lumps and ensuring an even distribution of the dry ingredients, which will add to the airy texture of the brownies once baked.
Step 5: Combine Wet and Dry Ingredients
Gradually add the flour mixture to your wet ingredients, stirring gently with a spatula or wooden spoon. Mix until just combined, being careful not to overmix to maintain that desired fudgy texture in your Roasted Cherry Brownies. The batter should be thick and rich, ready to embrace those juicy cherries.
Step 6: Fold in Roasted Cherries
Next, gently fold in 1 cup of roasted cherries into the batter. Use a spatula to incorporate them evenly without crushing the fruit. The cherries will add a delightful burst of flavor and sweetness with each bite of brownie, enhancing the overall experience of your homemade treat.
Step 7: Prepare for Baking
Pour the brownie batter into your prepared baking pan, spreading it evenly using a spatula. Make sure to level the surface so that they bake uniformly. Your delicious Roasted Cherry Brownies are now ready to make their way to the oven for that heavenly transformation.
Step 8: Bake the Brownies
Place the baking pan in the preheated oven and bake for 30-35 minutes. Keep an eye on the brownies; they are ready when a toothpick inserted into the center comes out clean or with a few moist crumbs. The edges should appear slightly firm while the center remains soft and gooey.
Step 9: Cool and Serve
Once baked, remove the pan from the oven and allow the brownies to cool in the pan for about 15 minutes. After cooling, carefully cut them into squares and serve. The warm and inviting nature of these Roasted Cherry Brownies will surely have everyone asking for seconds!
How to Store and Freeze Roasted Cherry Brownies
Room Temperature: Store the brownies in an airtight container at room temperature for up to 3 days. This keeps them moist and flavorful, perfect for satisfying those sweet cravings.
Fridge: For a slightly longer shelf life, place the brownies in the fridge for up to 1 week. Ensure they are wrapped well or stored in a sealed container to prevent drying out.
Freezer: To enjoy your Roasted Cherry Brownies later, freeze them in individual squares wrapped in plastic wrap, then store in a freezer-safe bag or container for up to 3 months. Thaw in the fridge before serving.
Reheating: If you prefer your brownies warm, simply pop them in the microwave for 10-15 seconds before serving. Enjoy a warm, chocolaty treat any time you like!
Roasted Cherry Brownies Variations & Substitutions
Feel free to get creative with these Roasted Cherry Brownies; the possibilities are endless and oh-so-delicious!
-
Vegan: Replace the butter with coconut oil and use flax eggs instead of regular eggs. This keeps the richness while catering to a plant-based diet.
-
Gluten-Free: Swap the all-purpose flour with almond flour or a gluten-free flour blend to create a delightful gluten-free brownie that everyone can enjoy.
-
Nutty Twist: Stir in ½ cup of chopped walnuts or pecans for added crunch and richness. The nutty flavor harmonizes perfectly with the sweet cherries and chocolate.
-
Minty Fresh: Add a teaspoon of peppermint extract with the vanilla for a refreshing minty flavor that’s a fun twist on classic brownies.
-
Spicy Kick: A sprinkle of cayenne pepper or chili powder in the batter adds a surprising kick, balancing the sweetness of the cherries beautifully.
-
Fruit Fusion: Substitute the roasted cherries with raspberries or strawberries for a different fruity burst, allowing you to change the flavor profile yet keep the delicious essence of the brownies.
-
Chocolate Lovers: For an extra chocolatey treat, add ½ cup of chocolate chips to the batter. This will make your brownies fudgier and even more chocolate-filled!
-
Caramel Drizzle: Top your brownies with a drizzle of caramel sauce before baking for an indulgent caramel-cherry pairing that will leave everyone craving for more.
Each variation adds its special flair, ensuring that every batch of Roasted Cherry Brownies becomes a new experience. Don’t hesitate to visit our article on baking with fresh fruit for even more delightful ideas!
Expert Tips for Roasted Cherry Brownies
-
Choose Fresh Cherries: Use ripe, sweet cherries for the best flavor. Roasting enhances their sweetness, making them even more delightful in your brownies.
-
Don’t Overmix: When combining the wet and dry ingredients, mix until just combined. Overmixing can lead to dense brownies instead of that lovely fudgy texture we all crave.
-
Check for Doneness: Use a toothpick to check if your brownies are done. If it comes out with a few moist crumbs, they are just perfect!
-
Experiment with Add-ins: Feel free to add nuts or a sprinkle of sea salt on top before baking for added texture and flavor in your Roasted Cherry Brownies.
-
Let Them Cool: Allow the brownies to cool in the pan for at least 15 minutes. This helps set the texture, making it easier to cut them into squares without crumbling.
Make Ahead Options
These Roasted Cherry Brownies are perfect for meal prep enthusiasts! You can prepare the brownie batter up to 24 hours in advance by mixing together the wet and dry ingredients before folding in the roasted cherries. Store the batter in an airtight container in the refrigerator to maintain freshness. When you're ready to bake, simply take the batter out, fold in the cherries, and pour it into the prepared pan. This ensures your brownies are just as delicious while saving you valuable time on busy evenings. For a deeper flavor, consider allowing the batter to sit overnight—your taste buds will thank you!
What to Serve with Roasted Cherry Brownies?
Indulging in a warm, gooey brownie is wonderful, but pairing it with delightful accompaniments elevates the experience to new heights.
- Vanilla Ice Cream: The creaminess of vanilla ice cream beautifully balances the richness of the brownies while adding a cooling touch.
- Whipped Cream: A fluffy dollop on top enhances the chocolate flavor and adds a light, airy contrast. Perfect for those who adore a little extra sweetness!
- Fresh Berries: A medley of fresh berries not only adds a pop of color but the tartness cuts through the sweetness of the brownies, creating a pleasing balance of flavors.
- Chocolate Sauce: Drizzled over the top, it intensifies the chocolate experience, satisfying any chocolate lover's dream! Enjoy it warm for that extra indulgence.
- Chopped Nuts: Toasted pecans or walnuts add a delightful crunch, contrasting with the smooth texture of the brownies. They also provide a nutty richness enhancing every bite.
- Espresso or Coffee: A strong cup of coffee or espresso pairs perfectly with the brownies, highlighting their chocolate flavors while providing a warm, comforting counterpoint.
- Caramel Sauce: A drizzle of rich caramel creates a sweet and salty blend, enhancing the creamy chocolate base and roasted cherries.
- Mint Tea: For a refreshing finish, mint tea cleanses the palate between bites, leaving you feeling satisfied and ready for another square.
- Coconut Whipped Cream: For a dairy-free option, this tropical whipped cream adds a delightful sweetness and unique flavor that complements the cherries beautifully.
Roasted Cherry Brownies Recipe FAQs
How do I select ripe cherries for roasting?
Absolutely! When selecting cherries, look for firm, shiny skin without any dark spots or wrinkles. They should have a sweet aroma, indicating ripeness. Opt for cherries that give slightly when pressed but aren't too soft, as those will provide the best flavor and texture when roasted!
What is the best way to store Roasted Cherry Brownies?
You can store your Roasted Cherry Brownies in an airtight container at room temperature for up to 3 days. If you're looking to keep them fresh longer, refrigerate them for up to a week, ensuring they're well-wrapped to prevent drying out. They’re still pretty tasty after a few days, but I recommend eating them sooner for the best flavor!
Can I freeze Roasted Cherry Brownies?
Yes, you can absolutely freeze these delicious treats! First, let the brownies cool completely. Then, cut them into individual squares and wrap each piece in plastic wrap. Place them in a freezer-safe bag or container, and they will last for up to 3 months. When you're ready to enjoy, simply thaw them in the fridge overnight or pop them in the microwave for 10-15 seconds for a warm, gooey bite!
What should I do if my brownies are too dry?
Very! If your brownies turn out dry, they may have been overbaked or overmixed. To avoid this, always check for doneness at around 30 minutes, and use a toothpick—look for moist crumbs, not a clean pick! If dry brownies are still your fate, try serving them with a scoop of ice cream or a drizzle of warm chocolate sauce to bring back some moistness!
Can I adapt this recipe for dietary restrictions, such as gluten-free or dairy-free?
Absolutely! To make gluten-free Roasted Cherry Brownies, simply substitute the all-purpose flour with a 1:1 gluten-free flour blend. For a dairy-free version, replace the butter with coconut oil or a plant-based butter alternative. Just keep in mind that these swaps may slightly alter the texture, but they’ll still taste heavenly!
Are Roasted Cherry Brownies safe for my pet if they get a bite?
Very! While the ingredients used in Roasted Cherry Brownies, like cherries in moderation, are generally safe for pets, the sugar, butter, and chocolate can be harmful to them. I highly recommend keeping these treats out of reach from pets, ensuring that your baking treats remain enjoyed only by you and your loved ones!
Delicious Roasted Cherry Brownies for a Sweet Treat Experience
Equipment
- Oven
- Mixing bowl
- Baking Pan
- Spatula
- Whisk
Ingredients
Brownie Ingredients
- ½ cup butter Melted butter adds richness and moisture.
- 1 cup sugar White sugar enhances sweetness.
- 2 large eggs Provides structure and binds ingredients.
- 1 teaspoon vanilla extract Elevates the flavor profile.
- 1 cup all-purpose flour Forms the brownie base.
- ⅓ cup unsweetened cocoa powder Delivers rich chocolate flavor.
- ¼ teaspoon salt Enhances sweetness.
- ½ teaspoon baking powder Helps the brownies rise.
- 1 cup roasted cherries Adds flavor and juiciness.
Instructions
Step-by-Step Instructions
- Preheat the oven to 350°F (175°C) and prepare a baking pan.
- Melt ½ cup of butter and mix with 1 cup of sugar until smooth.
- Add 2 large eggs and 1 teaspoon of vanilla extract, stirring until creamy.
- Sift together 1 cup of flour, ⅓ cup cocoa powder, ¼ teaspoon salt, and ½ teaspoon baking powder.
- Gradually mix the dry ingredients into the wet ingredients until just combined.
- Fold in 1 cup of roasted cherries gently.
- Pour the batter into the prepared pan and level the surface.
- Bake for 30-35 minutes or until a toothpick comes out clean.
- Allow to cool for 15 minutes before cutting into squares and serving.

Leave a Reply