
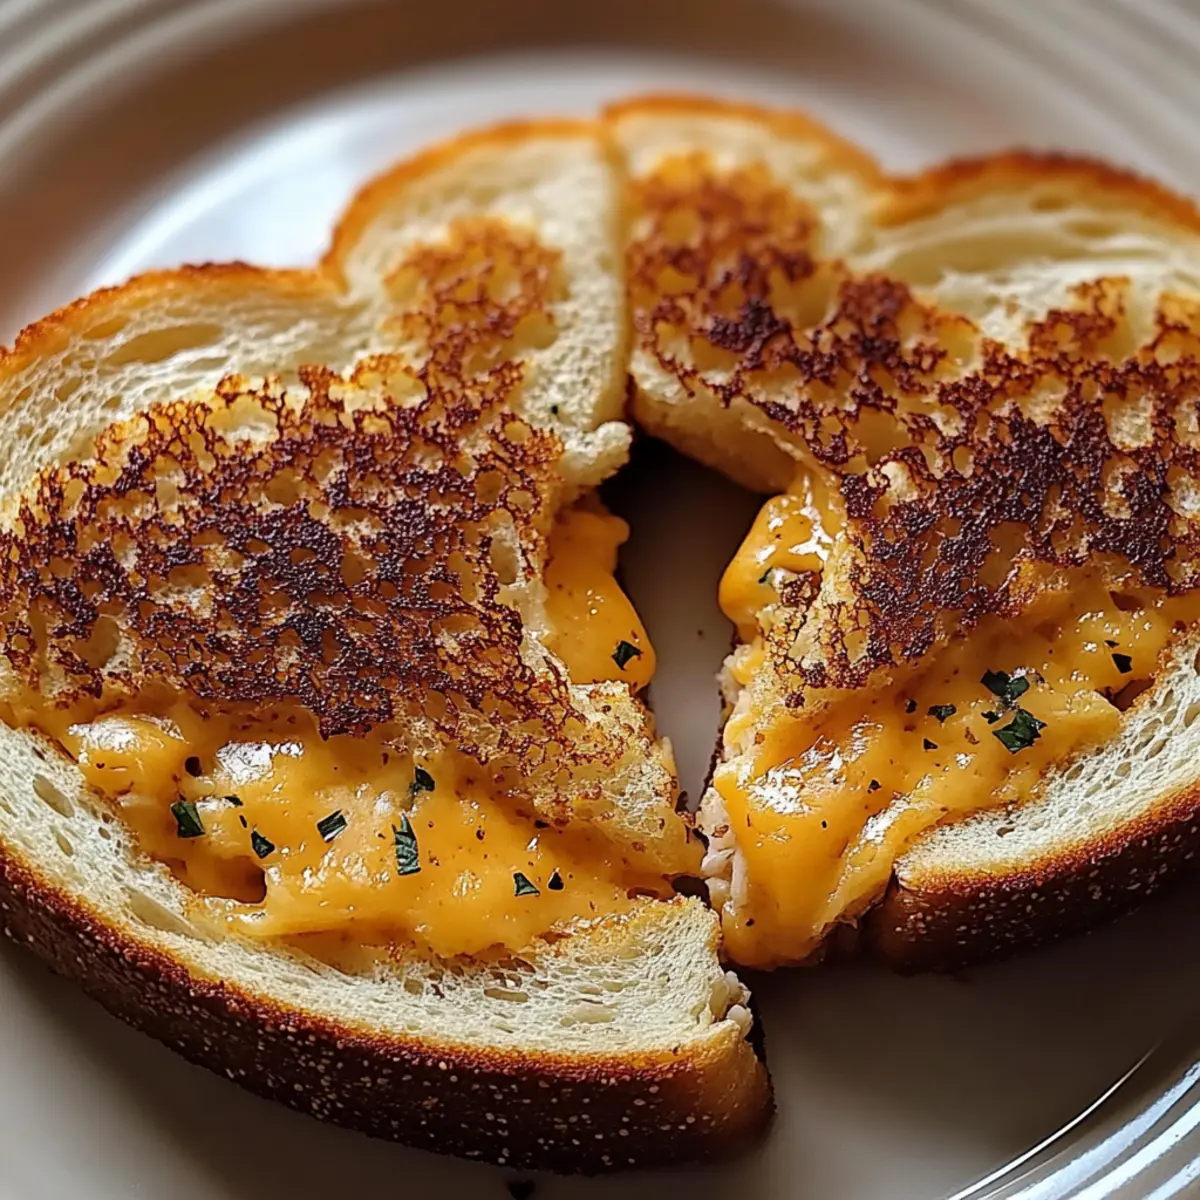
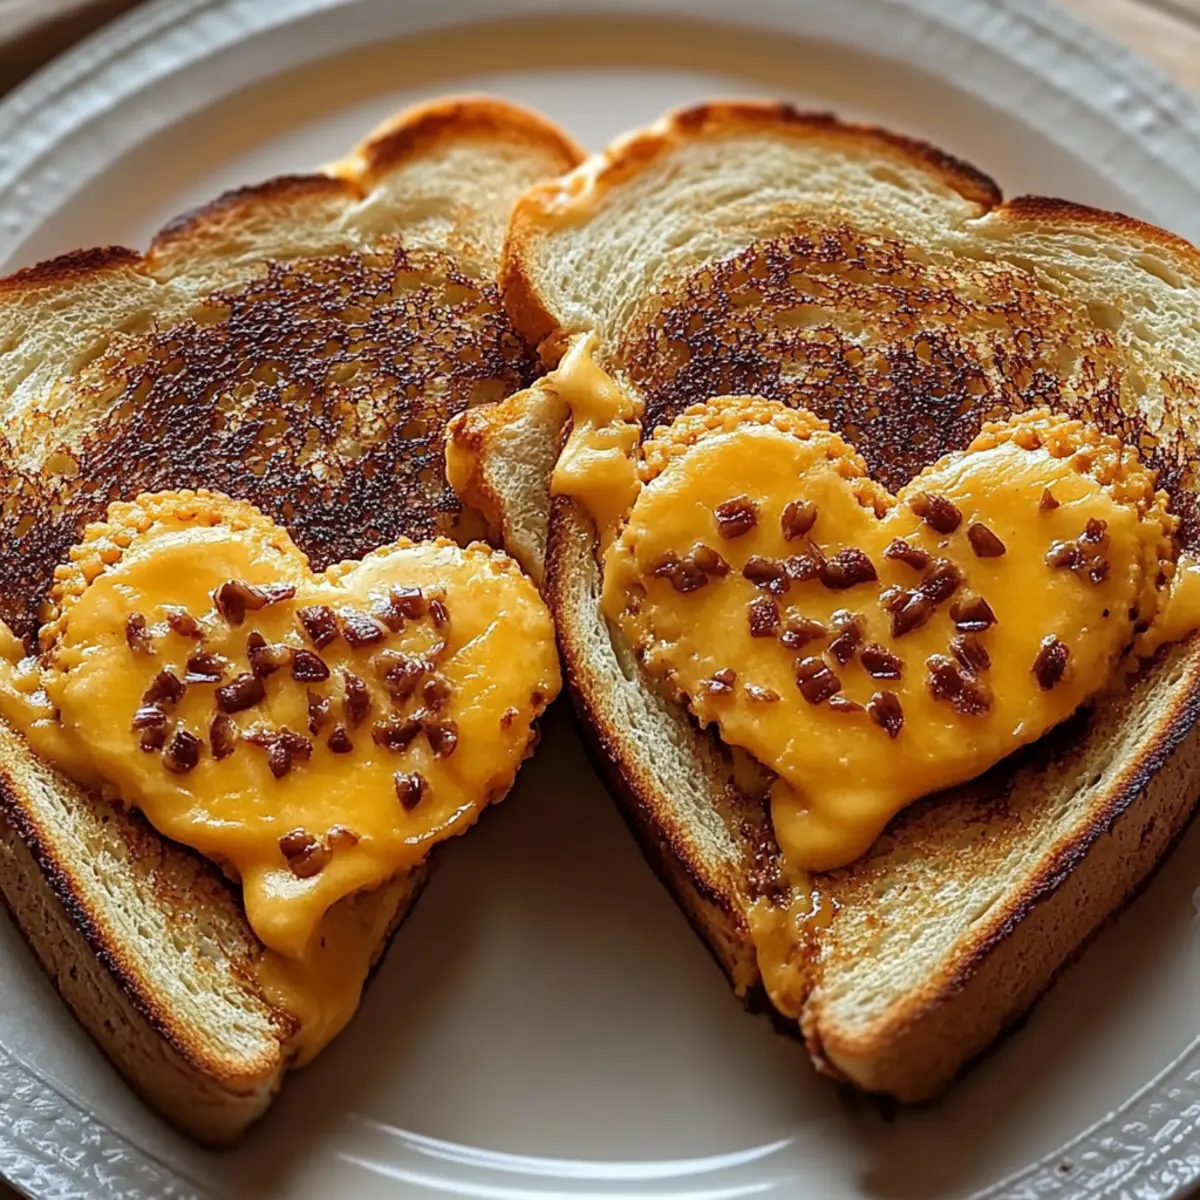
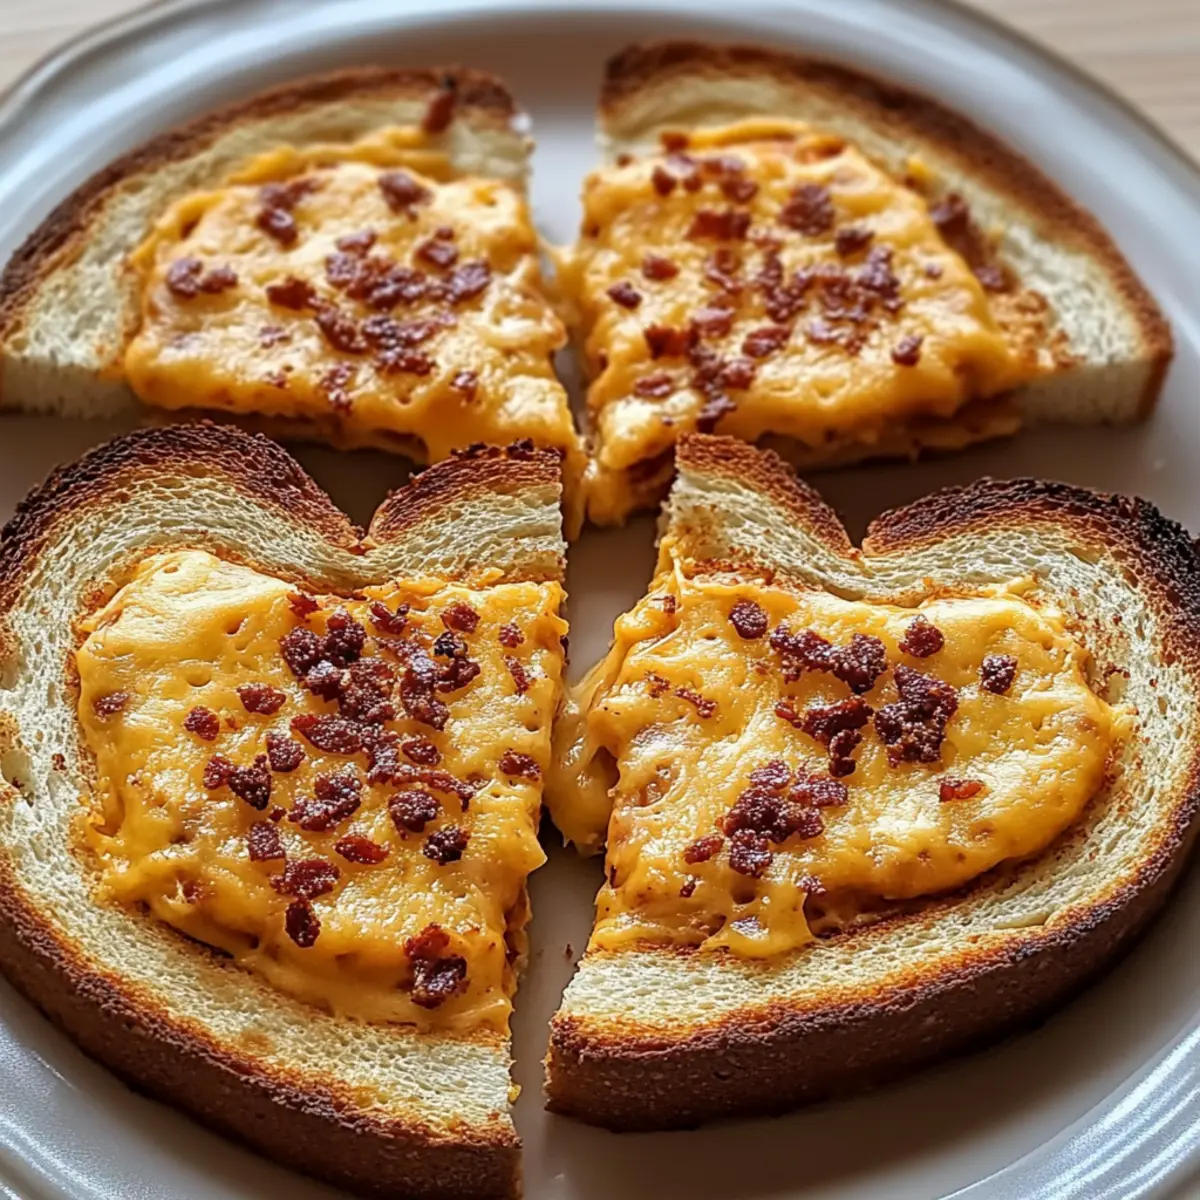
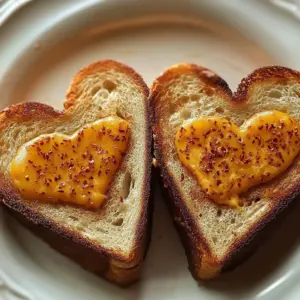
As I was flipping through an old recipe book, I stumbled upon a delightful twist on a classic favorite that instantly took me back to my childhood—Heart-Shaped Grilled Cheese Dippers. This fun and whimsical spin on a traditional grilled cheese sandwich is not only quick to prepare but also makes for a delightful addition to any lunch or snack time. Picture perfectly golden, crispy sandwiches, cut into charming hearts, ready for dips and deliciousness. These dippers are the ultimate comfort food that can turn an ordinary day into a special occasion. Plus, they invite endless customization, meaning you can add your favorite spices for that extra zing. So, are you ready to fall in love with lunch all over again? Let’s get cooking!
Why Are Heart-Shaped Dippers Special?
Whimsical and delightful, these Heart-Shaped Grilled Cheese Dippers add a playful twist to a classic comfort food. Quick to prepare, they’re perfect for busy days when you crave something easy yet satisfying. Customizable with optional spices like garlic powder and paprika, they can cater to any palate. Great for sharing, these dippers turn any gathering into a fun eating experience, whether it’s for kids or adults. For those looking to elevate their lunch game, this recipe is a must-try!
Heart-Shaped Grilled Cheese Dippers Ingredients
• Get ready for a cozy meal with these fun dippers!
For the Sandwiches
- 4 slices bread – choose your favorite type, from whole grain to sourdough, to add texture and flavor.
- 4 slices cheese – cheddar or American melts beautifully; feel free to mix for extra flavor!
For the Spread
- 2 tablespoons butter – softened for easy spreading; it’ll give your dippers that irresistible golden crust.
- 1 tablespoon mayonnaise (optional) – adds creaminess; leave it out for a classic taste.
For the Seasoning
- 1 pinch garlic powder (optional) – a sprinkle elevates the classic flavor profile of grilled cheese.
- 1 pinch paprika (optional) – adds a subtle smokiness and a touch of vibrant color.
Embrace the magic of heart-shaped grilled cheese dippers and let them bring joy to your table!
Step‑by‑Step Instructions for Heart-Shaped Grilled Cheese Dippers
Step 1: Prepare the Bread and Cheese
Begin by laying out your four slices of bread flat on a cutting board. Top each slice with a piece of cheese, ensuring it covers the bread completely. The choice of cheddar or American cheese works beautifully as both melt perfectly. This step sets the foundation for your Heart-Shaped Grilled Cheese Dippers, so make sure the cheese is placed evenly.
Step 2: Create Heart Shapes
Using a heart-shaped cookie cutter, press down firmly on the bread and cheese to cut out adorable heart shapes. Aim for a clean cut to ensure the hearts hold their shape during cooking. This step adds a whimsical touch to your dippers, making them visually appealing and perfect for sharing. Gather the leftover bread scraps for later use or toss them into a food processor for breadcrumbs!
Step 3: Butter the Sandwiches
Take your softened butter and spread a generous layer on one side of each heart-shaped sandwich. This butter will be key in giving your dippers that irresistible golden brown crust. Make sure each heart is well-coated, as it will help achieve that crispy, savory exterior during the cooking process. Having all sandwiches ready before cooking will make the next step smooth and efficient.
Step 4: Heat the Skillet
Preheat a non-stick skillet over medium heat. Once warmed, arrange the sandwiches butter-side down in the skillet, allowing them to sizzle gently as they begin cooking. It's vital to use medium heat to ensure the bread toasts perfectly without burning, setting the stage for delectable Heart-Shaped Grilled Cheese Dippers with a crunchy texture.
Step 5: Season and Flip
If you choose to use it, spread a thin layer of mayonnaise on the unbuttered side of each sandwich. Sprinkle a pinch of garlic powder and paprika on top for added flavor. Carefully monitor the cooking process and after about 2 to 3 minutes, check for a golden-brown bottom before flipping each heart to cook the other side until crispy and the cheese melts nicely.
Step 6: Finishing Touches
Once both sides of your Heart-Shaped Grilled Cheese Dippers are golden brown and the cheese is fully melted, remove them from the skillet. Allow them to cool slightly on a paper towel to blot any excess butter. This step prevents sogginess, ensuring your dippers retain their delightful crunch before serving.
Step 7: Serve and Enjoy
Finally, arrange your beautiful Heart-Shaped Grilled Cheese Dippers on a plate and pair them with your favorite dipping sauce, whether it’s a classic tomato soup or a spicy salsa. This presentation not only highlights the fun shape but also emphasizes how these dippers are perfect for sharing and enjoying cozy moments.
Heart-Shaped Grilled Cheese Dippers Variations
Feel free to get creative and customize these dippers with delightful twists that will awaken your taste buds!
-
Dairy-Free: Substitute cheese with vegan cheese or dairy-free alternatives for a comforting yet lactose-free version. Your heart-shaped creation will still shine!
-
Spicy Kick: Add a pinch of red pepper flakes or a few drops of hot sauce to the spread for a spicy version that adds a fun heat to your meal. It’s perfect for those who crave a bit of warmth!
-
Herb-Infused: Mix fresh or dried herbs like oregano, basil, or thyme into the butter for a fragrant, herbaceous twist. Each bite brings a burst of fresh flavor that will remind you of sunny days in the garden.
-
Crunchy Upgrade: Incorporate finely chopped nuts, like walnuts or almonds, into the cheese layer for added crunch and flavor. This delightful texture enhancement creates a satisfying contrast to the melted cheese.
-
Sweet Version: Use cinnamon and sugar on the outside of the bread with a drizzle of maple syrup for a dessert-style dipper. Pair it with fruit preserves for a sweet treat that’s perfect for brunch!
-
Whole Grain Twist: Choose whole grain or seed-based bread for a healthier version packed with fiber. This alternative not only adds nutritional value but promotes a delightful nutty flavor in every bite.
-
Loaded Veggie Dippers: Add sliced tomatoes, spinach, or avocado inside the heart before grilling for a heartier option. Each dippable slice is a wholesome meal, bursting with flavor and nutrients!
-
Pesto Infusion: Spread pesto on the bread before adding cheese for a gourmet touch. The basil flavor elevates these dippers, making them a hit at gatherings. Pair with a light salad for an irresistible combo!
Expert Tips for Heart-Shaped Grilled Cheese Dippers
-
Choose Quality Bread: Use fresh, artisanal bread for a chewy texture and enhanced flavor. Avoid stale bread, as it won’t toast well.
-
Perfect Cheese Melt: Make sure to use cheese that melts easily, like cheddar or American. Avoid using hard cheeses; they won’t give you that gooey interior.
-
Butter Generously: Spread a good amount of softened butter to ensure a crispy, golden crust. Skipping this step can lead to soggy dippers that lack crunch.
-
Control Cooking Heat: Keep the skillet on medium heat to avoid burning. If it’s too hot, the bread will brown before the cheese is melted.
-
Experiment with Spice: Don’t hesitate to add your favorite herbs or spices to the sandwiches for extra flavor. Just remember, a little goes a long way in enhancing these heart-shaped grilled cheese dippers!
-
Serve Warm: Enjoy your dippers fresh off the skillet for the best taste. Letting them sit for too long may make them lose their delightful crunch.
Make Ahead Options
These Heart-Shaped Grilled Cheese Dippers are fantastic for meal prep, making your busy weeknights a breeze! You can prepare the sandwiches up to 24 hours in advance by assembling the heart-shaped bread and cheese, then storing them in an airtight container in the refrigerator. To maintain quality and prevent sogginess, butter the outer sides just before cooking. When you’re ready to serve, heat a non-stick skillet over medium heat and proceed to cook the dippers — just like you would if they were made fresh! This prep-ahead approach ensures you can enjoy these charming dippers with minimal effort, perfect for hurried lunches or fun family dinners.
How to Store and Freeze Heart-Shaped Grilled Cheese Dippers
Fridge: Store leftover Heart-Shaped Grilled Cheese Dippers in an airtight container for up to 3 days. Place parchment paper between the layers to keep them from sticking together.
Freezer: For longer storage, wrap individual dippers in plastic wrap, then place them in a freezer bag. They’ll stay fresh for up to 2 months; just remember to label them!
Reheating: Reheat in a toaster oven or skillet over medium-low heat until warm and crispy, about 5-7 minutes. Avoid microwaving, as it can make them soggy.
Serving Tips: Enjoy the dippers while still warm for the best taste. Pair them with your favorite dipping sauce for a delightful treat!
What to Serve with Heart-Shaped Grilled Cheese Dippers
Imagine the aroma of crispy perfection filling the kitchen as you create a delightful meal around these playful dippers.
- Tomato Soup: This classic pairing offers a comforting contrast, allowing you to dip and savor every bite of cheesy goodness.
- Fresh Garden Salad: A light salad with crisp greens and vibrant veggies adds a refreshing crunch that perfectly complements the cheesy richness.
- Spicy Salsa: For a zesty twist, serve with fresh salsa that balances the buttery dippers, inviting a burst of flavor in every dip.
- Creamy Avocado Dip: The creaminess of avocado elevates your dippers, providing a rich and nutty flavor that’s indulgent and delightful.
- Sweet Potato Fries: Crunchy, slightly sweet fries contrast beautifully with melted cheese, offering a warm harmony that enhances your meal.
- Apple Slices with Honey: The crisp, sweet taste of apples dipped in honey adds an unexpected fruity element to the salty dippers, making every bite fun.
- Sparkling Lemonade: A refreshing drink like sparkling lemonade cleanses the palate, making it the perfect companion to your cheesy delights.
- Chocolate Dipped Strawberries: For a sweet finish, pair your meal with these decadent strawberries, creating a blissful end to your heart-shaped feast!
Heart-Shaped Grilled Cheese Dippers Recipe FAQs
What type of bread should I use for Heart-Shaped Grilled Cheese Dippers?
Absolutely! For Heart-Shaped Grilled Cheese Dippers, I recommend using fresh bread with a sturdy texture, like sourdough or whole grain. These choices not only hold up well when cut into shapes but also add a distinctive flavor that enhances the overall experience. Avoid stale bread, as it will yield a less appealing texture when toasting.
How should I store leftover Heart-Shaped Grilled Cheese Dippers?
Very good question! To keep your dippers at their best, store them in an airtight container in the fridge for up to 3 days. To prevent them from sticking together, place parchment paper between layers. This method helps maintain their lovely texture and ensures they’re ready to enjoy in a pinch!
Can I freeze Heart-Shaped Grilled Cheese Dippers?
Of course! Freezing these delightful dippers is easy. Wrap each cooled dipper individually in plastic wrap, then place them in a freezer-safe bag or container to avoid freezer burn. They can be kept for up to 2 months! Just make sure to label the bag with the date for quick reference.
What’s the best way to reheat frozen Heart-Shaped Grilled Cheese Dippers?
To bring your frozen dippers back to life, I recommend reheating them in a toaster oven or skillet set to medium-low heat. This method usually takes about 5-7 minutes until they’re warm and crispy again. Avoid using a microwave, as it can leave them soggy instead of deliciously crunchy.
Are there any dietary considerations I should keep in mind with this recipe?
Great inquiry! If you’re cooking for someone with dairy allergies, consider using dairy-free cheese alternatives to create a delicious variation of the Heart-Shaped Grilled Cheese Dippers. For those on gluten-free diets, opt for gluten-free bread which works just as well. Always double-check labels to ensure all ingredients fit your dietary needs!
Heart-Shaped Grilled Cheese Dippers for Cozy Eating Fun
Equipment
- Non-stick skillet
- Heart-shaped cookie cutter
- Cutting Board
Ingredients
For the Sandwiches
- 4 slices bread choose your favorite type, from whole grain to sourdough
- 4 slices cheese cheddar or American melts beautifully
For the Spread
- 2 tablespoons butter softened for easy spreading
- 1 tablespoon mayonnaise optional for creaminess
For the Seasoning
- 1 pinch garlic powder optional for flavor enhancement
- 1 pinch paprika optional for smokiness and color
Instructions
Step-by-Step Instructions
- Prepare the Bread and Cheese: Lay out your four slices of bread flat on a cutting board. Top each with a piece of cheese, covering the bread completely.
- Create Heart Shapes: Use a heart-shaped cookie cutter to cut out heart shapes from the bread and cheese.
- Butter the Sandwiches: Spread a generous layer of softened butter on one side of each heart-shaped sandwich.
- Heat the Skillet: Preheat a non-stick skillet over medium heat and arrange the sandwiches butter-side down.
- Season and Flip: If using mayonnaise, spread a thin layer on the unbuttered side, and sprinkle a pinch of garlic powder and paprika. Cook until golden-brown before flipping.
- Finishing Touches: Remove the dippers from the skillet once both sides are golden brown and the cheese melts.
- Serve and Enjoy: Arrange on a plate and pair with your favorite dipping sauce.


Leave a Reply