
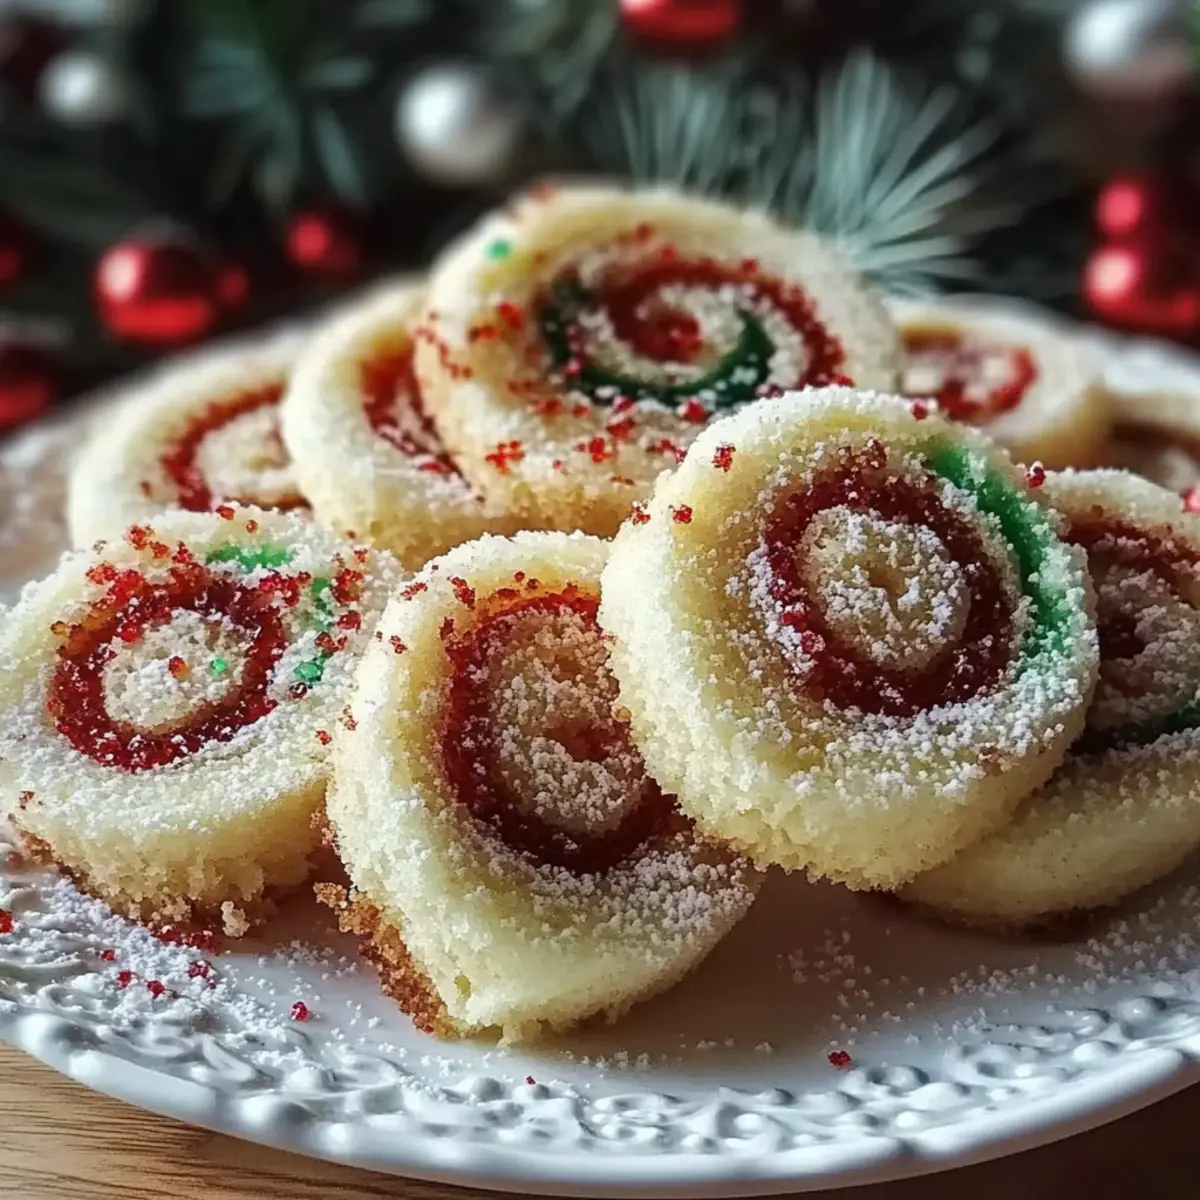
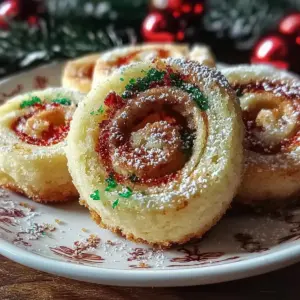
If you've ever crafted a colorful paper chain during the holiday season, you'll feel right at home making these Christmas Pinwheel Cookies. This delightful recipe combines classic flavors with a playful twist, making it the perfect treat for holiday gatherings or cozy nights in. With just 25 minutes of prep time, you can whip up a batch that's not only eye-catching but also a crowd-pleaser—who can resist those festive swirls? Each bite offers a comforting blend of buttery goodness, chocolate richness, and that signature crunch of festive sprinkles. Plus, these cookies are freezer-friendly, allowing you to share your holiday spirit long after the last present is unwrapped. Ready to roll up some fun in the kitchen? Let’s dive into the magic of these colorful pinwheel delights!
Why are Christmas Pinwheel Cookies special?
Unique, festive design: These cookies bring holiday cheer with their vibrant red and green swirls, making them the perfect centerpiece for your dessert table.
Delightfully delicious: The combination of buttery dough and rich cocoa guarantees a taste that will keep everyone coming back for more.
Easy to make: With simple steps, these cookies are perfect for bakers of any skill level. You can whip up a batch in just over an hour!
Perfect for sharing: Ideal for holiday parties, these cookies are a hit with guests and also make thoughtful gifts.
Freezer-friendly: Make a double batch and freeze some for later—your future self will thank you when you have festive treats on hand!
If you're looking for more sweet ideas, check out my Classic Gingerbread Cookies or consider a twist with these Peppermint Bark Brownies.
Christmas Pinwheel Cookies Ingredients
• Get ready to create the magic!
For the Dough
- 1 cup unsalted butter, softened – This key ingredient adds a rich flavor and tender texture to your cookies.
- 1 ½ cups granulated sugar – Sweetens the dough for that classic cookie taste; brown sugar can substitute for a deeper flavor.
- 1 large egg – Binds the ingredients together and contributes to the cookies’ delightful fluffiness.
- 1 teaspoon vanilla extract – Enhances the overall sweetness and gives a warm, comforting aroma.
For the Dry Mix
- 2 ½ cups all-purpose flour – The foundation of the dough, providing structure.
- 1 teaspoon baking powder – Leavens the cookies, giving them a light and airy bite.
- ¼ teaspoon salt – Balances the sweetness and enhances the other flavors.
- ⅓ cup unsweetened cocoa powder – Adds a rich chocolate flavor; be sure to sift for a smooth blend.
For the Festive Touch
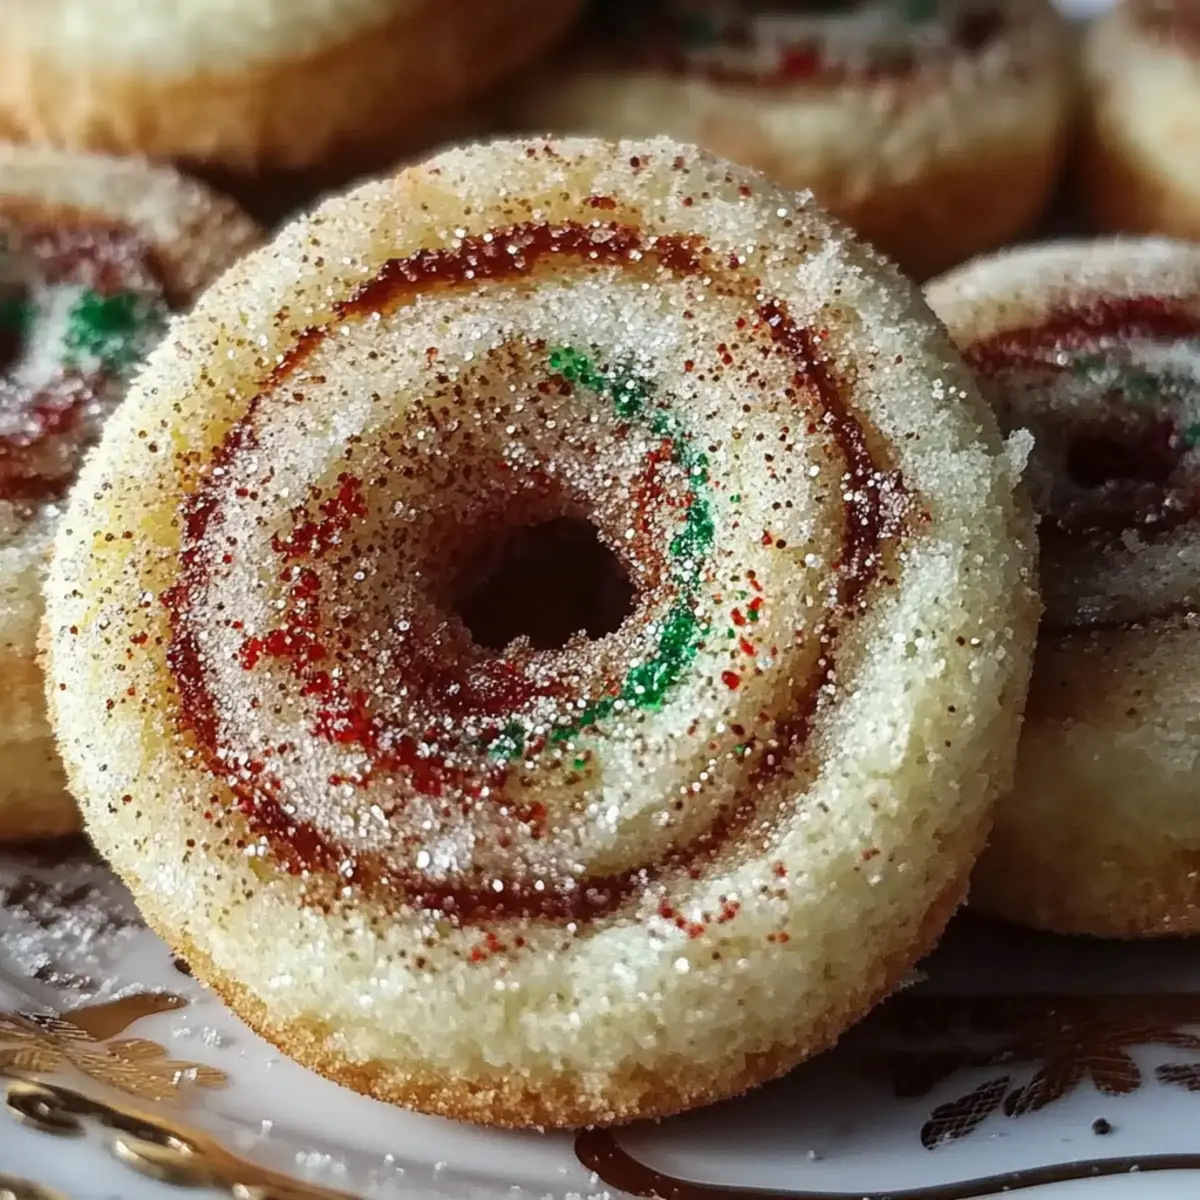
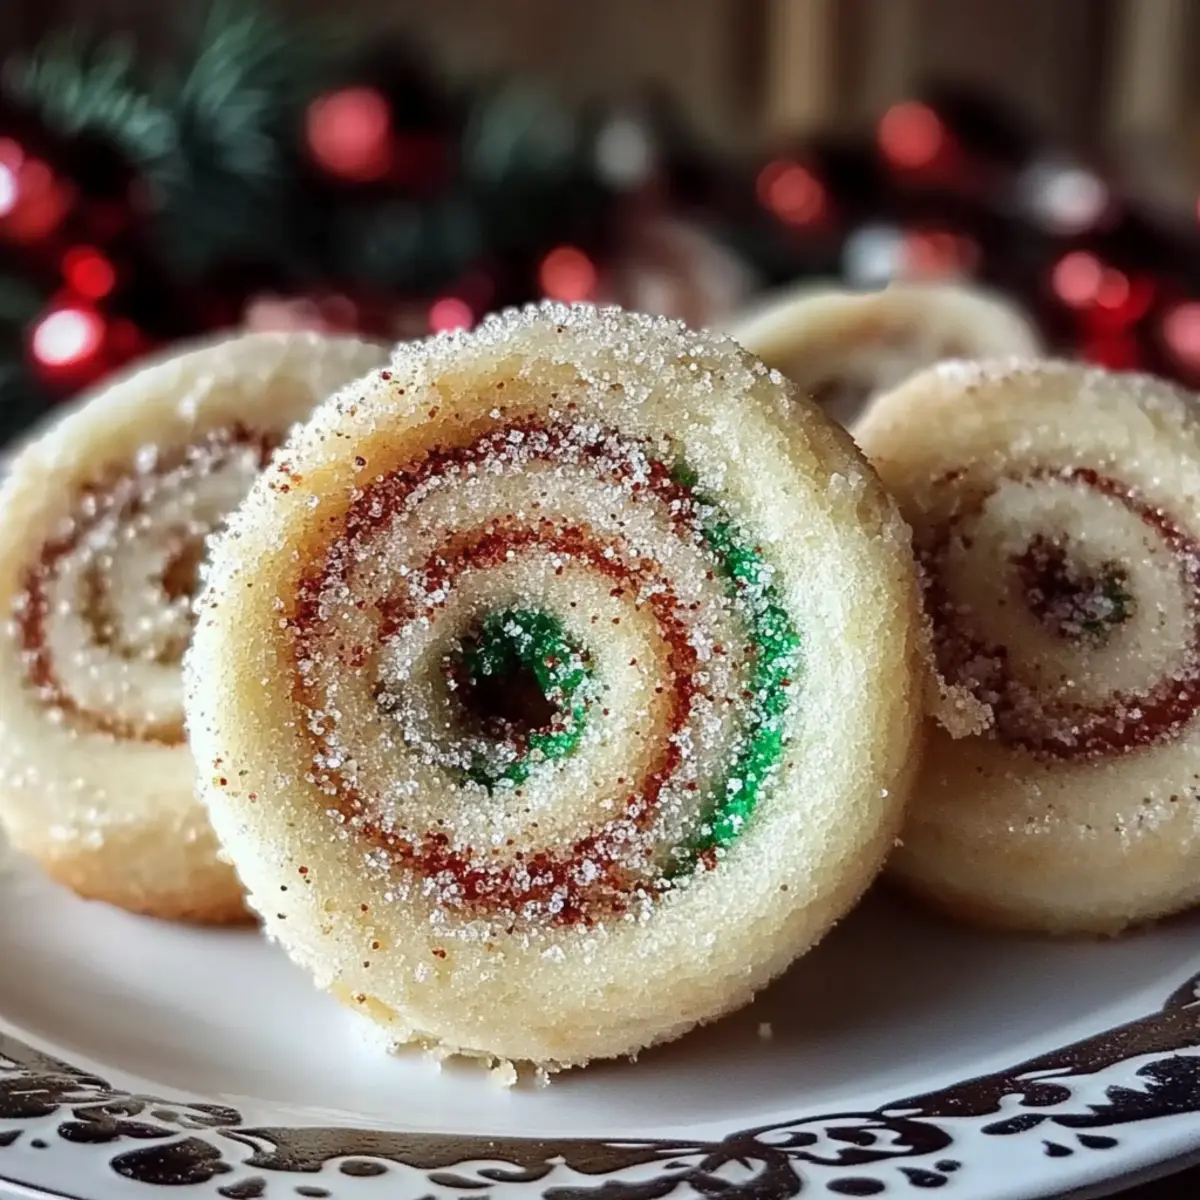
- ½ cup red and green sprinkles – These vibrant sprinkles make these Christmas Pinwheel Cookies a visually delightful treat.
- ¼ cup crushed peppermint candies – Optional, but they add a refreshing crunch for a fun holiday twist!
Step‑by‑Step Instructions for Christmas Pinwheel Cookies
Step 1: Preheat and Prepare
Begin by preheating your oven to 350°F (175°C). While it heats, line two baking sheets with parchment paper to prevent sticking. This preparation makes for easy cleanup and ensures your Christmas Pinwheel Cookies come out perfectly shaped.
Step 2: Cream Butter and Sugar
In a large mixing bowl, cream together 1 cup of softened unsalted butter and 1 ½ cups of granulated sugar. Use an electric mixer on medium speed for about 2-3 minutes until the mixture is light and fluffy. This step is crucial for incorporating air, leading to tender cookies with delightful texture.
Step 3: Add Egg and Vanilla
Next, beat in 1 large egg and 1 teaspoon of vanilla extract into the creamed mixture. Continue mixing until these ingredients are fully incorporated and the batter looks smooth and creamy, which typically takes about 1 minute. This adds richness and flavor to your Christmas Pinwheel Cookies.
Step 4: Combine Dry Ingredients
In a separate bowl, whisk together 2 ½ cups of all-purpose flour, 1 teaspoon of baking powder, and ¼ teaspoon of salt. Ensure everything is well blended; the dry mix helps structure the cookies. Gradually integrating this mixture will prevent clumping in the dough later on.
Step 5: Mix Dry and Wet Ingredients
Slowly add the dry ingredients to the butter mixture. Use a spatula or mixer on low speed to combine until just mixed, about 1-2 minutes. Be cautious not to overmix, as this can lead to tough cookies. The dough should be soft and slightly sticky, setting the stage for the pinwheel effect.
Step 6: Divide the Dough
Once your dough is prepared, divide it into two equal portions. Leave one portion plain and set it aside while you’ll work with the second half. This divides the base for your colorful Christmas Pinwheel Cookies, allowing you to incorporate cocoa in the next step.
Step 7: Add Cocoa to Dough
In the second portion of the dough, mix in ⅓ cup of unsweetened cocoa powder. Ensure the cocoa is fully integrated, resulting in a rich chocolate-flavored dough. This contrast will create the beautiful pinwheel design in your cookies, so mix well without lumps.
Step 8: Roll Out the Plain Dough
Place the plain dough between two sheets of parchment paper and roll it out into a rectangle about ¼ inch thick. Use a rolling pin to achieve an even thickness, making it easier for the layers to stick together. The parchment prevents sticking and simplifies the rolling process.
Step 9: Roll Out the Chocolate Dough
Repeat the same rolling process with the chocolate dough, ensuring that both rectangles are of similar size. This uniformity is key, as it will help your Christmas Pinwheel Cookies maintain their shape during baking and look neat and appealing.
Step 10: Layer the Doughs
Carefully peel away the top layer of parchment from the chocolate dough and place it directly on top of the plain dough, sticky side down. Gently press down to adhere the two layers, ensuring they stick without squishing them, as this will create your festive design.
Step 11: Roll the Dough Together
Starting from one long side of the layered dough, roll it up tightly, using the parchment to assist without tearing the dough. This forms a log shape, essential for creating clean, swirl-patterned slices of your Christmas Pinwheel Cookies later on.
Step 12: Chill the Dough Log
Wrap the dough log in plastic wrap and refrigerate for at least 30 minutes. This chilling step is important for firming up the dough, making it easier to slice. The dough should be firm to the touch before moving on to baking.
Step 13: Slice the Refrigerated Dough
Once chilled, remove the dough log from the refrigerator and slice it into ¼ inch thick rounds. Use a sharp knife for clean cuts, ensuring the colorful spirals are visible in each slice. This presentation is what makes your Christmas Pinwheel Cookies truly festive!
Step 14: Arrange on Baking Sheets
Place the cookie rounds onto the prepared baking sheets, leaving enough space between each to allow for spreading. This spacing is vital; if the cookies are too close, they may merge while baking, losing their distinctive look.
Step 15: Add Festive Toppings
If desired, sprinkle the tops of each cookie with colored sugar or crushed peppermint candies for an extra festive touch. This will not only enhance their appearance but also add a delightful crunch to each bite of your Christmas Pinwheel Cookies.
Step 16: Bake the Cookies
Bake the cookies in your preheated oven for 10-12 minutes. Watch carefully for the edges to turn lightly golden. This slight browning indicates they are baked to perfection, while the centers should remain soft and chewy, typical of pinwheel cookies.
Step 17: Cool and Transfer
After baking, let the cookies cool on the baking sheet for a few minutes. Once they are set enough to handle, transfer them to a wire rack to cool completely. This step is essential to help maintain their texture as they cool down, ensuring the best possible result for your Christmas Pinwheel Cookies.
How to Store and Freeze Christmas Pinwheel Cookies
Room Temperature: Store your Christmas Pinwheel Cookies in an airtight container at room temperature for up to 3 days to maintain their freshness and softness.
Fridge: If you're looking to extend their shelf life, these cookies can be stored in the fridge for up to a week. Just ensure they're in a well-sealed container to prevent drying out.
Freezer: For longer storage, freeze your Christmas Pinwheel Cookies! Place them in a single layer on a baking sheet to freeze individually, then transfer to a freezer-safe bag or container. They can be stored for up to 3 months.
Reheating: To enjoy them warm, thaw the cookies in the fridge overnight and then pop them in a preheated oven at 350°F (175°C) for about 5 minutes, restoring their delightful texture!
What to Serve with Christmas Pinwheel Cookies
Indulge in a delightful culinary experience that complements the festive cheer of your colorful Christmas pinwheel cookies.
-
Cozy Hot Chocolate: This rich and creamy drink warms you from the inside, pairing perfectly with the chocolatey cookie swirls. Add a sprinkle of marshmallows for extra comfort.
-
Crisp Apple Slices: Fresh, crisp apple slices bring a refreshing contrast to the sweetness of the cookies, enhancing your dessert table with vibrant color and texture.
-
Vanilla Ice Cream: A scoop of vanilla ice cream provides a creamy, luscious backdrop that balances the cookies' texture and flavor, creating a dessert dream.
-
Peppermint Whipped Cream: Light and airy, this add-on incorporates the festive spirit of peppermint, enhancing your cookies while adding a fluffy touch on top of beverages or desserts.
-
Eggnog: This traditional holiday drink, with its creamy, spiced notes, pairs beautifully with the sweetness of the cookies, making every bite feel like a festive celebration.
-
Nutty Biscotti: These crunchy treats offer a delightful contrast, with their nutty flavor enhancing the chocolate and vanilla in the pinwheel cookies while inviting a delightful crunch.
-
Warm Spiced Cider: This autumnal drink brings warmth with a hint of spice, balancing the sweetness of the cookies beautifully and filling your home with a festive aroma.
-
Gingerbread Men: Classic holiday treats, their spiced flavor complements the sweetness of the cookies, making a lovely duo that embraces holiday nostalgia.
-
Creamy Cheesecake: Try serving mini cheesecakes topped with fruit; their creamy richness adds another dimension of indulgence to your sweet spread.
-
Sparkling Cranberry Juice: This refreshing and tart drink not only delights the palate but also adds a festive sparkle to your holiday gathering, making it the perfect non-alcoholic option.
Make Ahead Options
These Christmas Pinwheel Cookies are perfect for making ahead, saving you precious time during the holiday rush! You can prepare the dough up to 24 hours in advance; simply follow the first eleven steps of the recipe and roll the dough log tightly in plastic wrap before refrigerating. If you want to extend your prep, the sliced cookies can also be frozen for up to 3 months—just place them in an airtight container or freezer bag. When you're ready to bake, simply pop the frozen slices directly onto a baking sheet and add a couple of extra minutes to the baking time. With these make-ahead options, you’ll enjoy warm, festive cookies with minimal effort when the time comes to celebrate!
Christmas Pinwheel Cookies Variations
Feel free to play around with these fun twists to make your Christmas Pinwheel Cookies uniquely yours!
-
Dairy-Free: Substitute butter with coconut oil for a delightful dairy-free option that still delivers a rich flavor. You won’t miss the creaminess!
-
Gluten-Free: Use a gluten-free flour blend in place of all-purpose flour. This allows everyone to enjoy these festive treats without worry.
-
Peppermint Twist: Incorporate 1 teaspoon of peppermint extract for an intensified minty flavor that pairs beautifully with cocoa and sprinkles.
-
Nutty Delight: Add a ½ cup of finely chopped nuts, such as walnuts or almonds, into your dough for added crunch. The nutty flavor complements the sweetness wonderfully!
-
Spiced Up: Mix in a teaspoon of cinnamon or nutmeg to the dough for a warm, holiday spice that dances on your taste buds.
-
All Chocolate: Swap the plain dough for more chocolate dough by using an additional ⅓ cup of cocoa powder. Perfect for true chocolate lovers!
-
Citrus Zing: Add the zest of one orange or lemon to the dough for a refreshing fruity flavor. This bright twist will surely bring smiles.
If you want more festive treat ideas, check out my Classic Gingerbread Cookies or consider a twist with these delectable Peppermint Bark Brownies!
Expert Tips for Christmas Pinwheel Cookies
- Chill the Dough: Don’t skip the chilling step! Refrigerating the log allows for easier slicing and helps maintain the swirls during baking.
- Even Thickness: Roll both doughs to uniform thickness for consistent baking. This ensures your Christmas Pinwheel Cookies have a pleasing shape and texture.
- Sharp Knife: Use a sharp knife for slicing the dough into rounds. A blunt knife can squish the swirls, messing up the festive design.
- Spacing Matters: Space the cookie rounds adequately on the baking sheet. This prevents them from spreading into each other while baking.
- Topping Variations: Experiment with different toppings! While sprinkles and crushed peppermint candies are festive, consider other options like chopped nuts for added texture.
Christmas Pinwheel Cookies Recipe FAQs
What type of butter should I use for the dough?
Absolutely use unsalted butter for the best flavor. It allows you to control the sodium levels in your cookies. Softened butter is key, as it helps create a light, fluffy texture when creamed with the sugar, bringing out that delightful buttery richness.
How long can I store my Christmas Pinwheel Cookies?
You can keep your Christmas Pinwheel Cookies at room temperature in an airtight container for up to 3 days. If you want them to last longer, store them in the fridge for up to 1 week. Just ensure they are well-sealed to prevent them from drying out!
Can I freeze Christmas Pinwheel Cookies?
Yes, indeed! To freeze your cookies, first lay them out in a single layer on a baking sheet to freeze individually. Once solid, transfer them to a freezer-safe bag or container. They’ll keep well for up to 3 months. When you're ready, just thaw them in the fridge overnight before enjoying!
What if my cookie dough is too sticky to roll?
No worries! If your dough feels too sticky, try chilling it for a bit longer. If that doesn’t help, lightly flour your work surface and the rolling pin to make the process easier. Just take care not to add too much flour, as that can alter the texture of your cookies.
Can these cookies be made nut-free or gluten-free?
Absolutely! For a nut-free version, ensure your toppings and any other ingredients used are also free from nuts. If you're looking for a gluten-free option, you can substitute the all-purpose flour with a 1:1 gluten-free baking mix to achieve similar results. Just remember to check for cross-contamination if allergies are a concern!
Are Christmas Pinwheel Cookies safe for pets?
It's best to keep these cookies away from pets. The ingredients, particularly the sugar and chocolate (from the cocoa powder), can be harmful to dogs and some other animals. Always check with your veterinarian if you’re unsure about giving your furry friends any human food!
Deliciously Fun Christmas Pinwheel Cookies to Bake Together
Equipment
- Electric mixer
- Mixing bowls
- parchment paper
- Rolling Pin
- Baking sheet
- wire rack
Ingredients
For the Dough
- 1 cup unsalted butter, softened adds rich flavor and tender texture
- 1.5 cups granulated sugar can substitute with brown sugar for deeper flavor
- 1 large egg binds ingredients and adds fluffiness
- 1 teaspoon vanilla extract enhances sweetness and aroma
For the Dry Mix
- 2.5 cups all-purpose flour provides structure
- 1 teaspoon baking powder leavens the cookies for a light bite
- 0.25 teaspoon salt balances sweetness
- 0.33 cup unsweetened cocoa powder adds rich chocolate flavor
For the Festive Touch
- 0.5 cup red and green sprinkles adds festive appearance
- 0.25 cup crushed peppermint candies optional for a refreshing crunch
Instructions
Step-by-Step Instructions
- Preheat your oven to 350°F (175°C) and line two baking sheets with parchment paper.
- In a large mixing bowl, cream together the softened butter and granulated sugar using an electric mixer for about 2-3 minutes until light and fluffy.
- Beat in the egg and vanilla extract until fully incorporated and the batter is smooth and creamy.
- In a separate bowl, whisk together the flour, baking powder, and salt.
- Gradually add the dry ingredients to the butter mixture and mix until just combined.
- Divide the dough into two equal portions. Leave one portion plain and set it aside.
- Mix the cocoa powder into the second portion of dough until fully integrated.
- Roll out the plain dough between parchment paper into a rectangle about ¼ inch thick.
- Repeat with the chocolate dough, ensuring both rectangles are of similar size.
- Layer the chocolate dough on top of the plain dough, sticky side down.
- Roll the layered dough tightly from one long side to form a log shape.
- Wrap the dough log in plastic wrap and refrigerate for at least 30 minutes.
- Slice the chilled log into ¼ inch thick rounds.
- Place the cookie rounds onto the prepared baking sheets, leaving space between each.
- Sprinkle the tops with colored sugar or crushed peppermint candies if desired.
- Bake the cookies for 10-12 minutes until the edges are lightly golden.
- Let the cookies cool on the baking sheet for a few minutes before transferring to a wire rack.

Leave a Reply