
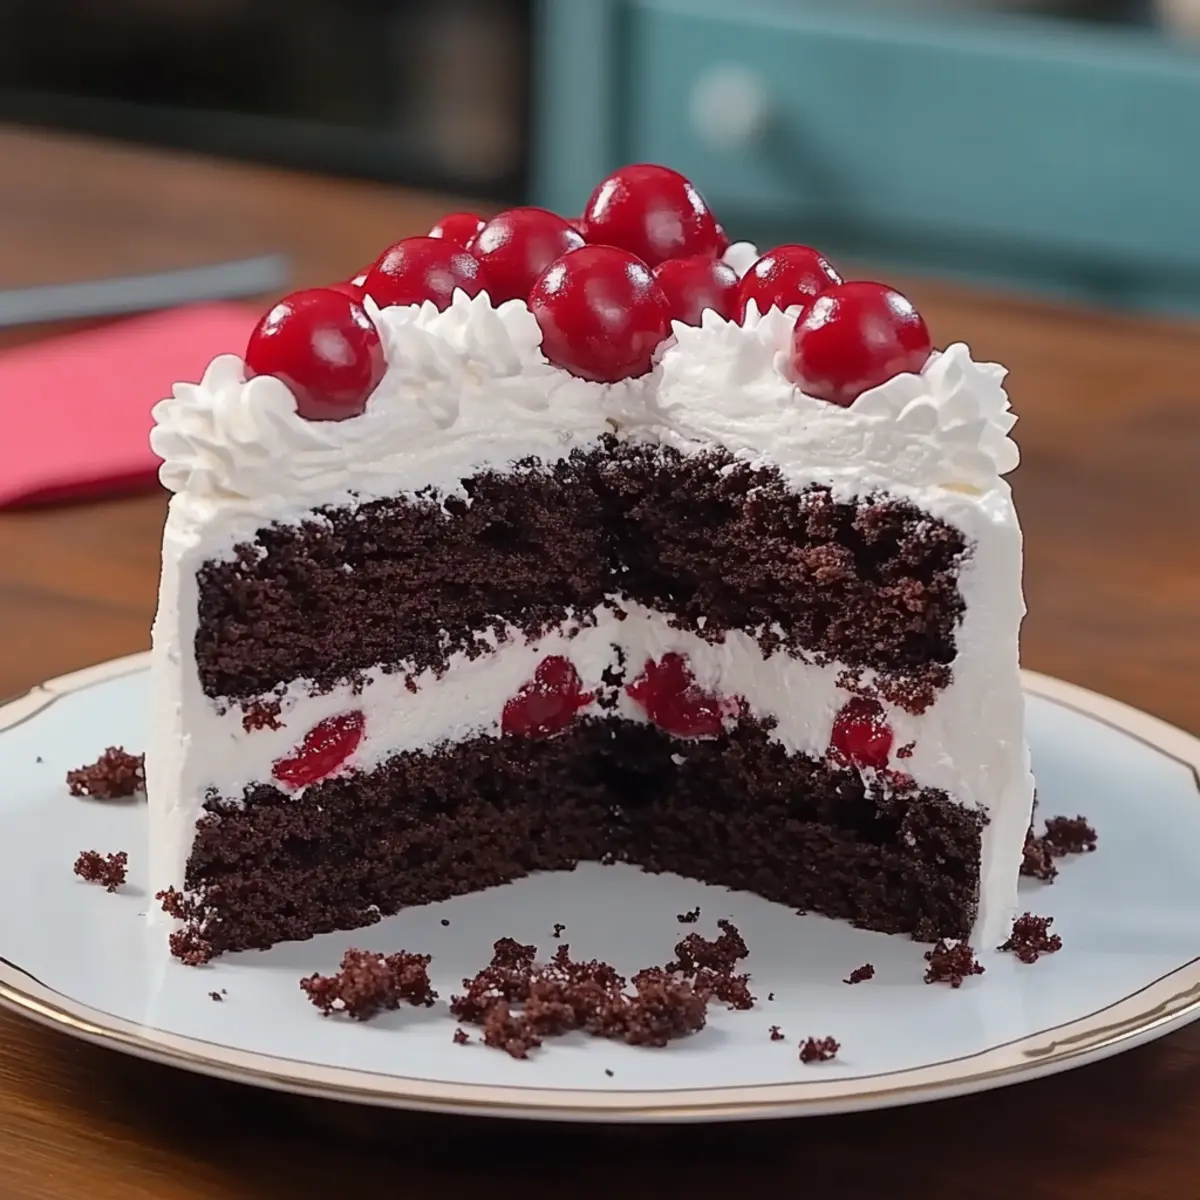
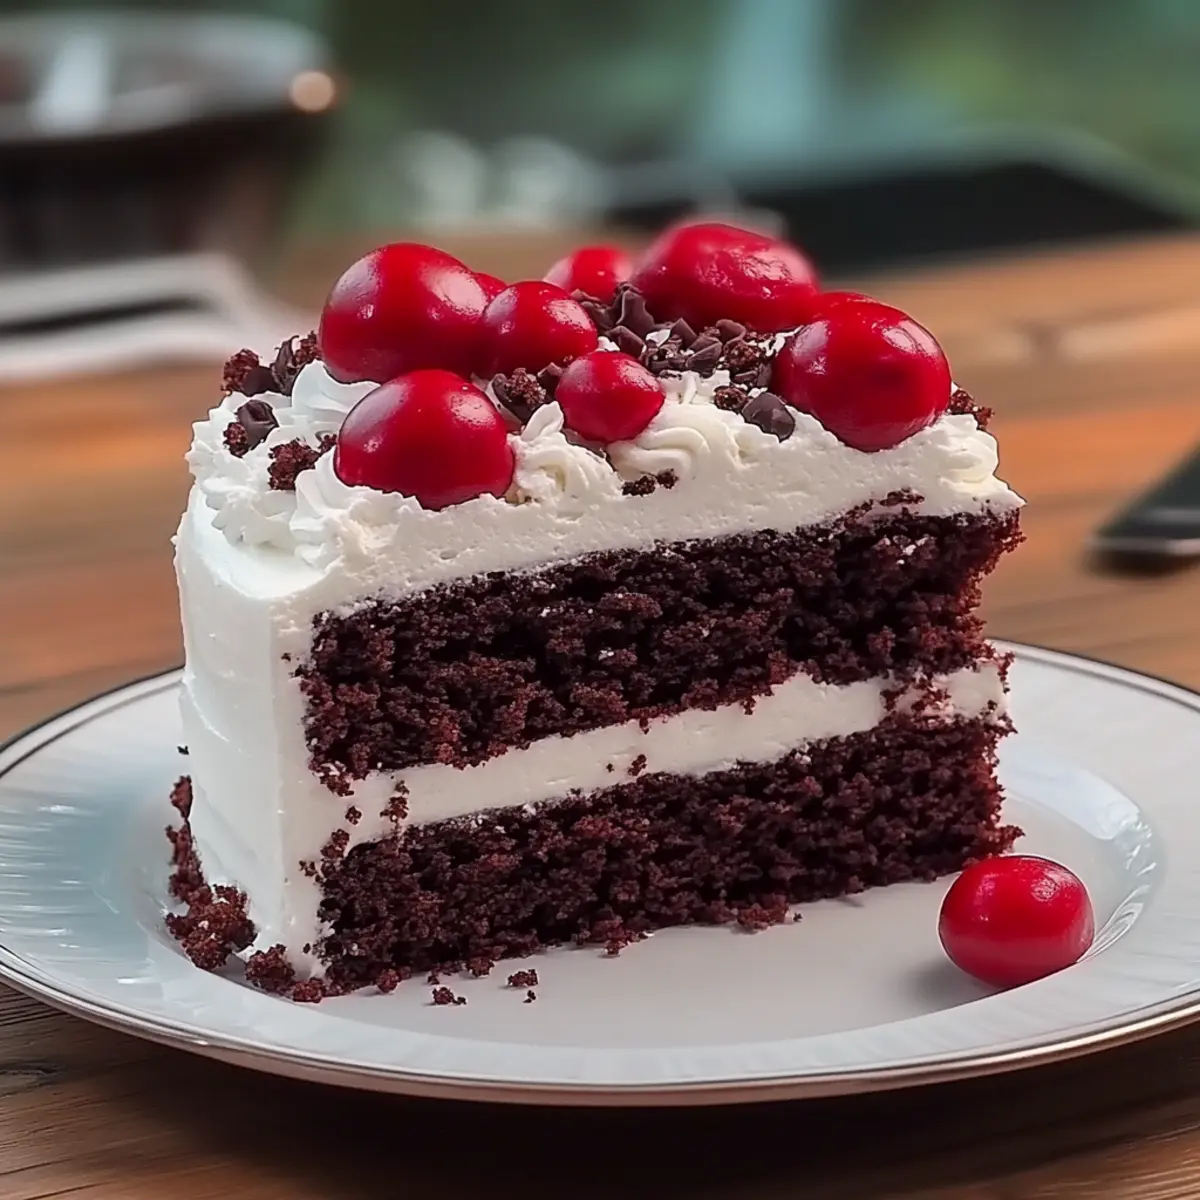
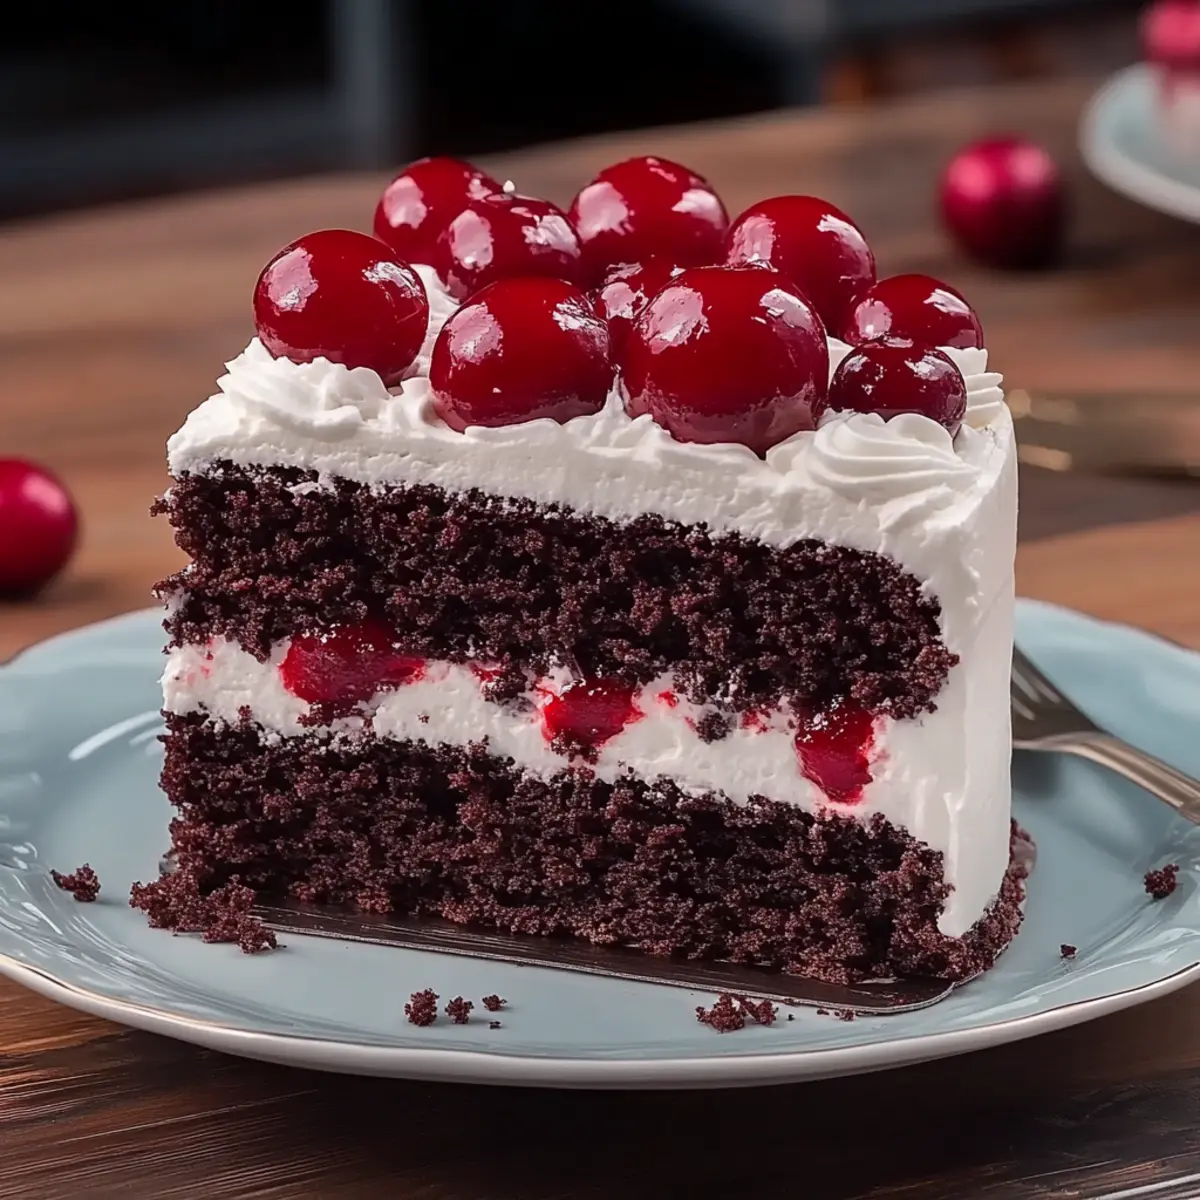
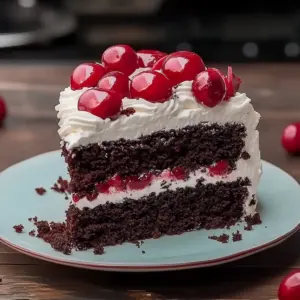
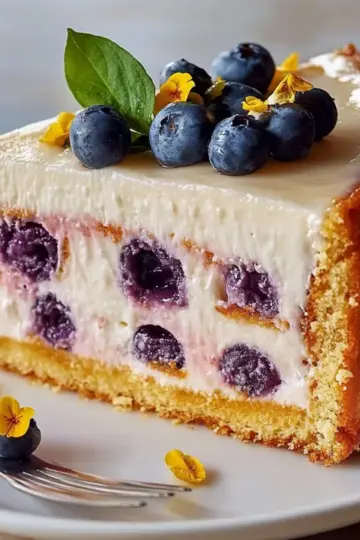
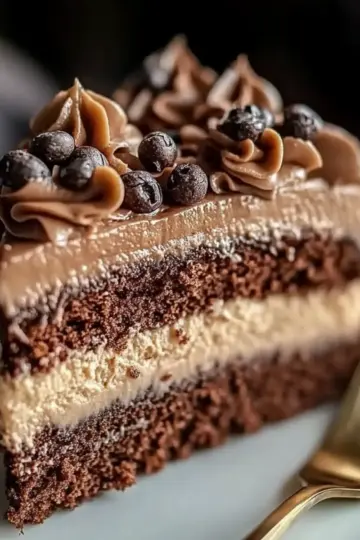
The first time I tasted Black Forest Cake, it felt like a slice of pure joy on my plate. This delightful dessert is not only a showstopper with its rich chocolate layers and bright cherry accents, but it’s also surprisingly easy to whip up at home. Imagine impressing your loved ones with this indulgent treat that blends fluffy chocolate cake and luscious whipped cream—it’s a true crowd-pleaser! And the best part? You can prep it in just about an hour, making it perfect for both special occasions and cozy gatherings. So, are you ready to unlock the secrets of this classic German dessert and take your baking skills to the next level? Let's dive into the delicious details of making your very own Black Forest Cake!
Why Is Black Forest Cake So Irresistible?
Decadent richness: Layers of moist chocolate cake paired with light whipped cream create a delightful contrast that keeps you coming back for more.
Vibrant flavors: The sweet cherries not only add visual appeal but also a burst of freshness, balancing the chocolate beautifully.
Crowd-pleaser: Perfect for celebrations or family get-togethers, this cake is sure to impress friends and loved ones alike. If you love scrumptious desserts, you might also enjoy my Divorce Carrot Cake or Birthday Cake Pops.
Easy to make: With simple steps and straightforward ingredients, even novice bakers can master this recipe in no time!
Showstopper presentation: Topped with chocolate shavings and cherries, it’s a dessert that looks as good as it tastes.
Black Forest Cake Ingredients
• Get ready to bake this classic delight!
For the Cake
- All-purpose flour – essential for a sturdy cake that holds its layers.
- Granulated sugar – adds sweetness and helps create a tender crumb.
- Unsweetened cocoa powder – brings intense chocolate flavor to the cake.
- Baking powder – ensures the cake rises beautifully, creating a light texture.
- Baking soda – works with the baking powder to help the cake achieve a perfect lift.
- Salt – balances the sweetness, enhancing all the flavors.
- Large eggs – provide structure and moisture for the cake.
- Whole milk – adds richness and moisture for a deep, delicious taste.
- Vegetable oil – keeps the cake moist and tender.
- Vanilla extract – infuses a warm, aromatic flavor throughout the cake.
- Boiling water – activates the cocoa powder and creates a luscious batter.
For the Whipped Cream
- Heavy whipping cream – forms the luscious layer that complements the chocolate.
- Powdered sugar – sweetens the whipped cream and helps stabilize it.
- Vanilla extract – enhances the cream with a lovely flavor.
For the Decoration
- Cherries – use these for layering and garnishing to add a pop of color and flavor.
- Chocolate shavings – sprinkle on top for a beautiful finish and extra chocolate goodness.
Now, gather your ingredients, and let’s bring this Black Forest Cake to life in your kitchen!
Step‑by‑Step Instructions for Black Forest Cake
Step 1: Preheat and Prepare
Begin by preheating your oven to 350°F (175°C) and greasing two 9-inch round cake pans with butter or non-stick spray before dusting with flour to prevent sticking. This sets the stage for your moist Black Forest Cake, ensuring it’ll slide out easily once baked.
Step 2: Mix Dry Ingredients
In a large mixing bowl, whisk together 2 cups of all-purpose flour, 2 cups of granulated sugar, ¾ cup of unsweetened cocoa powder, 1½ teaspoons of baking powder, 1½ teaspoons of baking soda, and 1 teaspoon of salt. Mix until everything is well combined and the cocoa powder is evenly distributed, creating a delightful chocolate aroma.
Step 3: Add Wet Ingredients
To the dry mixture, add 2 large eggs, 1 cup of whole milk, ½ cup of vegetable oil, and 2 teaspoons of vanilla extract. Using an electric mixer, beat the mixture on medium speed for about 2 minutes until it’s smooth and creamy, and watch as your batter transforms into a luscious chocolate delight.
Step 4: Incorporate Boiling Water
Next, carefully stir in 1 cup of boiling water into the batter. Take your time as you mix, since the batter will be thin, but that's perfectly fine! Keep mixing until it's smooth, achieving a silky texture that will result in a beautifully moist Black Forest Cake.
Step 5: Bake the Cake
Pour the batter evenly into the prepared cake pans, ensuring they are filled to the same level for even baking. Bake in the preheated oven for about 30–35 minutes, or until a toothpick inserted in the center comes out clean. Enjoy the delightful aroma as it fills your kitchen!
Step 6: Cool the Cake
Once baked, allow the cakes to cool in their pans for about 10 minutes. After that, gently transfer them to wire racks. Let them cool completely before slicing, letting the fluffy texture settle while you prepare the next steps.
Step 7: Slice the Cake Layers
When the cakes have cooled, carefully slice each layer in half horizontally, creating four layers in total. This step is essential for those luscious layers of whipped cream. Additionally, drain your cherries and reserve their juice to enhance the flavor during assembly.
Step 8: Whip the Cream
In a large mixing bowl, whip together 3 cups of heavy whipping cream, ½ cup of powdered sugar, and 1 teaspoon of vanilla extract using an electric mixer until stiff peaks form. This creamy topping will add a light, airy contrast to your rich chocolate layers.
Step 9: Assemble the Cake
Start by placing one layer of cake on a serving platter. Moisten this first layer with some reserved cherry juice to infuse moisture. Spread a generous layer of whipped cream over it, followed by a scattering of cherries. Repeat this process for another layer, building the delicious flavor.
Step 10: Top with Final Layer
Once your layers are stacked, place the final layer of cake on top. Use the remaining whipped cream to fully cover the top and sides of your Black Forest Cake, creating an enticing presentation. This is where the indulgence really begins!
Step 11: Decorate the Cake
Finish decorating the cake by generously sprinkling chocolate shavings on top and arranging extra cherries for that classic Black Forest look. This beautiful finish not only adds a gourmet touch but also invites everyone to dig in.
Step 12: Chill Before Serving
Finally, refrigerate the complete Black Forest Cake for at least 30 minutes before slicing to enhance the flavors and firm up the cream. The wait will be worth it as you prepare to dazzle your guests with this stunning dessert!
Expert Tips for the Best Black Forest Cake
- Quality Ingredients: Use high-quality cocoa powder and fresh cherries for intense flavor. Cheap ingredients can lead to a less satisfying end result.
- Avoid Overmixing: Mix just until everything is combined to keep your cake light and airy. Overmixing can result in a dense Black Forest Cake.
- Even Layers: To achieve uniform layers, use a serrated knife to trim any domed tops after cooling. This also helps the whipped cream adhere better.
- Chill Thoroughly: Don’t skip the chilling step before slicing. This helps the layers settle and makes for cleaner slices—it's well worth the wait!
- Decorating Tips: For a stunning presentation, consider using a piping bag for the whipped cream, giving you more control over the decoration.
- Experiment with Flavors: Feel free to introduce a splash of cherry liqueur in the cherry juice for an adult twist, deepening the Black Forest Cake experience.
Make Ahead Options
These delightful Black Forest Cakes are perfect for meal prep enthusiasts! You can bake the cake layers up to 3 days in advance; just cool completely and tightly wrap them in plastic wrap before refrigerating to maintain their moisture. The whipped cream can also be prepared up to 24 hours ahead—whip it and store it in an airtight container in the fridge. When you're ready to assemble, simply slice the cake layers and layer them with the cherry juice, whipped cream, and cherries. This way, you’ll have a stunning dessert ready to impress with minimal effort, just as delicious as if made fresh!
How to Store and Freeze Black Forest Cake
Fridge: Keep leftover Black Forest Cake in an airtight container in the fridge for up to 3 days. This helps maintain its moistness and flavor.
Freezer: For longer storage, wrap individual slices or the whole cake tightly in plastic wrap, then in aluminum foil. It can be frozen for up to 3 months.
Thawing: To enjoy, transfer the cake to the fridge for 6-8 hours or overnight to thaw. Allow it to reach room temperature before serving for the best taste.
Reheating: If desired, you can warm individual slices in the microwave for about 10-15 seconds to enjoy a melty whipped cream experience!
What to Serve with Black Forest Cake?
Imagine the joy of pairing this luscious dessert with scrumptious sides that elevate every bite and create a full dining experience.
-
Coffee or Espresso: The deep, rich flavors of coffee beautifully balance the sweetness of the cake, enhancing your dessert experience.
-
Vanilla Ice Cream: A scoop of creamy vanilla ice cream offers a delightful contrast to the rich chocolate and cherry flavors while adding a refreshing chill.
-
Fruit Salad: A light, zesty fruit salad with berries and citrus adds freshness and a burst of color, perfectly complementing the indulgent cake.
-
Chocolate-Dipped Strawberries: These sweet treats echo the chocolate theme and add an extra layer of decadence, making for a romantic touch.
-
Sparkling Water with Lemon: A refreshing drink that cleanses the palate, sparkling water helps to balance the dessert's richness while energizing your taste buds.
-
Cheese Platter: An assortment of mild cheeses with crackers offers a savory counterpoint to the sweetness of the Black Forest Cake, creating an elegant contrast.
Pairing your Black Forest Cake thoughtfully not only completes your meal but also enhances each luscious bite, turning any occasion into a memorable celebration!
Black Forest Cake Variations
Customize your Black Forest Cake to suit your taste buds and dietary needs with these delightful twists!
- Gluten-Free: Substitute all-purpose flour with a 1:1 gluten-free baking mix for a delicious alternative that everyone can enjoy.
- Dairy-Free: Use coconut cream or a non-dairy whipped topping to create a luscious layer without the dairy. It offers a tropical twist!
- Reduced Sugar: For a healthier option, cut down on granulated sugar by half and use a sugar substitute like stevia or monk fruit to keep sweetness without the guilt.
- Chocolate Ganache: For an indulgent twist, drizzle melted chocolate ganache over each layer before adding whipped cream for an extra layer of decadence.
- Add Some Crunch: Sprinkle crushed nuts, such as hazelnuts or almonds, between layers for a delightful crunch that contrasts beautifully with the creamy texture. It's an unexpected surprise!
- Cherry Liqueur: For an adult version, mix in a tablespoon of cherry liqueur with the reserved cherry juice. This will intensify the cherry flavor and charm your guests!
- Fruit Twists: Mix in other fruits like raspberries or strawberries along with the cherries for a burst of mixed berry flavor that adds a vibrant touch.
- Birthday Cake Style: Transform this into a celebratory cake by incorporating colorful sprinkles between layers or on top with whipped cream—perfect for birthday parties!
If you love experimenting with flavors, don't forget to check out my Light Cloud Cake for another delightful dessert experience.
Black Forest Cake Recipe FAQs
How do I choose ripe cherries for my Black Forest Cake?
Absolutely! Look for cherries that are firm and glossy with a deep red color. Avoid any with dark spots all over or that feel overly soft, as these may not be fresh. For this cake, sweet Bing cherries work wonderfully.
How should I store my Black Forest Cake?
To keep your cake fresh, place any leftovers in an airtight container and store them in the fridge for up to 3 days. This keeps the cream luscious and the cake moist. If long-term storage is needed, consider freezing it instead!
Can I freeze Black Forest Cake?
Yes! To freeze your Black Forest Cake, wrap individual slices or the whole cake tightly in plastic wrap, then cover that with aluminum foil. This prevents freezer burn. It can last up to 3 months in the freezer. When you're ready to enjoy it, thaw it in the fridge for about 6-8 hours or overnight.
What should I do if my cake layers are uneven?
Very common! If your cake tops dome while baking, just use a serrated knife to trim them for even layers. This makes it easier when assembling and helps the cream adhere better. Don’t worry, those trimmed pieces can be snacked on!
Is Black Forest Cake safe for my pets?
No, it’s best to keep this treat away from pets. The chocolate and sugar can be harmful to dogs and other animals. Always make sure that they have pet-safe treats to enjoy while you indulge in your baking!
Can I make this Black Forest Cake dairy-free?
Absolutely! For a dairy-free version, substitute whole milk with almond, soy, or oat milk, and use a plant-based whipping cream alternative for the frosting. You can even swap the butter for a plant-based margarine in the cake if needed.
Decadent Black Forest Cake That Will Wow Your Friends
Equipment
- Oven
- Mixing bowl
- Electric mixer
- cake pans
- Whisk
- Spatula
Ingredients
For the Cake
- 2 cups all-purpose flour
- 2 cups granulated sugar
- ¾ cup unsweetened cocoa powder
- 1½ teaspoons baking powder
- 1½ teaspoons baking soda
- 1 teaspoon salt
- 2 large eggs
- 1 cup whole milk
- ½ cup vegetable oil
- 2 teaspoons vanilla extract
- 1 cup boiling water
For the Whipped Cream
- 3 cups heavy whipping cream
- ½ cup powdered sugar
- 1 teaspoon vanilla extract
For the Decoration
- 1 cup cherries
- ½ cup chocolate shavings
Instructions
Step-by-Step Instructions
- Preheat your oven to 350°F (175°C) and grease two 9-inch round cake pans with butter or non-stick spray before dusting with flour.
- In a large mixing bowl, whisk together all-purpose flour, granulated sugar, cocoa powder, baking powder, baking soda, and salt.
- Add the eggs, whole milk, vegetable oil, and vanilla extract to the dry mixture and mix on medium speed until smooth.
- Carefully stir in boiling water into the batter until smooth.
- Pour the batter evenly into prepared cake pans and bake for about 30–35 minutes.
- Allow the cakes to cool in their pans for about 10 minutes before transferring to wire racks to cool completely.
- Slice each cooled cake layer in half horizontally to create four layers.
- Whip heavy whipping cream, powdered sugar, and vanilla extract until stiff peaks form.
- Assemble by layering cake, cherry juice, whipped cream, and cherries for two layers.
- Cover the assembled cake with the remaining whipped cream, and decorate with chocolate shavings and cherries.
- Refrigerate for at least 30 minutes before slicing and serving.

Leave a Reply